Pioneer DEH-4300UB Owners Manual - Page 7
Initial Settings, Operating this unit, Selecting the illumination, color - demo
 |
UPC - 884938116497
View all Pioneer DEH-4300UB manuals
Add to My Manuals
Save this manual to your list of manuals |
Page 7 highlights
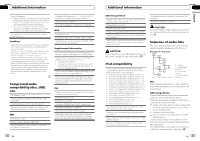
Section 02 Operating this unit The cut-off frequency and output level can be adjusted when the subwoofer output is on. Only frequencies lower than those in the selected range are outputted from the subwoofer. 1 Press M.C. to display the setting mode. 2 Press M.C. to cycle between the cut-off frequency and output level of the subwoofer. Cut-off frequency (Cut-off frequency display flashes.)-Output level (Output level display flashes.) 3 Turn M.C. to select the desired setting. Cut-off frequency: 50HZ-63HZ-80HZ-100HZ -125HZ Output level: -24 to +6 SLA (source level adjustment) SLA (Source Level Adjustment) lets you adjust the volume level of each source to prevent radical changes in volume when switching between sources. ! Settings are based on the FM volume level, which remains unchanged. ! The MW/LW volume level can also be adjusted with this function. ! When selecting FM as the source, you cannot switch to SLA. 1 Press M.C. to display the setting mode. 2 Turn M.C. to adjust the source volume. Adjustment range: +4 to -4 3 Press M.C. to confirm the selection. Initial Settings Important PW SAVE (power saving) is cancelled if the vehicle battery is disconnected and will need to be turned back on once the battery is reconnected. When PW SAVE (power saving) is off, depending on connection methods, the unit may continue to draw power from the battery if your vehicle's ignition switch doesn't have an ACC (accessory position). 1 Press and hold S (SRC/OFF) until the unit turns off. 2 Press S (SRC/OFF) and hold until function name appears in the display. 3 Turn M.C. to select the initial setting. After selecting, perform the following procedures to set the initial setting. FM STEP (FM tuning step) Normally, the FM tuning step employed by seek tuning is 50 kHz. When AF or TA is on, the tuning step automatically changes to 100 kHz. It may be preferable to set the tuning step to 50 kHz when AF is on. ! The tuning step remains at 50 kHz during manual tuning. 1 Press M.C. to display the setting mode. 2 Turn M.C. to select the FM tuning step. 50 KHZ (50 kHz)-100 KHZ (100 kHz) 3 Press M.C. to confirm the selection. AUTO-PI (auto PI seek) The unit can automatically search for a different station with the same programming, even during preset recall. 1 Press M.C. to turn Auto PI seek on or off. AUX (auxiliary input) Activate this setting when using an auxiliary device connected to this unit. 1 Press M.C. to turn AUX on or off. USB (plug and play) This setting allows you to switch your source to USB/ iPod automatically. 1 Press M.C. to turn the plug and play function on or off. ON - When a USB storage device/iPod is connected, depending on the type of device, the source is automatically switched to USB/iPod when you turn on the engine. If you disconnect your USB storage device/iPod, this unit's source is turned off. OFF - When a USB storage device/iPod is connected, the source is not switched to USB/iPod automatically. Please change the source to USB/ iPod manually. SW CONTROL (rear output and subwoofer setting) 12 En Operating this unit Section 02 English The rear speaker leads output and RCA output can be used for full-range speaker or subwoofer connection. If you switch to REAR-SP :SW, you can connect a rear speaker lead directly to a subwoofer without using an auxiliary amp. Initially, REAR-SP is set for rear full-range speaker connection (FUL). 1 Press M.C. to display the setting mode. 2 Turn M.C. to change the output and press to se- lect. REAR-SP-PREOUT 3 Turn M.C. to change the setting. REAR-SP: FUL-SW PREOUT: SW-REA ! Even if you change this setting, there is no output unless you turn the subwoofer output on (refer to SUBWOOFER1 (subwoofer on/off setting) on page 11). ! If you change this setting, subwoofer output in the audio menu will return to the factory settings. DEMO (demo display setting) 1 Press M.C. to turn the demo display on or off. SCROLL (scroll mode setting) When ever scroll is set to ON, recorded text information scrolls continuously in the display. Set to OFF if you prefer the information to scroll just once. 1 Press M.C. to turn the ever scroll on or off. TITLE (multi-language) This unit can display the text information of a compressed audio file even if they are embedded in a Western European or Russian language. ! If the embedded language and the selected lan- guage setting are not the same, text information may not be displayed properly. ! Some characters may not be displayed properly. 1 Press M.C. to display the setting mode. 2 Turn M.C. to select the desired setting. EUROPEAN (European)-RUSSIAN (Russian) 3 Press M.C. to confirm the selection. PW SAVE (power saving) Switching this function on enables you to reduce the consumption of battery power. ! Turning on the source is the only operation al- lowed when this function is on. 1 Press M.C. to turn the power save on or off. Selecting the illumination color (Function of DEH-4300UB) This unit is equipped with multiple-color illumination. You can select a desired color from the color list. Direct selection from the illumination color list 1 Press M.C. to display the main menu. 2 Turn M.C. to change the menu option and press to select ILLUMI. 3 Turn M.C. to select the illumination color. You can select one option from the following list. ! 30 preset colors (WHITE to ROSE) ! SCAN (cycle through all colors) ! CUSTOM (customized illumination color) 4 Press M.C. to confirm the selection. Notes ! When SCAN is selected, the illuminated color automatically cycles through the 30 preset colors. ! When CUSTOM is selected, the customized color saved is selected. Customizing the illumination color 1 Press M.C. to display the main menu. 2 Turn M.C. to change the menu option and press to select ILLUMI. 3 Turn M.C. to select the preset color or CUSTOM illumination color. # You cannot create a custom illumination color when SCAN is selected. 4 Press M.C. and hold until the customizing illumination color setting appears in the display. En 13
-
 1
1 -
 2
2 -
 3
3 -
 4
4 -
 5
5 -
 6
6 -
 7
7 -
 8
8 -
 9
9 -
 10
10 -
 11
11 -
 12
12 -
13
-
14
-
15
-
16
-
17
-
18
-
19
-
20
-
21
-
22
-
23
-
24
-
25
-
26
-
27
-
28
-
29
-
30
-
31
-
32
-
33
-
34
-
35
-
36
-
37
-
38
-
39
-
40
-
41
-
42
-
43
-
44
-
45
-
46
-
47
-
48
-
49
-
50
-
51
-
52
-
53
-
54
-
55
-
56
-
57
-
58
-
59
-
60
-
61
-
62
-
63
-
64
-
65
-
66
-
67
-
68
-
69
-
70
-
71
-
72
-
73
-
74
-
75
-
76
-
77
-
78
-
79
-
80
-
81
-
82
-
83
-
84
-
85
-
86
-
87
-
88
-
89
-
90
-
91
-
92
-
93
-
94
-
95
-
96
-
97
-
98
-
99
-
100
 |
 |