Pioneer DEH-P8300UB Owner's Manual - Page 16
PH.B.Name view
 |
UPC - 884938118569
View all Pioneer DEH-P8300UB manuals
Add to My Manuals
Save this manual to your list of manuals |
Page 16 highlights
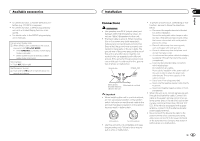
Section 03 Available accessories Available accessories Connect phone (connecting a registered cellular phone) ! This function cannot be operated when a cellu- lar phone is connected. 1 Push M.C. up or down to select a pairing as- signment. P1 (user phone 1)-P2 (user phone 2)-P3 (user phone 3)-G1 (guest phone 1)-G2 (guest phone 2) ! If the assignment is empty, No data is dis- played and operation is not possible. 2 Press M.C. to connect the selected cellular phone. While connecting, Connecting is displayed. After the connection is completed, Connected is displayed. Set phone (registereing a connected cellular phone) 16 En ! This function cannot be operated when the cellular phone is not connected or already connected and registered. 1 Push M.C. up or down to select a pairing assignment. P1 (user phone 1)-P2 (user phone 2)-P3 (user phone 3)-G1 (guest phone 1)-G2 (guest phone 2) ! As you select each assignment, you can see whether or not a phone is already registered. If the assignment is empty, No data is displayed. If the assignment is already taken, the device name appears. To replace an assignment with a new phone, first delete the current assignment. Refer to Delete phone (deleting a registered cellular phone). 2 Press M.C. to register the currently connected phone. When registration is completed, Reg.Completed is displayed. ! If the registration fails, Reg.ERROR is displayed. In this case, return to step 1 and try again. Delete phone (deleting a registered cellular phone) 1 Push M.C. up or down to select a pairing assignment. P1 (user phone 1)-P2 (user phone 2)-P3 (user phone 3)-G1 (guest phone 1)-G2 (guest phone 2) ! If the assignment is empty, No data is displayed and operation is not possible. 2 Push M.C. right to select Delete YES. Delete YES is displayed. Deleting phone is now on standby. 3 Press M.C. to delete the phone. After the phone is deleted, Deleted is displayed. PH.B.Transfer (transferring entries to the phone book) The Phone Book can hold a total of 500 entries. 300 from User 1, 150 from User 2, and 50 from User 3. 1 Press M.C. to enter the phone book transfer standby mode. Transfer YES appears in the display. 2 Press M.C. to show the confirmation display. Transfer -/- appears in the display. 3 Use the cellular phone to perform phone book transfer. Perform phone book transfer using the cellular phone. For detailed instructions, refer to the instruction manual that came with your cellular phone. ! The display indicates how many entries have been transferred and the total number to be transferred. 4 Data transferred is displayed and phone book transfer is completed. PH.B.Name view (changing the phone book display order) ! This function cannot be operated when the cellular phone is not connected or not registered. ! This function cannot be operated when the registered guest phone is used. ! This function cannot be operated when a Bluetooth telephone is connected via HSP (head set profile). 1 Press M.C. to change the name view order. Inverted is displayed and the name view order is changed. Pressing M.C. repeatedly changes the name view order between first and last name. Clear memory (clearing memory) ! This function cannot be operated when the cellular phone is not connected or not registered. ! This function cannot be operated when a Bluetooth telephone is connected via HSP (head set profile). 1 Push M.C. up or down to select an item. Phone book (phone book)-Missed calls (missed call history)-Dialed calls (dialled call history)-Received calls (received call history)-Dial preset (preset phone numbers)- All clear (delete all memory) ! If you want to clear all the Phone Book, dialled/received/missed call history list and preset phone number, select All clear. ! If guest phone is connected to this unit via Bluetooth wireless technology, Phone book cannot be selected. 2 Push M.C. right to determine the item that you want to delete from this unit. Clear memory YES is displayed. Clearing memory is now on standby. ! If you do not want to clear the memory that you have selected, push M.C. left. The display reverts to normal. 3 Press M.C. to clear the memory. Cleared is displayed and data on the selected item is cleared from this unit's memory. Number dial (making a call by entering phone number)
-
 1
1 -
2
-
3
-
4
-
5
-
6
-
7
-
8
-
9
-
10
-
 11
11 -
 12
12 -
 13
13 -
 14
14 -
 15
15 -
 16
16 -
 17
17 -
 18
18 -
 19
19 -
 20
20 -
 21
21 -
22
-
23
-
24
-
25
-
26
-
27
-
28
-
29
-
30
-
31
-
32
-
33
-
34
-
35
-
36
-
37
-
38
-
39
-
40
-
41
-
42
-
43
-
44
-
45
-
46
-
47
-
48
-
49
-
50
-
51
-
52
-
53
-
54
-
55
-
56
-
57
-
58
-
59
-
60
-
61
-
62
-
63
-
64
-
65
-
66
-
67
-
68
-
69
-
70
-
71
-
72
-
73
-
74
-
75
-
76
-
77
-
78
-
79
-
80
-
81
-
82
-
83
-
84
-
85
-
86
-
87
-
88
-
89
-
90
-
91
-
92
-
93
-
94
-
95
-
96
 |
 |
