Pioneer VSX-92TXH Owner's Manual - Page 79
Controlling the rest of your system, Renaming input source names, Direct function, Multi Operation
 |
View all Pioneer VSX-92TXH manuals
Add to My Manuals
Save this manual to your list of manuals |
Page 79 highlights
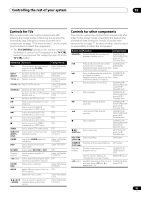
Controlling the rest of your system 12 3 Press the button of the component for which you want to check the preset code, then press ENTER. The brand name and preset code appears in the display for three seconds. Renaming input source names You can customize the names that appear on the remote LCD when you select an input source (for example, you could change the name of DVR 1 to HDD/DVR). 1 While pressing the RECEIVER button, press SETUP. The remote LCD display shows SETUP. 2 Use / to select RENAME then press ENTER. The LCD on the remote prompts you for the button of the input source you want to rename. 3 Press the input source button you want to rename then press ENTER. 4 Use / to select NAME EDT then press ENTER. To reset the button to its original (default) name, select NAME RST above. 5 Edit the name of the input source in the remote control LCD, pressing ENTER when you're finished. Use / to change the character and / to move forward/back a position. The name can be up to eight characters (the possible characters are listed below). ABCDEFGHIJKLMNOPQRSTUVWXYZ 0123456789 \ / * + - [space] Direct function • Default setting: ON You can use the direct function feature to control one component using the remote control while at the same time, using your receiver to playback a different component. This could let you, for example, use the remote control to set up and listen to a CD on the receiver and then use the remote control to rewind a tape in your VCR while you continue to listen to your CD player. When direct function is on, any component you select (using the input source buttons) will be selected by both the receiver and the remote control. When you turn direct function off, you can operate the remote control without affecting the receiver.1 1 While pressing the RECEIVER button, press SETUP. The remote LCD display shows SETUP. 2 Use / to select DIRECT F then press ENTER. The LCD on the remote prompts you for the button of the input source you want to control. 3 Press the input source button for the component you want to control then press ENTER. 4 Use / to switch direct function ON or OFF then press ENTER. The LCD shows OK to confirm the setting. Multi Operation and System Off The Multi Operation feature allows you to program a series of up to 5 commands for the components in your system. For example, you could turn on your TV, turn on your DVD player and start playing the loaded DVD using only two buttons on the remote control. Similar to multi operations, System Off allows you to use one button to stop and switch off a series of components in your system at the same time.2 Programming a multi-operation or a shutdown sequence RECEIVER INPUT SELECT SYSTEM OFF SOURCE CD DVD DVR2 DVR1 CD-R TV HOME MEDIA GALLERY i Pod XM RADIO HDMI BD TV CTRL SIRIUS ZONE2/3 TUNER RECEIVER SLEEP DIMMER ANALOG D.ACCESS CLEAR +10 A PARAMETER TOP MENU TUNE CLASS DISC CH ENTER LEVEL V PARAMETER MENU T.EDIT BAND ST SETUP ENTER ST RETURN PROGRAM TUNE CATEGORY GUIDE TV CONTROL TV VOL INPUT SELECT TV CH VOL 1 While pressing the RECEIVER button, press SETUP. The remote LCD display shows SETUP. 2 Use / to select MULTI OP or SYS OFF from the menu and press ENTER. If you selected Multi Operation (MULTI OP), the LCD on the remote prompts you for an input source button. If you selected System Off (SYSOFF), go to step 4. 3 Press the input source button for the component that will start the multi-operation then press ENTER. For example, if you want to start the sequence by switching on your DVD player, press DVD. 4 Use / to select CODE EDT then press ENTER. To erase any previously stored multi-operations (or shutdown sequences) select CODE ERS above. Note 1 You can't use direct function with the TV CTRL function. 2 • Before Multi Operation and System Off will work correctly, you must setup the remote to work with your TV and other components (see Setting the remote to control other components on page 77 for more on this). • Some units may take some time to power up, in which case multiple operations may not be possible. • Power on and off commands only work with components that have a standby mode. 79 En
-
 1
1 -
2
-
3
-
4
-
5
-
6
-
7
-
8
-
9
-
10
-
11
-
12
-
13
-
14
-
15
-
16
-
17
-
18
-
19
-
20
-
21
-
22
-
23
-
24
-
25
-
26
-
27
-
28
-
29
-
30
-
31
-
32
-
33
-
34
-
35
-
36
-
37
-
38
-
39
-
40
-
41
-
42
-
43
-
44
-
45
-
46
-
47
-
48
-
49
-
50
-
51
-
52
-
53
-
54
-
55
-
56
-
57
-
58
-
59
-
60
-
61
-
62
-
63
-
64
-
65
-
66
-
67
-
68
-
69
-
70
-
71
-
72
-
73
-
 74
74 -
 75
75 -
 76
76 -
 77
77 -
 78
78 -
 79
79 -
 80
80 -
 81
81 -
 82
82 -
 83
83 -
 84
84 -
85
-
86
-
87
-
88
-
89
-
90
-
91
-
92
-
93
-
94
-
95
-
96
-
97
-
98
-
99
-
100
 |
 |
