Ricoh P C200W Embedded Web Server Administrator s Guide - Page 11
Configuring the e‑mail settings
 |
View all Ricoh P C200W manuals
Add to My Manuals
Save this manual to your list of manuals |
Page 11 highlights
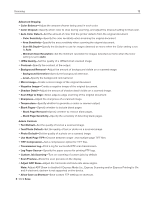
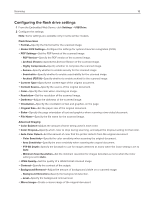
Scanning 11 y Background Removal-Adjust the amount of background visible on a scanned image. - Background Detection-Specify the background detection. Notes: y To remove the background color from the original document, set Background Detection to Content‑based. y To remove the image noise, set Background Detection to Fixed. - Level-Specify the background removal level. y Auto Center-Align the content at the center of the page. y Mirror Image-Create a mirror image of the original document. y Negative Image-Create a negative image of the original document. y Shadow Detail-Adjust the amount of shadow detail visible on a scanned image. y Scan Edge to Edge-Allow edge‑to‑edge scanning of the original document. y Sharpness-Adjust the sharpness of a scanned image. Admin Controls y Allow Color Copies-Print copies in color. y Allow Priority Copies-Interrupt a print job to copy a page or document. y Custom Job Scanning-Turn on scanning of custom jobs by default. y Allow Save as Shortcut-Save custom copy settings as shortcuts. y Adjust ADF Skew-Adjust the front‑side and back‑side skew angles. Note: Adjust ADF Skew is disabled if Express Mode (i.e., Express Scanning and/or Express Printing) is On and if electronic deskew is not supported on the device. y Sample Copy-Print a sample copy. 3 Click Save. Configuring the e‑mail settings 1 From the Embedded Web Server, click Settings > E‑mail. 2 Configure the settings. Note: Some settings are available only in some models. E‑mail Setup y Primary SMTP Gateway-Type the IP address or host name of the primary SMTP server for sending e-mail. y Primary SMTP Gateway Port-Enter the port number of the primary SMTP server. y Secondary SMTP Gateway-Type the server IP address or host name of your secondary or backup SMTP server. y Secondary SMTP Gateway Port-Enter the server port number of your secondary or backup SMTP server. y SMTP Timeout-Set the time before the printer times out when the SMTP server does not respond. y Reply Address-Specify a reply address in the e‑mail. y Always use SMTP default Reply Address-Always use the default reply address in the SMTP server.
-
 1
1 -
2
-
3
-
4
-
5
-
 6
6 -
 7
7 -
 8
8 -
 9
9 -
 10
10 -
 11
11 -
 12
12 -
 13
13 -
 14
14 -
 15
15 -
 16
16 -
17
-
18
-
19
-
20
-
21
-
22
-
23
-
24
-
25
-
26
-
27
-
28
-
29
-
30
-
31
-
32
-
33
-
34
-
35
-
36
-
37
-
38
-
39
-
40
-
41
-
42
-
43
-
44
-
45
-
46
-
47
-
48
-
49
-
50
-
51
-
52
-
53
-
54
-
55
-
56
-
57
-
58
-
59
-
60
-
61
-
62
-
63
-
64
-
65
-
66
-
67
-
68
-
69
-
70
 |
 |
