Ricoh P C200W Embedded Web Server Administrator s Guide - Page 21
Faxing
 |
View all Ricoh P C200W manuals
Add to My Manuals
Save this manual to your list of manuals |
Page 21 highlights
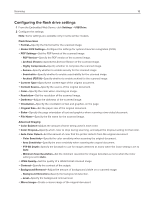
Faxing 21 Faxing Configuring the fax settings Setting the fax mode 1 From the Embedded Web Server, click Settings > Fax > Fax Defaults. 2 From the Fax Mode field, select a fax mode. y Fax-Send fax jobs through a telephone line. y Fax Server -Send fax jobs through a fax server. y Disabled 3 Click Save. Configuring analog fax General Fax Settings 1 From the Embedded Web Server, click Settings > Fax > Fax Setup > General Fax Settings. 2 Configure the settings. Note: Some settings are available only in some printer models. y Fax Name-Identify your fax machine. y Fax Number-Identify your fax number. y Fax ID-Specify whether to notify recipients of your fax name or fax number. y Memory Use-Set the amount of internal printer memory allocated for faxing. y Cancel Faxes-Cancel outgoing faxes before they are transmitted, or cancel incoming faxes before they finish printing. y Fax Number Masking-Specify the format for masking an outgoing fax number. y Digits to Mask-Specify the number of digits to mask in an outgoing fax number. y Enable Line Connected Detection-Determine whether a telephone line is connected to the printer. y Optimize Fax Compatibility-Configure the printer fax functionality for optimal compatibility with other fax machines. y Fax Transport-Set the transport to use for faxing. 3 Click Save. Fax Send Settings 1 From the Embedded Web Server, click Settings > Fax > Fax Setup > Fax Send Settings. 2 Configure the settings.
-
 1
1 -
2
-
3
-
4
-
5
-
6
-
7
-
8
-
9
-
10
-
11
-
12
-
13
-
14
-
15
-
 16
16 -
 17
17 -
 18
18 -
 19
19 -
 20
20 -
 21
21 -
 22
22 -
 23
23 -
 24
24 -
 25
25 -
 26
26 -
27
-
28
-
29
-
30
-
31
-
32
-
33
-
34
-
35
-
36
-
37
-
38
-
39
-
40
-
41
-
42
-
43
-
44
-
45
-
46
-
47
-
48
-
49
-
50
-
51
-
52
-
53
-
54
-
55
-
56
-
57
-
58
-
59
-
60
-
61
-
62
-
63
-
64
-
65
-
66
-
67
-
68
-
69
-
70
 |
 |
