Ricoh P C200W Embedded Web Server Administrator s Guide - Page 18
Creating a shortcut, Managing Scan Center destinations
 |
View all Ricoh P C200W manuals
Add to My Manuals
Save this manual to your list of manuals |
Page 18 highlights
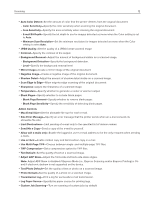
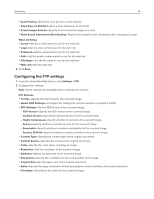
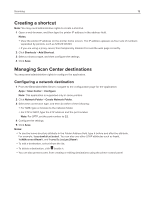
Scanning 18 Creating a shortcut Note: You may need administrative rights to create a shortcut. 1 Open a web browser, and then type the printer IP address in the address field. Notes: y View the printer IP address on the printer home screen. The IP address appears as four sets of numbers separated by periods, such as 123.123.123.123. y If you are using a proxy server, then temporarily disable it to load the web page correctly. 2 Click Shortcuts > Add Shortcut. 3 Select a shortcut type, and then configure the settings. 4 Click Save. Managing Scan Center destinations You may need administrative rights to configure the application. Configuring a network destination 1 From the Embedded Web Server, navigate to the configuration page for the application: Apps > Scan Center > Configure Note: This application is supported only in some printers. 2 Click Network Folder > Create Network Folder. 3 Select the connection type, and then do either of the following: y For SMB, type or browse to the network folder. y For FTP or SFTP, type the FTP address and the port number. Note: For SFTP, set the port number to 22. 4 Configure the settings. 5 Click Save. Notes: y To use the home directory attribute in the Folder Address field, type % before and after the attribute. For example, %customAttribute%. You can also use other LDAP attributes such as %cn%, %sAMAccountName%, and %userPrincipalName%. y To edit a destination, select it from the list. y To delete a destination, click beside it. y You can also prevent users from creating or editing destinations using the printer control panel.
-
 1
1 -
2
-
3
-
4
-
5
-
6
-
7
-
8
-
9
-
10
-
11
-
12
-
 13
13 -
 14
14 -
 15
15 -
 16
16 -
 17
17 -
 18
18 -
 19
19 -
 20
20 -
 21
21 -
 22
22 -
 23
23 -
24
-
25
-
26
-
27
-
28
-
29
-
30
-
31
-
32
-
33
-
34
-
35
-
36
-
37
-
38
-
39
-
40
-
41
-
42
-
43
-
44
-
45
-
46
-
47
-
48
-
49
-
50
-
51
-
52
-
53
-
54
-
55
-
56
-
57
-
58
-
59
-
60
-
61
-
62
-
63
-
64
-
65
-
66
-
67
-
68
-
69
-
70
 |
 |
