Samsung CLX-9250ND Installation Guide - Page 22
Replace the DADF cable cover and tighten the screw .
 |
View all Samsung CLX-9250ND manuals
Add to My Manuals
Save this manual to your list of manuals |
Page 22 highlights
19. Replace the DADF cable cover and tighten the screw . 20. Open the DADF and place the sheet inside. The white side should face down toward the scanner glass. Then remove all protective pieces of paper from the white sheet's Velcro fastener. Setting up the hardware_ 21
-
 1
1 -
2
-
3
-
4
-
5
-
6
-
7
-
8
-
9
-
10
-
11
-
12
-
13
-
14
-
15
-
16
-
 17
17 -
 18
18 -
 19
19 -
 20
20 -
 21
21 -
 22
22 -
 23
23 -
 24
24 -
 25
25 -
 26
26 -
 27
27 -
28
-
29
-
30
-
31
-
32
-
33
-
34
-
35
-
36
-
37
-
38
-
39
-
40
-
41
-
42
-
43
-
44
-
45
-
46
-
47
-
48
-
49
-
50
-
51
-
52
-
53
-
54
-
55
-
56
-
57
-
58
-
59
-
60
-
61
-
62
-
63
-
64
-
65
-
66
-
67
-
68
-
69
 |
 |

Setting up the hardware
_ 21
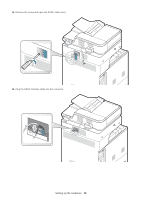
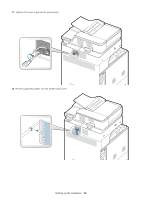
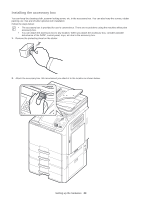
19.
Replace the DADF cable cover and tighten the screw .
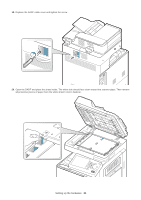
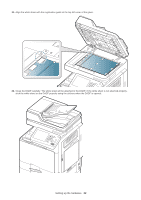
20.
Open the DADF and place the sheet inside. The white side should face down toward the scanner glass. Then remove
all protective pieces of paper from the white sheet’s Velcro fastener.