Samsung CLX-9250ND Installation Guide - Page 30
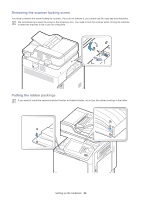
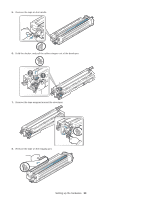
surface of the imaging unit.
 |
View all Samsung CLX-9250ND manuals
Add to My Manuals
Save this manual to your list of manuals |
Page 30 highlights
2. Squeeze and push down the lever, and open the inner cover. 3. Take the new imaging units out from their packages. Do not use sharp objects, such as a knife or scissors, to open the imaging unit package. You could damage the surface of the imaging unit. 4. Remove the paper protecting the surface of the imaging unit. Setting up the hardware_ 29
-
 1
1 -
2
-
3
-
4
-
5
-
6
-
7
-
8
-
9
-
10
-
11
-
12
-
13
-
14
-
15
-
16
-
17
-
18
-
19
-
20
-
21
-
22
-
23
-
24
-
 25
25 -
 26
26 -
 27
27 -
 28
28 -
 29
29 -
 30
30 -
 31
31 -
 32
32 -
 33
33 -
 34
34 -
 35
35 -
36
-
37
-
38
-
39
-
40
-
41
-
42
-
43
-
44
-
45
-
46
-
47
-
48
-
49
-
50
-
51
-
52
-
53
-
54
-
55
-
56
-
57
-
58
-
59
-
60
-
61
-
62
-
63
-
64
-
65
-
66
-
67
-
68
-
69
 |
 |

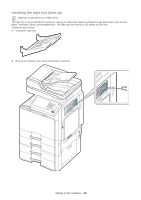
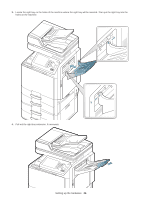
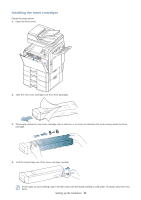
Setting up the hardware
_ 29
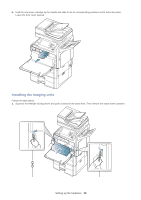
2.
Squeeze and push down the lever, and open the inner cover.
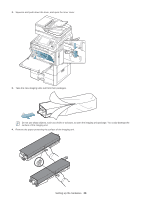
3.
Take the new imaging units out from their packages.
Do not use sharp objects, such as a knife or scissors, to open the imaging unit package. You could damage the
surface of the imaging unit.
4.
Remove the paper protecting the surface of the imaging unit.