Samsung DVD-HR720 Quick Guide (easy Manual) (ver.1.0) (English)
Samsung DVD-HR720 Manual
 |
View all Samsung DVD-HR720 manuals
Add to My Manuals
Save this manual to your list of manuals |
Samsung DVD-HR720 manual content summary:
- Samsung DVD-HR720 | Quick Guide (easy Manual) (ver.1.0) (English) - Page 1
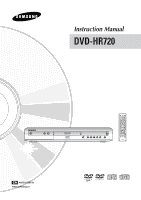
Instruction Manual DVD-HR720 CA AK68-00758C-01 www.samsung.ca - Samsung DVD-HR720 | Quick Guide (easy Manual) (ver.1.0) (English) - Page 2
the power supply is AC 120V, 60Hz. It cannot NOTE be used elsewhere. I This HDD & DVD recorder is designed and manufactured to respond to the Region Management Information. If the Region number of a HDD & DVD disc does not correspond to the Region number of this HDD & DVD recorder, the HDD & DVD - Samsung DVD-HR720 | Quick Guide (easy Manual) (ver.1.0) (English) - Page 3
servicing to qualified service personnel. Servicing is required when the apparatus has been damaged in any way, such as power- HDD & DVD RECORDER in a place subject to extreame changes in temperature. • Do not apply a strong shock to the HDD & DVD RECORDER. • Do not place the HDD & DVD RECORDER - Samsung DVD-HR720 | Quick Guide (easy Manual) (ver.1.0) (English) - Page 4
wait for one to two hours with the power on before atttempting playback. • Be careful not to harm the disc because the data on these discs is highly vulnerable to the environment. Disc Specifications Disc Type DVD-Video • A digital versatile disc (DVD) can contain up to 135minutes of images, 8 audio - Samsung DVD-HR720 | Quick Guide (easy Manual) (ver.1.0) (English) - Page 5
This unit can play back DVD-R discs recorded and finalized with a Samsung DVD video recorder. It may not be able to play some DVD-R discs depending on the disc and the condition of the recording. Audio CD • An audio disc on which 44.1kHz PCM Audio is recorded. • Plays CD-DA format audio CD-R and CD - Samsung DVD-HR720 | Quick Guide (easy Manual) (ver.1.0) (English) - Page 6
Disc Format Getting Started Contents Copy Specifications Contents HDD © DVD DVD © HDD Recorded Video Title Supported Supported Copy Protected Title Not supported Not supported Move Copy Once Title (Deletes the Title in the Not supported HDD after copying) MP3 Not supported supported - Samsung DVD-HR720 | Quick Guide (easy Manual) (ver.1.0) (English) - Page 7
"No disc." or "Please check the regional code." will be displayed. • If your DVD-RW disc is an illegal copy or is not in DVD video format, it may also not be playable. ❋ 3x 2x 3x 2x 2x 3x 3x Disc DVD-RAM DVD-RW DVD-R Maximum no. of recordings by disc type 100,000 1,000 1 • We take no responsibility - Samsung DVD-HR720 | Quick Guide (easy Manual) (ver.1.0) (English) - Page 8
Handling 4 Disc Storage 4 Disc Specifications 4 Disc Copy 6 General Features 10 Before Reading the User's Manual 11 How to use the HDD & DVD RECORDER 11 Unpacking 13 Description 15 Front Panel 15 Front Panel Display 15 Rear Panel 16 Tour of the Remote Control 17 Connecting & Setting up - Samsung DVD-HR720 | Quick Guide (easy Manual) (ver.1.0) (English) - Page 9
from the Copy List 112 Changing Record Mode of All Titles from the Copy List 112 Copying from DVD to HDD 113 Copying MP3 or JPEG Files from a Disc to HDD 114 File Copy 114 Folder Copy 115 Disc Manager 116 Editing the Disc Name 116 Disc Protection 117 Formatting a Disc 118 Delete All Title - Samsung DVD-HR720 | Quick Guide (easy Manual) (ver.1.0) (English) - Page 10
the scheduled time can be recorded onto the free disc space. (See page 84) The HDD & DVD RECORDER allows you to record and play high quality digital video on DVD-RAM/-RW/-R or HDD discs. You can also edit digital images on DVD-RAM/-RW/-R discs or HDD. HDD Recording You can record up to 208 hours of - Samsung DVD-HR720 | Quick Guide (easy Manual) (ver.1.0) (English) - Page 11
If a problem occurs, check the Troubleshooting. (See pages 123~126) Copyright ©2005 Samsung Electronics Co. All rights reserved; No part or whole of this user's manual may be reproduced or copied without the prior written permission of Samsung Electronics Co. How to use the HDD & DVD RECORDER Step - Samsung DVD-HR720 | Quick Guide (easy Manual) (ver.1.0) (English) - Page 12
's length (interval between chapters) varies according to the recording mode. Step 5 Editing a recorded disc Editing on discs is easier than conventional video tapes. The recorder supports many different edit functions, possible only with DVDs and HDD. With a simple and easy edit menu, you can - Samsung DVD-HR720 | Quick Guide (easy Manual) (ver.1.0) (English) - Page 13
TV with this remote control. Control function buttons involve: TV POWER, CH , TV VOL + -, number buttons, TV MUTE, INPUT button. Remote Control Batteries for Remote Control (AAA Size) Instruction Manual Quick Guide Preparing the Remote Control Install Batteries in the Remote Control • Open the - Samsung DVD-HR720 | Quick Guide (easy Manual) (ver.1.0) (English) - Page 14
POWER button. 2. Enter a 2-digit code by using the numerical buttons on the remote control. See "Controllable TV Codes" If the code works, your TV set will be turned on or off. If it does not respond, try other codes. Controllable TV Codes RCA REX SABA SALORA SAMSUNG SANYO SCHNEIDER BUTTON 82 10 - Samsung DVD-HR720 | Quick Guide (easy Manual) (ver.1.0) (English) - Page 15
CH button on the remote control. 9. AV 2 INPUT Connect external equipment. 10. DV-INPUT Connect external digital equipment with a DV jack. (such as a camcorder) 11. OPEN/CLOSE BUTTON Opens and closes the disc tray. 12. PLAY/PAUSE BUTTON Plays a disc or pauses playback or recording. 13. P.SCAN BUTTON - Samsung DVD-HR720 | Quick Guide (easy Manual) (ver.1.0) (English) - Page 16
power is on. Ensure a minimum of 4" clear space on all sides of the fan when installing the product. 1. DIGITAL AUDIO OUT(OPTICAL) Connects to an amplifier having a digital optical audio input jack. 2. DIGITAL DVD. To watch a DVD on NOTE your TV, you must connect audio/video cables. 16 - - Samsung DVD-HR720 | Quick Guide (easy Manual) (ver.1.0) (English) - Page 17
the Remote Control 1 20 2 3 21 4 22 5 23 24 6 25 26 7 7 8 9 9 10 27 11 28 12 29 13 14 30 15 31 16 32 17 33 18 34 19 35 1. DVD POWER Button 2. NUMBER Buttons 3. 100+ Button Press this to select channel 100 or higher. 4. DVD Button Press this to operate DVD. 5. HDD - Samsung DVD-HR720 | Quick Guide (easy Manual) (ver.1.0) (English) - Page 18
the HDD & DVD RECORDER to other external components and required initial setting modes. Quick Overview A Quick Overview presented in this guide attention to Article 820-40 of the National Electrical Code (Section 54 of Canadian Electrical Code, Part I), that provides guidelines for proper grounding - Samsung DVD-HR720 | Quick Guide (easy Manual) (ver.1.0) (English) - Page 19
two separate antennas (one VHF and the other UHF), use a UHF/VHF combiner-adaptor (available at most electronics shops) to connect the antenna to the HDD & DVD RECORDER. To RF OUT TV RF Cable To ANT INPUT I The VHF/UHF RF OUT jack of this product sends only signals received through the antenna - Samsung DVD-HR720 | Quick Guide (easy Manual) (ver.1.0) (English) - Page 20
that the cable box is turned on. Method 3 : Antenna + HDD & DVD RECORDER + Cable box + TV : Cable box with a few scrambled channels You can record non-scrambled channels by selecting the channel on the cable box. You cannot record scrambled channels that require a cable box. Wall Cable box To RF - Samsung DVD-HR720 | Quick Guide (easy Manual) (ver.1.0) (English) - Page 21
available only if your TV supports S-Video input or Component video resulting in a more stable, flicker-free, and clear image than interlaced video scan picture problems, it is recommended that the user switch between the VIDEO(yellow) OUT jack on HDD & DVD RECORDER and VIDEO(yellow) IN jack on the - Samsung DVD-HR720 | Quick Guide (easy Manual) (ver.1.0) (English) - Page 22
enjoy high quality and accurate color reproduction images. Connecting & Setting up 22 - English I Make sure that the color coded connections match. The Y, PB, PR NOTE component output jacks of your HDD & DVD RECORDER must be connected to the exact corresponding component input jacks on your TV. - Samsung DVD-HR720 | Quick Guide (easy Manual) (ver.1.0) (English) - Page 23
and R), use the AUDIO OUT jacks. There are several ways to connect your HDD & DVD RECORDER. Select the audio connection that best suits you below. • Method 1 : trademarks of Dolby Laboratories. "DTS" and "DTS Digital Out" are trademarks of Digital Theater Systems, Inc. Method 1 : Connecting to your - Samsung DVD-HR720 | Quick Guide (easy Manual) (ver.1.0) (English) - Page 24
AV amplifier has a Dolby Digital or DTS decoder and a digital input jack, use this connection. To enjoy Dolby Digital or DTS sound, you will need to set up the audio settings. (See page 38) or Step 4 : Connecting External devices This allows you to connect your HDD & DVD RECORDER to other external - Samsung DVD-HR720 | Quick Guide (easy Manual) (ver.1.0) (English) - Page 25
has a DV output jack, connect it to the DV input jack of your HDD & DVD RECORDER. I After the current time is set automatically, the recorder will perform Auto Channel NOTE Memory for about 3 minutes. If power is on, while Auto Channel Memory is in process, Auto Channel Memory will stop - Samsung DVD-HR720 | Quick Guide (easy Manual) (ver.1.0) (English) - Page 26
functions on your HDD & DVD RECORDER. Use the following buttons to open and navigate through the on-screen menus. System Setup On-Screen Menu Navigation 26 OSD Language Setup 27 Auto Clock Set 27 Manual Clock Set 29 Auto Channel Memory 30 Manual Channel Set 31 Auto Power Off Setting 32 - Samsung DVD-HR720 | Quick Guide (easy Manual) (ver.1.0) (English) - Page 27
Audio Video Parental Control Setup Setup MOVE SELECT RETURN EXIT 3 Press the ...† buttons to select System, then press the ENTER or √ button. • System menu will be displayed. HDD Title Music Photo Timer Record Setup System Clock Set √ Channel Set √ Auto Power Off : Off √ CM - Samsung DVD-HR720 | Quick Guide (easy Manual) (ver.1.0) (English) - Page 28
System Setup 4 Press the ...† buttons to select Clock Set, then press the ENTER or √ button. HDD Title Music Auto Clock Set Manual Clock Set Clock Set √ √ Photo Timer Record Setup MOVE SELECT RETURN EXIT 5 Press the ...† buttons to select Auto Clock Set, then press the ENTER or √ button. - Samsung DVD-HR720 | Quick Guide (easy Manual) (ver.1.0) (English) - Page 29
HDD Title Music Photo Timer Record System Language Audio Video Parental Control Setup Setup MOVE SELECT RETURN EXIT HDD Title Music Photo Manual System menu will be displayed. HDD Title Music Photo Timer Record Setup System Clock Set √ Channel Set √ Auto Power Off : Off √ CM Skip - Samsung DVD-HR720 | Quick Guide (easy Manual) (ver.1.0) (English) - Page 30
Audio Video Parental Control Setup Setup MOVE SELECT RETURN EXIT 3 Press the ...† buttons to select System, then press the ENTER or √ button. • System menu will be displayed. HDD Title Music Photo Timer Record Setup System Clock Set √ Channel Set √ Auto Power Off : Off √ CM - Samsung DVD-HR720 | Quick Guide (easy Manual) (ver.1.0) (English) - Page 31
Audio Video Parental Control Setup Setup MOVE SELECT RETURN EXIT 3 Press the ...† buttons to select System, then press the ENTER or √ button. • System menu will be displayed. HDD Title Music Photo Timer Record Setup System Clock Set √ Channel Set √ Auto Power Off : Off √ CM - Samsung DVD-HR720 | Quick Guide (easy Manual) (ver.1.0) (English) - Page 32
the desired item, then press the ENTER or √ button. • Off : Auto power off is disabled. • 2 Hour : HDD & DVD RECORDER will automatically turns off for 2 hours after the last button is pressed. • 6 Hour : HDD & DVD RECORDER will automatically turns off for 6 hours after the last button is pressed. If - Samsung DVD-HR720 | Quick Guide (easy Manual) (ver.1.0) (English) - Page 33
When a program recorded on a HDD, a DVD-RAM, a DVD-RW, or a DVD-R is played, the unit can be set to automatically skip a portion of the program corresponding to a CM(commercial) skip time set by the user. HDD Title Music Photo Timer Record Setup System Clock Set √ Channel Set √ Auto Power Off - Samsung DVD-HR720 | Quick Guide (easy Manual) (ver.1.0) (English) - Page 34
Language Audio Video Parental Control Setup Setup MOVE SELECT RETURN EXIT 3 Press the ...† buttons to select System, then press the ENTER or √ button. System menu will be displayed. HDD Title Music Photo Timer Record Setup System Clock Set √ Channel Set √ Auto Power Off : Off √ CM - Samsung DVD-HR720 | Quick Guide (easy Manual) (ver.1.0) (English) - Page 35
Title Music Photo Timer Record System Language Audio Video Parental Control Setup Setup MOVE SELECT RETURN EXIT 4 Press the ...† buttons to select Front Display, then press the ENTER or √ button. System HDD Title Clock Set √ Channel Set √ Music Auto Power Off : Off √ Photo CM - Samsung DVD-HR720 | Quick Guide (easy Manual) (ver.1.0) (English) - Page 36
Audio Video Parental Control Setup Setup MOVE SELECT RETURN EXIT 3 Press the ...† buttons to select System, then press the ENTER or √ button. System menu will be displayed. DVD-RW(V) Title Music Photo Timer Record Setup System Clock Set √ Channel Set √ Auto Power Off : Off √ CM - Samsung DVD-HR720 | Quick Guide (easy Manual) (ver.1.0) (English) - Page 37
ENTER or √ button. HDD Title Music Photo Timer Record System Language Audio Video Parental Control Setup Setup MOVE SELECT Recording or when you turn the power off. 3 Press the ...† buttons to select Language, then press the ENTER or √ button. Language setup menu will be displayed. HDD - Samsung DVD-HR720 | Quick Guide (easy Manual) (ver.1.0) (English) - Page 38
menu. Press the MENU NOTE button to exit the menu. I The selected language will only appear if it is supported on the disc. Setting up the Audio Options You can connect the HDD & DVD RECORDER to an external amp or Home theater. Allow you to setup the Audio device and sound status depending on - Samsung DVD-HR720 | Quick Guide (easy Manual) (ver.1.0) (English) - Page 39
1. Off : Doesn't output DTS signal. Select this when your AV receiver or AV amplifier does not have DTS decoder. 2. On : Outputs DTS Bitstream via digital output when you play DTS track. Select this only when your AV receiver (or AV amplifier) have DTS decoder. I When DTS soundtrack is played, sound - Samsung DVD-HR720 | Quick Guide (easy Manual) (ver.1.0) (English) - Page 40
HDD Title Music Photo Timer Record System Language Audio Video Parental Control Setup Select when you want to see the total 16:9 ratio screen DVD supplies, even though you have a TV with a 4:3 ratio 1. 0 IRE : This is the standard NTSC reference black level for consistent brightness/ contrast - Samsung DVD-HR720 | Quick Guide (easy Manual) (ver.1.0) (English) - Page 41
Setting up the Progressive scan 3 The message "Video Output Mode Progressive Scan" will appear. If the TV supports Progressive Scan, press the P.SCAN button on the front of the HDD & DVD RECORDER to enjoy. If you select 'progressive', the component cable has to be connected at first. (See page - Samsung DVD-HR720 | Quick Guide (easy Manual) (ver.1.0) (English) - Page 42
unit in Stop mode, press the P.SCAN button on the front of the HDD & DVD RECORDER. The message "Press [Yes] to confirm Interlace scan mode. Otherwise, you press the P.SCAN button by mistake when your TV does not support Progressive mode, you need to release the Progressive mode. To release the - Samsung DVD-HR720 | Quick Guide (easy Manual) (ver.1.0) (English) - Page 43
helps you control the types of DVDs that your family watches. There are up to 8 rating levels on a disc. 4 Enter the 4-digit password using the number buttons on the remote control. The "Confirm the password" message will be displayed. Enter your password again. HDD Title Music Photo Timer Record - Samsung DVD-HR720 | Quick Guide (easy Manual) (ver.1.0) (English) - Page 44
then press the ENTER or √ button. 3 When you operate your HDD & DVD RECORDER for the first time, the "Create the Password" message will be digit password using the number buttons on the remote control. The "Confirm the password" message will be displayed. HDD Title Music Photo Timer Record - Samsung DVD-HR720 | Quick Guide (easy Manual) (ver.1.0) (English) - Page 45
Region code (DVD-Video only) Both the HDD & DVD RECORDER and the discs are coded by region. These regional codes must match in order for the disc to play. If the codes do not match, the disc will not play. The Region Number for this HDD & DVD RECORDER is described on the rear panel of the HDD & DVD - Samsung DVD-HR720 | Quick Guide (easy Manual) (ver.1.0) (English) - Page 46
HDD & DVD RECORDER closes the disc tray and plays the disc automatically. • The recorder does not play discs automatically after the initial power on. • When the recorder is powered on the disc type. If this occurs, refer to the instructions written on the disc case. I Be especially careful that - Samsung DVD-HR720 | Quick Guide (easy Manual) (ver.1.0) (English) - Page 47
may not support the title menu functionality. For HDD/DVD-RAM/-RW/-R Disc 1 During play, press the SEARCH ( the remote control. ) buttons on HDD/ DVD-VIDEO/ DVD-RAM/-RW to help you select a title. Since the title NOTE list consists of the information on video stream that is actually recorded, - Samsung DVD-HR720 | Quick Guide (easy Manual) (ver.1.0) (English) - Page 48
you can search quickly through a chapter or track. 1 During play, press the SKIP ( remote control. ) buttons on the • If you press the SKIP ( ) button, it moves to the beginning of the chapter or track or marker(HDD/DVD-RAM/-RW(VR mode)). Pressing the button once again within 3 seconds returns to - Samsung DVD-HR720 | Quick Guide (easy Manual) (ver.1.0) (English) - Page 49
ANYKEY Press the STEP( in the pause mode. ) buttons on the remote control • Each time the button is pressed, a new frame will appear. to select Search, then press the ENTER or √ button. HDD Title 1/10 Time 00:01:45 MOVE CHANGE Playback DVD-Video Title 1/10 Chapter 1/40 Time 00:01:45 MOVE - Samsung DVD-HR720 | Quick Guide (easy Manual) (ver.1.0) (English) - Page 50
the ENTER button. • If you want to move to a desired time following will help you find a scene. I This may not work for some discs. When NOTE an select Search, then press the ENTER or √ button. HDD Title 1/10 Time 00:01:45 MOVE CHANGE Playback DVD-Video Title 1/10 Chapter 1/40 Time 00:01:45 - Samsung DVD-HR720 | Quick Guide (easy Manual) (ver.1.0) (English) - Page 51
mode, press the MENU button. HDD Title Music Title Press OK or Right button for Title List. Photo Timer Record Setup MOVE SELECT RETURN EXIT • 2005 12:39 AM 00:01:43 SP Playing Time 00:13:27 Audio Dolby Digital 1/1 L+R Title Protection Not Protected JAN/01/2005 (SAT) AM 12:00 - Samsung DVD-HR720 | Quick Guide (easy Manual) (ver.1.0) (English) - Page 52
to select Scene Navigation, then press the ENTER or √ button. Scene Navigation HDD Title List No. 1 01 00:00:16 01 00:05:16 HDD Title Music Title Press OK or Right button for Title List. Photo Timer Record Setup MOVE SELECT RETURN EXIT 1/1 Page MOVE SELECT RETURN EXIT 5 Press the - Samsung DVD-HR720 | Quick Guide (easy Manual) (ver.1.0) (English) - Page 53
Title List No. 1 01 00:00:16 01 00:05:16 1/1 Page MOVE SELECT RETURN EXIT HDD Title Music Title Press OK or Right button for Title List. Photo Timer Record Setup MOVE SELECT RETURN EXIT • Press the ...† buttons to select Title, then press the ENTER or √ button. 4 Press the buttons - Samsung DVD-HR720 | Quick Guide (easy Manual) (ver.1.0) (English) - Page 54
buttons to select Time Navigation, then press the ENTER or √ button. Time Navigation HDD √ 12:15 AM 12:15 AM 12:25 AM œ √ CHANGE SELECT RETURN Cursor does not move if selected recorded title is shorter than 1 minute. NOTE I A disc that has not been recorded by this device may not operates - Samsung DVD-HR720 | Quick Guide (easy Manual) (ver.1.0) (English) - Page 55
Repeat √ Zoom Select Media √ Disc Manager • Press the ...† buttons to select Marker, then press the ENTER or √ button. MOVE √ PLAY CANCEL RETURN • HDD, DVD-RAM or DVD-RW (VR Mode) discs have the Marker function instead of the Bookmark function. The Marker function allows you to mark up to - Samsung DVD-HR720 | Quick Guide (easy Manual) (ver.1.0) (English) - Page 56
Playing back a marker Using the MARKER button 1 Press the MARKER button during playback. Marker 01 02 N:2 Clearing a marker Using the MARKER button 1 Press the MARKER button during playback. Marker 01 02 03 04 05 06 07 08 09 10 √ N:10 Playback MOVE √ PLAY CANCEL RETURN Using the ANYKEY button - Samsung DVD-HR720 | Quick Guide (easy Manual) (ver.1.0) (English) - Page 57
I When a marker is cleared while HDD/DVDRAM/-RW (VR mode) is playing, marker numbers will change. For example, if the 7th marker is cleared after ten markers are registered, the marker - Samsung DVD-HR720 | Quick Guide (easy Manual) (ver.1.0) (English) - Page 58
Playing back a bookmark Using the MARKER button 1 Press the MARKER button during playback. Bookmark 1 2 Clearing a bookmark Using the MARKER button 1 Press the MARKER button during playback. Bookmark 1 2 MOVE √ PLAY CANCEL RETURN Using the ANYKEY button. • Press the ANYKEY button during - Samsung DVD-HR720 | Quick Guide (easy Manual) (ver.1.0) (English) - Page 59
Selecting the Subtitle Language Using the ANYKEY button 1 Press the ANYKEY button during playback. Selects one of the subtitle language recorded on the disc. (VR mode) Search Navigation √ Marker Subtitle √ Audio √ Repeat √ Zoom Select Media √ Disc Manager Using the SUBTITLE button 1 - Samsung DVD-HR720 | Quick Guide (easy Manual) (ver.1.0) (English) - Page 60
Selecting the Audio Selects one of the soundtracks recorded on the disc. Also selects the audio 1 Press the AUDIO button during playback. HDD/DVD-RAM/-RW Audio Dolby Digital 2/0 L + R 2 Press the be different because they are disc-specific. NOTE I Some discs allow you to select the audio - Samsung DVD-HR720 | Quick Guide (easy Manual) (ver.1.0) (English) - Page 61
Playback Changing the Camera Angle When a HDD & DVD RECORDER contains multiple angles of a particular scene, you can select the Angle function. Repeat Play Playing Repeatedly(Repeat Playback) Using the ANYKEY button 1 Press the ANYKEY - Samsung DVD-HR720 | Quick Guide (easy Manual) (ver.1.0) (English) - Page 62
the ...† buttons to select Repeat Off, Repeat A-B, Repeat Title, Repeat Track or Repeat Chapter you want to play repeatedly, then press the ENTER or √ button. I HDD/DVD-RAM/-RW(VR mode), unfinalized DVD-R and unfinalized DVD- NOTE RW (V mode) do not repeat a chapter. Playback 62 - English - Samsung DVD-HR720 | Quick Guide (easy Manual) (ver.1.0) (English) - Page 63
2.0 is in the Menu Off mode only. HDD/DVD-VIDEO/ DVD-RAM/-RW/-R VCD normal size ➔ X2 ➔ X4 ➔ X2 ➔ normal size normal size ➔ X2 ➔ normal size I When recording is done in the EP mode, the Zoom function will not be supported except NOTE when the recording has been done in V mode. I This function - Samsung DVD-HR720 | Quick Guide (easy Manual) (ver.1.0) (English) - Page 64
Select Media, then press the ENTER or √ button. Search Navigation Marker Subtitle Audio Repeat Zoom Select Media Disc Manager √ √ √ √ √ HDD DVD 3 Press the ...† buttons to select HDD or DVD, then press the ENTER or √ button. Playing an Audio CD/MP3 Playing an Audio CD(CD-DA) 1 Insert an audio - Samsung DVD-HR720 | Quick Guide (easy Manual) (ver.1.0) (English) - Page 65
the Remote Control used the current track when pressed during playback. If pressed again, your HDD & DVD RECORDER moves to and plays the previous track. If you press the JPEG files, the MP3 or JPEG screen NOTE appears after the disc is loaded. I If a disc contains a mix of MP3 and JPEG files, you - Samsung DVD-HR720 | Quick Guide (easy Manual) (ver.1.0) (English) - Page 66
Buttons on the Remote Control used for MP3 playback Repeat CD (CD-DA) & MP3 Using : Returns to the beginning of the current track when pressed during playback. If pressed again, your HDD & DVD RECORDER moves to and plays the previous track. If you press the this button within three seconds after - Samsung DVD-HR720 | Quick Guide (easy Manual) (ver.1.0) (English) - Page 67
play mode, then press the ENTER or √ button. • Normal (CD (CD-DA)/MP3): Track on a disc are played in the order in which they were recorded on the disc. • Repeat Track (CD (CD-DA)/MP3) • Repeat Folder (MP3) • Repeat All (CD (CD-DA)/MP3) • Random (CD (CD-DA)/MP3): The random - Samsung DVD-HR720 | Quick Guide (easy Manual) (ver.1.0) (English) - Page 68
4 If you playlisted a wrong track, press the √...† buttons to select wrong track, then press the ENTER or CANCEL button. The wrong track will be removed. CD TRACK 1 01. CDDA TRACK 2 02. CDDA TRACK 3 03. CDDA TRACK 4 CDDA TRACK 5 CDDA TRACK 6 CDDA TRACK 7 1/3 Page MOVE Delete Make - Samsung DVD-HR720 | Quick Guide (easy Manual) (ver.1.0) (English) - Page 69
Delete the Playlist Go To Edit Playlist Playback 1 Press the ANYKEY button during the Music List playback. Music List CD TRACK 1 » 02 : 10 TRACK 1 CDDA TRACK 2 CDDA TRACK 3 CDDA TRACK 4 CD-DA Pla0y 1M/1o5de CDDA TRACK 5 √ CDDA TRACK 6 Go 0T4o:5P7laylist CDDA TRACK 7 New Playlist 1/3 - Samsung DVD-HR720 | Quick Guide (easy Manual) (ver.1.0) (English) - Page 70
5 Press the ...† buttons to select the Go To Edit Playlist, then press the ENTER or √ button. CD CDDA TRACK 1 CDDA TRACK 2 CDDA TRACK 3 CDDA TRACK 4 CDDA TRACK 5 CDDA TRACK 6 CDDA TRACK 7 1/3 Page Edit Playlist 01. TRACK 1 02. TRACK 3 03. TRACK 7 04. TRACK 4 1/1 Page MOVE Add RETURN EXIT 6 - Samsung DVD-HR720 | Quick Guide (easy Manual) (ver.1.0) (English) - Page 71
Right button for Title List. Photo Timer Record Setup MOVE SELECT RETURN EXIT CD Copy .mp3 √ DVD 1/3 Page MOVE SELECT RETURN EXIT 3 Press the ...† buttons to select HDD or DVD, then press MP3 or JPEG screen NOTE appears after the disc is loaded. I If a disc contains a mix of MP3 and - Samsung DVD-HR720 | Quick Guide (easy Manual) (ver.1.0) (English) - Page 72
Slide Show To set up, follow steps 1~3 in page 71. 4 Press the ANYKEY button. CD DSC01194 Photo List Index: 1/10 .. DSC01189 DSC01190 DSC01191 Copy DSSClid0e11S9h2ow DSC0√1193 DSC01194 Select Media √ 1/2 Page DSC01199 MOVE SELECT RETURN EXIT Rotate To set up, follow steps 1~3 in page 71. - Samsung DVD-HR720 | Quick Guide (easy Manual) (ver.1.0) (English) - Page 73
Zoom To set up, follow steps 1~3 in page 71. 4 Press the ENTER button to select you want to see the picture, then press the ANYKEY button. Go To Photo List To set up, follow steps 1~3 in page 71. 4 Press the ENTER button to select you want to see the picture, then press the ANYKEY button. - Samsung DVD-HR720 | Quick Guide (easy Manual) (ver.1.0) (English) - Page 74
Company's Recorder Disc Types DVD-RAM DVD-RW DVD-R Recording format VR Mode VR Mode V Mode V Mode Recording Device Finalizing Additional Recording in Samsung Recorder Samsung X Recordable Other Company X Recordable Samsung finalized Not recordable not finalized Recordable Other Company - Samsung DVD-HR720 | Quick Guide (easy Manual) (ver.1.0) (English) - Page 75
about 1.2 Mbps Approx.1~6 hours I Recording time may vary according to specific conditions. NOTE Unrecordable video Video with copy protection cannot be recorded on this HDD & DVD RECORDER. When the HDD & DVD RECORDER receives a copy guard signal while recording, recording stops and the following - Samsung DVD-HR720 | Quick Guide (easy Manual) (ver.1.0) (English) - Page 76
the HDD or DVD button. If you select DVD, Press the OPEN/CLOSE button and place a recordable disc on the disc tray. Press the OPEN/CLOSE button to close the disc tray. Wait until LOAD disappears from the front panel display. If an unused DVD-RAM disc is used, you will be prompted to format first - Samsung DVD-HR720 | Quick Guide (easy Manual) (ver.1.0) (English) - Page 77
mode NOTE and the channel while recording. I Recording will stop automatically if there is no free space left for recording. I Up to 99 titles can be recorded onto a disc.(DVD-RAM/-RW/-R) I Up to 999 titles can be registered on the HDD. I HDD recording is available for up to 24 hours - Samsung DVD-HR720 | Quick Guide (easy Manual) (ver.1.0) (English) - Page 78
. 1 Press the HDD or DVD button. If you select DVD, Press the OPEN/CLOSE button and place a recordable disc on the disc tray. Press the OPEN/CLOSE button to close the disc tray. Wait until LOAD disappears from the front panel display. If an unused DVD-RAM disc is used, whether to format or not will - Samsung DVD-HR720 | Quick Guide (easy Manual) (ver.1.0) (English) - Page 79
playback related icons on the screen, press any direction button on the remote control. - To stop recording - Press the STOP ( ) button to stop or finish a recording in progress. • When using DVD-RAM/-RW/-R discs, the message "Updating the information of disc. Please wait for a moment" is displayed - Samsung DVD-HR720 | Quick Guide (easy Manual) (ver.1.0) (English) - Page 80
up to 8 hours by pressing the REC button. 1 Press the HDD or DVD button. If you select DVD, Press the OPEN/CLOSE button and place a recordable disc on the disc tray. Press the OPEN/CLOSE button to close the disc tray. Wait until LOAD disappears from the front panel display. 2 If you want to - Samsung DVD-HR720 | Quick Guide (easy Manual) (ver.1.0) (English) - Page 81
. I No sound is heard during search mode. NOTE I DVD disc playback is available during HDD recording. However, JPEG and MP3 files in the disc cannot be played back. I HDD playback is available during DVD recording. However, JPEG and MP3 files in the HDD cannot be played back. Using the TITLE LIST - Samsung DVD-HR720 | Quick Guide (easy Manual) (ver.1.0) (English) - Page 82
in progress screen appears. 2 Pressing the STOP ( ) button once more will stop the recording. Using the TITLE LIST button 1 With the unit in recording mode, press the TITLE LIST button. The Title List screen is displayed. Title List HDD No. Title Length 008 JAN/18/2005 02:15A 00:10:21 009 - Samsung DVD-HR720 | Quick Guide (easy Manual) (ver.1.0) (English) - Page 83
a value. • To : Select the media to record HDD or DVD. • Source : The video input source (AV1, AV2), or the broadcasting channel you want to make a timer recording from. • Date : Timer Recording allows setting the recording time within one month period. Set the recording day. (day/month) 01 JAN 02 - Samsung DVD-HR720 | Quick Guide (easy Manual) (ver.1.0) (English) - Page 84
don't want to set a timer recording. 5 When you want to recording on DVD-RAM/-RW/-R, you must insert the disc. 6 Press the MENU button to finish the Timer Recording setting. Flexible Recording (for Timer recording only) In FR mode, the most suitable record mode is adjusted automatically, according - Samsung DVD-HR720 | Quick Guide (easy Manual) (ver.1.0) (English) - Page 85
the TIMER button 1 With the unit in Stop mode/Playback mode, press the TIMER button. The Timer Record List screen is displayed. HDD No. To Source 01 HDD CH 07 02 HDD CH 11 03 HDD AV 2 Timer Record List Current Time 11:00 AM Date Start End Mode 01 JAN 11 : 00 AM 02 : 00PM - Samsung DVD-HR720 | Quick Guide (easy Manual) (ver.1.0) (English) - Page 86
the TIMER button 1 With the unit in Stop mode/Playback mode, press the TIMER button. The Timer Record List screen is displayed. HDD No. To Source 01 HDD CH 07 02 HDD CH 11 03 HDD AV 2 Timer Record List Current Time 11:00 AM Date Start End Mode 01 JAN 11 : 00 AM 02 : 00PM - Samsung DVD-HR720 | Quick Guide (easy Manual) (ver.1.0) (English) - Page 87
RETURN EXIT Using the TIMER button 1 With the unit in Stop mode/Playback mode, press the TIMER button. The Timer Record List screen is displayed. HDD No. To Source Timer Record List Current Time 11:00 AM Date Start End Mode Add a list 4 Press the MENU button after finishing the operation - Samsung DVD-HR720 | Quick Guide (easy Manual) (ver.1.0) (English) - Page 88
Information about History List Informs whether the selected History List performed a Timer Recording successfully. 3-1 Press the ...† buttons to select the number of the History List, then press the ANYKEY button. History List HDD No. Source Date Start End Mode To Status 01 CH 07 01 JAN 11 : 00 - Samsung DVD-HR720 | Quick Guide (easy Manual) (ver.1.0) (English) - Page 89
2 01 JAN 15 : 10 AM 02 : 30PM SP HDD Done Delete List Clear Go To Timer Rec List MOVE SELECT RETURN EXIT 4 Press the ...† buttons to select Go To Timer Rec List, then press the ENTER or √ button. HDD No. To Source Timer Record List Current Time 11:00 AM Date Start End - Samsung DVD-HR720 | Quick Guide (easy Manual) (ver.1.0) (English) - Page 90
Copying Multiple Titles at One Time 109 Copying from DVD to HDD 113 Copying MP3 or JPEG Files from a Disc to HDD . . .114 Disc Manager 116 90 - English • Title List A title is a section of recorded video and audio. Title List shows a list to help you select a title. Since the title consists of - Samsung DVD-HR720 | Quick Guide (easy Manual) (ver.1.0) (English) - Page 91
Editing (Title List) Renaming(Labeling) a Title Follow these instructions to rename a title list entry, i.e., to edit the title of a recorded program. 3 Press the ...† buttons to select Rename, then press the ENTER or √ button. The Rename screen is displayed. HDD JAN / 1 8 / 2005 12:15 AM CH 11 - Samsung DVD-HR720 | Quick Guide (easy Manual) (ver.1.0) (English) - Page 92
Locking (Protecting) a Title Follow these instructions to lock an entry to protect it from accidental deletion. button. • Press the ...† buttons to select Title, then press the ENTER or √ button. Title List HDD Title Protection: JAN/18/2005 12:15 AM CH11 On Off JAN/18/2005 12:15 AM SP MOVE - Samsung DVD-HR720 | Quick Guide (easy Manual) (ver.1.0) (English) - Page 93
instructions to delete an entry from the Title List. Using the TITLE LIST button 1 With the unit in Stop mode/Playback mode, press the TITLE LIST button. The Title List screen is displayed. Title List HDD be prompted with the confirmation message. HDD, DVD-RAM(VR mode), DVDRW(VR mode): - Samsung DVD-HR720 | Quick Guide (easy Manual) (ver.1.0) (English) - Page 94
See page 117) I Once an entry is deleted from the Title List it cannot be recovered. I Once DVD-RW/-R is finalized, it cannot be deleted. Splitting a Section of a Title (Split) Follow these instructions to split a section of a Title List entry. Using the TITLE LIST button 1 With the unit in Stop - Samsung DVD-HR720 | Quick Guide (easy Manual) (ver.1.0) (English) - Page 95
"This title cannot be recovered after splitting. Do you want to split?" is displayed. Split HDD JAN/18/2005 12:15 AM CH11 Title List No. 05 Split 1 Split 2 This SELECT RETURN EXIT x First split interval ➁ Total recording time of title list ➂ Start time of the second split and its screen - Samsung DVD-HR720 | Quick Guide (easy Manual) (ver.1.0) (English) - Page 96
instructions to delete a section of a Title List entry. (VR mode) Using the TITLE LIST button 1 With the unit in Stop mode/Playback mode, press the TITLE LIST button. The Title List screen is displayed. Title List HDD SELECT RETURN EXIT • When using DVD-RAM/-RW(VR) disc, you can select Partial - Samsung DVD-HR720 | Quick Guide (easy Manual) (ver.1.0) (English) - Page 97
7 Press the œ √ buttons to select Delete, then press the ENTER button. Partial Delete HDD JAN/18/2005 12:15 AM CH11 Title List No. 001 Start End 00:01:00 Start 00:06:35 00:06:35 Return MOVE SELECT RETURN EXIT Partial Delete HDD JAN/18/2005 12:15 AM CH11 Title List No. 001 Start End - Samsung DVD-HR720 | Quick Guide (easy Manual) (ver.1.0) (English) - Page 98
instructions to create a new playlist entry from a recorded title. (VR mode) Using the TITLE LIST button 3 Press the ...† buttons to select New Playlist, then press the ENTER or √ button. The Make Playlist screen is displayed. HDD the ENTER or √ button. HDD Make Playlist New Playlist Scene No - Samsung DVD-HR720 | Quick Guide (easy Manual) (ver.1.0) (English) - Page 99
will skip to the next title. Playing Entries in the Playlist Follow these instructions to play the playlist entries. (VR mode) Using the PLAY LIST button mode, press the PLAY LIST button. The Playlist screen is displayed. Playlist HDD No. Title Lengtha 001 JAN/16/2005 12:15A 00:10:21 002 - Samsung DVD-HR720 | Quick Guide (easy Manual) (ver.1.0) (English) - Page 100
Renaming a Playlist Entry Follow these instructions to rename a playlist entry, i.e. to edit the title of a playlist entry. 3 Press the ...† buttons to select Rename, then press the ENTER or √ button. The Rename screen is displayed. (VR mode) Using the PLAY LIST button HDD 1 8 / JAN / 2005 12:15 - Samsung DVD-HR720 | Quick Guide (easy Manual) (ver.1.0) (English) - Page 101
Editing a Scene for the Playlist Follow these instructions to edit scenes for a playlist. (VR mode) Using the select Edit Playlist, then press the ENTER or √ button. The Edit Playlist Scene screen is displayed. Edit Playlist HDD Playlist No. 1 01 00:00:26 02 0:00:07 03 00:06:04 04 0:00:03 05 0: - Samsung DVD-HR720 | Quick Guide (easy Manual) (ver.1.0) (English) - Page 102
0:00:03 Return MOVE SELECT RETURN EXIT 5 Press the ...† buttons to select Modify, then press the ENTER or √ button. The Modify Scene screen is displayed. HDD Modify Scene New Playlist Scene No. 001 Start End Title List : 1/7 00:00:00 Start End Change MOVE SELECT 00:00:00 00:00:20 - Samsung DVD-HR720 | Quick Guide (easy Manual) (ver.1.0) (English) - Page 103
scene you want to move (change the position), then press the ANYKEY button. Edit Playlist HDD Playlist No. 1 01 0:00:26 02 Play Modify Move 05 Add0:00:26 06 the ...† buttons to select Move, then press the ENTER or √ button. Edit Playlist HDD Playlist No. 1 01 00:00:26 02 00:00:07 03 00:00:04 - Samsung DVD-HR720 | Quick Guide (easy Manual) (ver.1.0) (English) - Page 104
press the ENTER or √ button. The Add Scene screen is displayed. Add Scene HDD JAN/16/2005 12:15AM Scene No. 001 Start End Title List : 1/7 00 6 Press the ENTER button at the starting point of the scene. Add Scene HDD JAN/16/2005 12:15AM Scene No. 001 Start End Title List : 1/7 00 - Samsung DVD-HR720 | Quick Guide (easy Manual) (ver.1.0) (English) - Page 105
the ...† buttons to select Delete, then press the ENTER or √ button. Edit Playlist HDD Playlist No. 1 01 0:00:26 Do02you w0:0a0n:0t7to d03elete00:t0h6e:04sce0n4e ? 0: , Copy, Delete, Edit Playlist, Go To Titlelist, Disc Manager. HDD Rename Copy Delete JAN/16/2005 12:15 AM CH11 Edit Playlist - Samsung DVD-HR720 | Quick Guide (easy Manual) (ver.1.0) (English) - Page 106
& Remaining time and space on the current disc in DVD Record mode * Total record time and space of selected titles for copying Contents Copy Specifications Contents HDD © DVD Recorded Video Title Supported Copy Protected Title Not supported Copy Once Title Move (Deletes the Title in the - Samsung DVD-HR720 | Quick Guide (easy Manual) (ver.1.0) (English) - Page 107
button to close the disc tray. Wait until LOAD disappears from the front panel display. Check that the disc has enough available space for the recording. 3 Select the HDD by pressing the HDD button on the front panel of the HDD & DVD RECORDER or on the remote control. 4 With the unit in Stop mode - Samsung DVD-HR720 | Quick Guide (easy Manual) (ver.1.0) (English) - Page 108
in progress, press the CANCEL button. - Copying an Unedited title - 9-1 The "Do you want to use high speed copy mode?" message is displayed. Copy HDD Copy To : HDD © DVD No. Title Rec.Mode Length 1 JAN/18/2005 12:15A LP © HS 00:10:21 Start Do you waAnddt taolisutse high speed copy moRedce - Samsung DVD-HR720 | Quick Guide (easy Manual) (ver.1.0) (English) - Page 109
to close the disc tray. Wait until LOAD disappears from the front panel display. Check that the disc has enough available space for the recording. 3 Select the HDD by pressing the HDD button on the front panel of the HDD & DVD RECORDER or on the remote control. 4 With the unit in Stop mode/Playback - Samsung DVD-HR720 | Quick Guide (easy Manual) (ver.1.0) (English) - Page 110
EXIT 10 Repeat steps 8~9 to select a title you want to copy. Copy HDD Copy To : HDD © DVD No. Title Rec.Mode Length 1 JAN/18/2005 12:15A LP © or √ buttons to select Start, then press the ENTER button. Copy HDD Copy To : HDD © DVD No. Title Rec.Mode Length 1 JAN/18/2005 12:15A LP © - Samsung DVD-HR720 | Quick Guide (easy Manual) (ver.1.0) (English) - Page 111
ANYKEY button. Press the ...† buttons to select Delete, then press the ENTER or √ button. The message "Do you want to delete?" is displayed. Copy HDD Copy To : HDD © DVD No. Title Rec.Mode Length 1 JAN/18/2005 12:15A LP © HS 00:10:21 2 JAN/19/2005 13:1D5oA youLPw©anHtS to d00e - Samsung DVD-HR720 | Quick Guide (easy Manual) (ver.1.0) (English) - Page 112
for each title. To setup, follow steps 1 to 7 in pages 109~110. 8 Press the ...† buttons to select a title to change its record mode in the copy screen. Copy HDD Copy To : HDD © DVD No. Title Rec.Mode Length 1 JAN/18/2005 12:15A LP © HS 00:10:21 2 JAN/19/2005 13:15A SP - Samsung DVD-HR720 | Quick Guide (easy Manual) (ver.1.0) (English) - Page 113
Start Add a list [HDD] Available LP 40:16:56 52.99 GB Total 00:10:21 0.25 GB MOVE SELECT RETURN EXIT - About Using COPY button - Press the ...† buttons to select title you want to copy from the title list and then press the COPY button on the remote control. You can go - Samsung DVD-HR720 | Quick Guide (easy Manual) (ver.1.0) (English) - Page 114
mode cannot be changed when you copy a title from DVD to HDD. Contents Copy Specifications Contents Recorded Video Title Copy Protected Title Copy Once Title DVD © HDD Supported Not supported Not supported CD MP3 01/15 4.0 MB MOVE Music List Bryan Adams.mp3 √ 02 : 10 .. Bryan Adams.mp3 MP3 - Samsung DVD-HR720 | Quick Guide (easy Manual) (ver.1.0) (English) - Page 115
begins. Subfolders and files in the selected folder are copied. Music List CD Bryan Adams.mp3 MUSIC Copying... Disc Type : HDD Bryan Adams.mp3 HDD MP3 Bryan Adams_2.mp3 free space : 2939 MB MP3 Straight from the heart.mp3 totaMl fUilSeInCumber : 1/16 MP3 Run to you.mp3 Copying File Name - Samsung DVD-HR720 | Quick Guide (easy Manual) (ver.1.0) (English) - Page 116
may be slightly different due to the file system. Contents Copy Specifications Contents MP3 JPEG(photo) HDD © DVD Not supported Not supported DVD © HDD supported supported Disc Manager Editing the Disc Name Follow these instructions to give a name to a disc. 1 With the unit in Stop mode, press - Samsung DVD-HR720 | Quick Guide (easy Manual) (ver.1.0) (English) - Page 117
√ buttons to select Rename, then press the ENTER button. The Rename screen is displayed. DVD-RAM(VR) Rename Disc Protection Disc Protection allows you to protect your discs from being formatted or deleted due to unintended operations. Back Space Space Delete Clear Save MOVE SELECT RETURN EXIT - Samsung DVD-HR720 | Quick Guide (easy Manual) (ver.1.0) (English) - Page 118
Protection Delete All Finalize Format MOVE SELECT RETURN EXIT 4 Press the œ √ buttons to select Yes, then press the ENTER button. The disc is formatted. DVD-VR and DVD-V are defined according to their recording format. DISC DVD-VR DVD-RAM DVD-RW DVD-V DVD-RW DVD-R Editing 118 - English - Samsung DVD-HR720 | Quick Guide (easy Manual) (ver.1.0) (English) - Page 119
will be deleted. [Music/Photo PDaortityioonu] want to continue? Used Space Ye0s006MB No Available Space 10034MB MOVE Delete All Format SELECT RETURN EXIT Photo Disc Manager HDD [Title Partition] Used Space 00 : 10 : 32 Available Space 054 : 20 SP All photo will be deleted. [Music - Samsung DVD-HR720 | Quick Guide (easy Manual) (ver.1.0) (English) - Page 120
a protected entry, disable Protect for it on the Lock item. • When protected a DVD-RAM is used, data cannot be deleted from a disc. 4 Press the œ √ : 06 SP Disc Protection Info Not Protected Rename Protection Delete All Format MOVE SELECT RETURN EXIT 3 Press the œ √ buttons to select Delete - Samsung DVD-HR720 | Quick Guide (easy Manual) (ver.1.0) (English) - Page 121
record titles onto a DVD-RW/DVD-R disc with your HDD & DVD RECORDER Mode Rename Protection Delete All Finalize Format MOVE SELECT RETURN EXIT 3 recorder is powered off during finalize process. I When the disc contains a music or JPEG files, you cannot finalise the disc. Disc Manager DVD - Samsung DVD-HR720 | Quick Guide (easy Manual) (ver.1.0) (English) - Page 122
continue? Current Rec. Mode DVD-V Yes No MOVE unfinalize Format SELECT RETURN EXIT 122 - English I A DVD-RW can be finalized or unfinalized in Video mode. NOTE Finalize Unfinalize Mark DVD-Video(RW) DVD-RW(V) Operation Same as DVD-Video Additional recording, protection and deletion are - Samsung DVD-HR720 | Quick Guide (easy Manual) (ver.1.0) (English) - Page 123
into the power outlet. Did you set the HDD & DVD RECORDER channel settings correctly? Check the free space on your HDD/DVD-RAM/-RW/-R discs. I pressed the REC button but there is no response. Troubleshooting 123 Specifications 127 Checkpoint 1 Recording is possible for HDD/DVDRAM/DVD-RW - Samsung DVD-HR720 | Quick Guide (easy Manual) (ver.1.0) (English) - Page 124
Check the regional code of the DVD disc. This HDD & DVD RECORDER cannot play DVD discs encoded with copy protection can not be copied to HDD. Checkpoint 2 Refer to "Contents Copy Specifications" on page 6 to check if copying is supported. Reference Checkpoint 1 The aspect ratio is fixed for DVD - Samsung DVD-HR720 | Quick Guide (easy Manual) (ver.1.0) (English) - Page 125
time and the end time settings again. Recording will be cancelled if the power is interrupted due to a power failure or another similar reason while recording. Checkpoint 1 Check whether you have selected the correct digital output options in the Audio Output Options menu. (See page 38) Reference - Samsung DVD-HR720 | Quick Guide (easy Manual) (ver.1.0) (English) - Page 126
table of contents and then find and read the section describing your problem, follow the instructions given. Plug your HDD &DVD RECORDER off and on. If the problem still persists, contact a nearby Samsung service center. Other I forgot my password for parental supervision. Checkpoint 1 Press and - Samsung DVD-HR720 | Quick Guide (easy Manual) (ver.1.0) (English) - Page 127
at 75Ω load) Picture Compression format MPEG-II Audio Compression format Dolby Digital 2ch/256Kbps Recording Recording Quality XP (about 8.5 Mbps), SP (about 4.5 Mbps), LP (about 2 Mbps), EP (about 1.6 Mbps or about 1.2 Mbps), Audio Frequency Response 20 Hz ~ 20 kHz Audio Output For DVD discs - Samsung DVD-HR720 | Quick Guide (easy Manual) (ver.1.0) (English) - Page 128
by a SECA Authorized Service Center. (The name and address of the location nearest you can be obtained by calling toll free: 1- 800- SAMSUNG) LABOR One year under this warranty. Customer adjustments which are explained in the instruction manual are not covered under the terms of this warranty. This - Samsung DVD-HR720 | Quick Guide (easy Manual) (ver.1.0) (English) - Page 129
- Samsung DVD-HR720 | Quick Guide (easy Manual) (ver.1.0) (English) - Page 130
ELECTRONICS
-
 1
1 -
 2
2 -
 3
3 -
 4
4 -
 5
5 -
 6
6 -
 7
7 -
8
-
9
-
10
-
11
-
12
-
13
-
14
-
15
-
16
-
17
-
18
-
19
-
20
-
21
-
22
-
23
-
24
-
25
-
26
-
27
-
28
-
29
-
30
-
31
-
32
-
33
-
34
-
35
-
36
-
37
-
38
-
39
-
40
-
41
-
42
-
43
-
44
-
45
-
46
-
47
-
48
-
49
-
50
-
51
-
52
-
53
-
54
-
55
-
56
-
57
-
58
-
59
-
60
-
61
-
62
-
63
-
64
-
65
-
66
-
67
-
68
-
69
-
70
-
71
-
72
-
73
-
74
-
75
-
76
-
77
-
78
-
79
-
80
-
81
-
82
-
83
-
84
-
85
-
86
-
87
-
88
-
89
-
90
-
91
-
92
-
93
-
94
-
95
-
96
-
97
-
98
-
99
-
100
-
101
-
102
-
103
-
104
-
105
-
106
-
107
-
108
-
109
-
110
-
111
-
112
-
113
-
114
-
115
-
116
-
117
-
118
-
119
-
120
-
121
-
122
-
123
-
124
-
125
-
126
-
127
-
128
-
129
-
130
 |
 |

Instruction Manual
DVD-HR720
CA
CA
AK68-00758C-01
www.samsung.ca