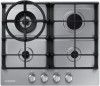
Samsung NA24T4230FS/AA Installation Guide - Page 15
Step 3. Connect the cooktop to gas supply, Hold Down Bracket Installation
 |
View all Samsung NA24T4230FS/AA manuals
Add to My Manuals
Save this manual to your list of manuals |
Page 15 highlights
Correct installation Hold down bracket holes 4. With bottom side first, gently put the cooktop down. • Make sure the front of the countertop is parallel to the cooktop. • Make final check that all required clearances are met. 5. Secure the cooktop to the countertop using the provided hold-down brackets as shown. Front of unit Hold Down Bracket Installation Step 2-2. Hold down bracket install guide (A) SEALING STRIP Side wall of undercounter cabinet 1. Place the Bracket(B)over the holes that match the size of the screws. There are one set of screw holes in each corner of the hob(H). Slightly tighten a screw(C) through the bracket(B) so that the bracket is attached to the hob, but so that you can still adjust the position . (C) SCREW (B) BRACKET 2. Carefully turn the hob back over and then gently lower it into the aperture hole that you have cut out. H 3. On the underneath of the hob, adjust H the brackets into a position that is suitable for your worktop. Then fully tighten the screws(C) to H secure the hob into position. H Step 3. Connect the cooktop to gas supply Shut off the main gas supply valve before disconnecting the old cooktop and leave it off until the new hookup has been completed. Don't forget to relight the burner on other gas appliances when you turn the gas back on. Because hard piping restricts movement of the cooktop, the use of a CSA International-certified flexible metal appliance connector is recommended unless local codes require a hard-piped connection. WARNING If the information in this manual is not followed exactly, a fire or explosion may result, causing death, personal injury, or property damage. - Do not store or use gasoline or other flammable vapors and liquids in the vicinity of this or any other appliance. - WHAT TO DO IF YOU SMELL GAS: • DO NOT light a match, candle, or cigarette. • DO NOT try to light any appliance. • DO NOT touch any electrical switch. • DO NOT use any phone in your building. • Clear the room, building, or area of all occupants. Installation instructions English 15
-
 1
1 -
2
-
3
-
4
-
5
-
6
-
7
-
8
-
9
-
 10
10 -
 11
11 -
 12
12 -
 13
13 -
 14
14 -
 15
15 -
 16
16 -
 17
17 -
 18
18 -
 19
19 -
 20
20 -
21
-
22
-
23
-
24
-
25
-
26
-
27
-
28
-
29
-
30
-
31
-
32
-
33
-
34
-
35
-
36
-
37
-
38
-
39
-
40
-
41
-
42
-
43
-
44
-
45
-
46
-
47
-
48
-
49
-
50
-
51
-
52
-
53
-
54
-
55
-
56
-
57
-
58
-
59
-
60
-
61
-
62
-
63
-
64
-
65
-
66
-
67
-
68
-
69
-
70
-
71
-
72
-
73
-
74
-
75
-
76
-
77
-
78
-
79
-
80
-
81
-
82
-
83
-
84
 |
 |
