Samsung SPH-I500SS User Manual (user Manual) (ver.f2) (English) - Page 74
Address Details, Show in List, Press the Address Book button
 |
View all Samsung SPH-I500SS manuals
Add to My Manuals
Save this manual to your list of manuals |
Page 74 highlights
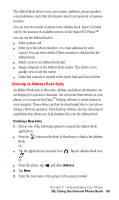
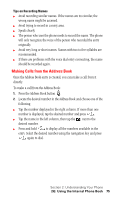
Address Details To open the Address Entry screen: 1. Press the Address Book button . 2. Tap the desired entry. The Address View screen is displayed. 3. Tap the Edit button. The Edit screen is displayed. 4. Tap the Details button. When the Details button is tapped in an Address edit screen, a variety of options is displayed. These options can be associated with the Address Book entry. The options available are: ᮣ Show in List ᮣ Category ᮣ Special Ringer ᮣ Private Show in List You may have several different numbers, such as work, home, pager, fax, e-mail, etc. To determine which one is displayed in the Address Book, you use the "Show in List" feature. To display the correct number: 1. Press the Address Book button . 2. Tap the desired entry. The Address View screen is displayed. 3. Tap the Edit button. The Edit screen is displayed. 4. Tap the Details button. 5. Tap the drop down arrow from "Show in List" and select the desired number. The choices are: ᮣ Work ᮣ Home ᮣ Fax ᮣ Mobile ᮣ Other 6. Tap OK to exit. Section 2: Understanding Your Phone 2G: Using the Internal Phone Book 71
-
 1
1 -
2
-
3
-
4
-
5
-
6
-
7
-
8
-
9
-
10
-
11
-
12
-
13
-
14
-
15
-
16
-
17
-
18
-
19
-
20
-
21
-
22
-
23
-
24
-
25
-
26
-
27
-
28
-
29
-
30
-
31
-
32
-
33
-
34
-
35
-
36
-
37
-
38
-
39
-
40
-
41
-
42
-
43
-
44
-
45
-
46
-
47
-
48
-
49
-
50
-
51
-
52
-
53
-
54
-
55
-
56
-
57
-
58
-
59
-
60
-
61
-
62
-
63
-
64
-
65
-
66
-
67
-
68
-
 69
69 -
 70
70 -
 71
71 -
 72
72 -
 73
73 -
 74
74 -
 75
75 -
 76
76 -
 77
77 -
 78
78 -
 79
79 -
80
-
81
-
82
-
83
-
84
-
85
-
86
-
87
-
88
-
89
-
90
-
91
-
92
-
93
-
94
-
95
-
96
-
97
-
98
-
99
-
100
-
101
-
102
-
103
-
104
-
105
-
106
-
107
-
108
-
109
-
110
-
111
-
112
-
113
-
114
-
115
-
116
-
117
-
118
-
119
-
120
-
121
-
122
-
123
-
124
-
125
-
126
-
127
-
128
-
129
-
130
-
131
-
132
-
133
-
134
-
135
-
136
-
137
-
138
-
139
-
140
-
141
-
142
-
143
-
144
-
145
-
146
-
147
-
148
-
149
-
150
-
151
-
152
-
153
-
154
-
155
-
156
-
157
-
158
-
159
-
160
-
161
-
162
-
163
-
164
-
165
-
166
-
167
-
168
-
169
-
170
-
171
-
172
-
173
-
174
-
175
-
176
-
177
-
178
-
179
-
180
-
181
-
182
-
183
-
184
-
185
-
186
-
187
-
188
-
189
-
190
-
191
-
192
-
193
-
194
-
195
-
196
-
197
-
198
-
199
-
200
-
201
-
202
-
203
-
204
-
205
-
206
-
207
-
208
-
209
-
210
-
211
-
212
-
213
-
214
-
215
-
216
-
217
-
218
 |
 |