Samsung SRN-3250 User Manual - Page 20
Installation
 |
View all Samsung SRN-3250 manuals
Add to My Manuals
Save this manual to your list of manuals |
Page 20 highlights
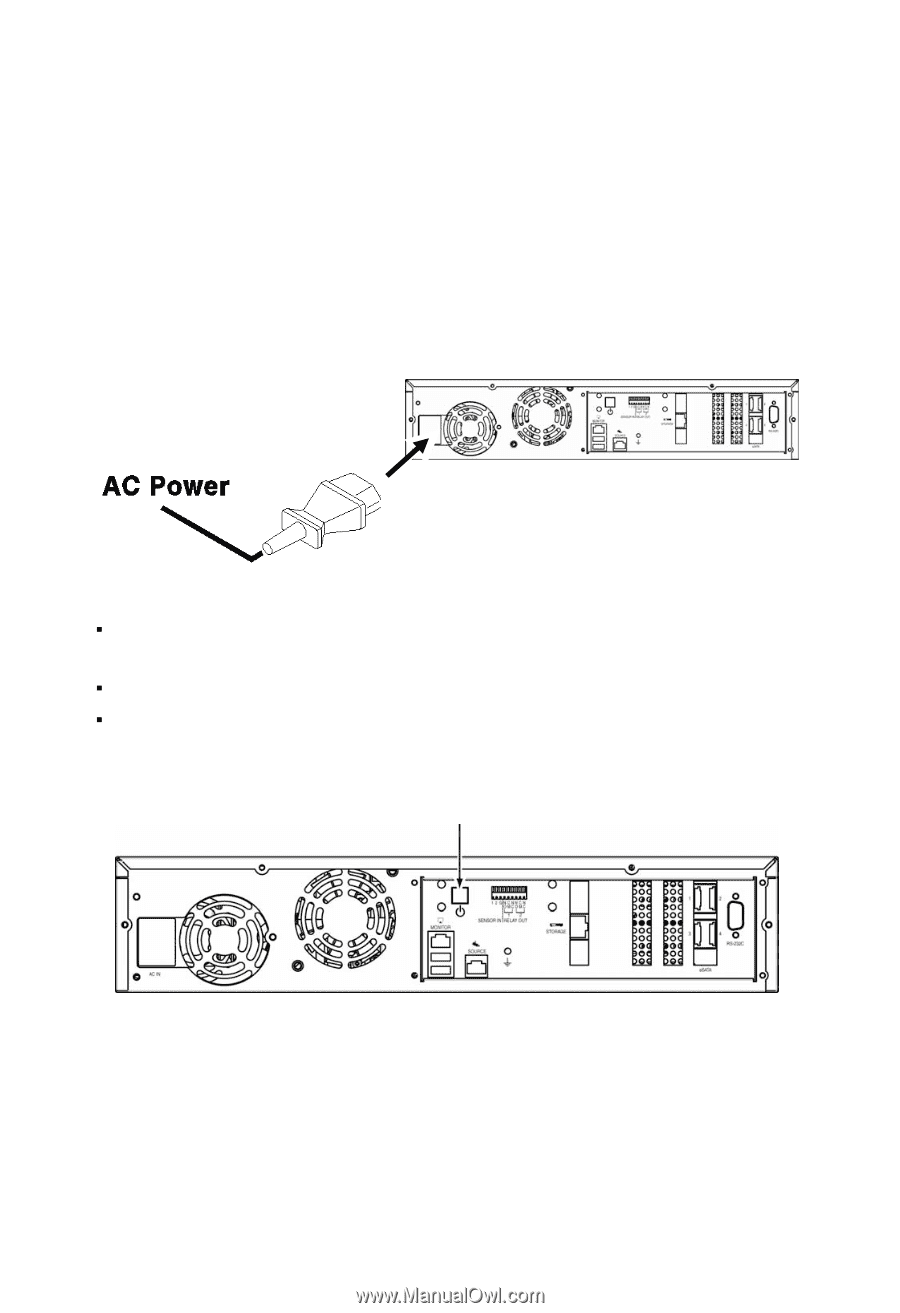
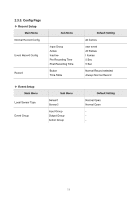
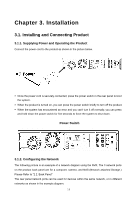
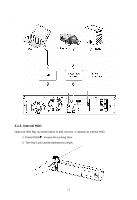
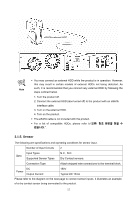
Chapter 3. Installation 3.1. Installing and Connecting Product 3.1.1. Supplying Power and Operating the Product Connect the power cord to the product as shown in the picture below. ƒ Once the power cord is securely connected, press the power switch in the rear panel to boot the system. ƒ When the product is turned on, you can press the power switch briefly to turn off the product. ƒ When the system has encountered an error and you can't turn it off normally, you can press and hold down the power switch for five seconds to force the system to shut down. Power Switch 3.1.2. Configuring the Network The following picture is an example of a network diagram using the NVR. The 3 network ports on the product back panel are for a computer, camera, and NAS (Network attached Storage.) Please Refer to "2.2. Back Panel" The rear panel network ports can be used for devices within the same network, or in different networks as shown in the example diagram. 18
-
 1
1 -
2
-
3
-
4
-
5
-
6
-
7
-
8
-
9
-
10
-
11
-
12
-
13
-
14
-
 15
15 -
 16
16 -
 17
17 -
 18
18 -
 19
19 -
 20
20 -
 21
21 -
 22
22 -
 23
23 -
 24
24 -
 25
25 -
26
-
27
-
28
-
29
-
30
-
31
-
32
-
33
-
34
-
35
-
36
-
37
-
38
-
39
-
40
-
41
-
42
-
43
-
44
-
45
-
46
-
47
-
48
-
49
-
50
-
51
-
52
-
53
-
54
-
55
-
56
-
57
-
58
-
59
-
60
-
61
-
62
-
63
-
64
-
65
-
66
-
67
-
68
-
69
-
70
-
71
-
72
-
73
-
74
-
75
-
76
-
77
-
78
-
79
-
80
-
81
-
82
-
83
-
84
-
85
-
86
-
87
-
88
-
89
-
90
-
91
-
92
-
93
-
94
-
95
-
96
-
97
-
98
-
99
-
100
-
101
-
102
-
103
-
104
-
105
-
106
-
107
-
108
-
109
-
110
-
111
-
112
-
113
-
114
-
115
-
116
-
117
-
118
-
119
-
120
-
121
-
122
-
123
-
124
-
125
-
126
-
127
-
128
-
129
-
130
-
131
-
132
 |
 |