Sharp AR-M162E AR-M162E AR-M207E Operation Manual Suite - Page 115
Setup In A Windows Environment, Hardware And Software Requirements
 |
View all Sharp AR-M162E manuals
Add to My Manuals
Save this manual to your list of manuals |
Page 115 highlights
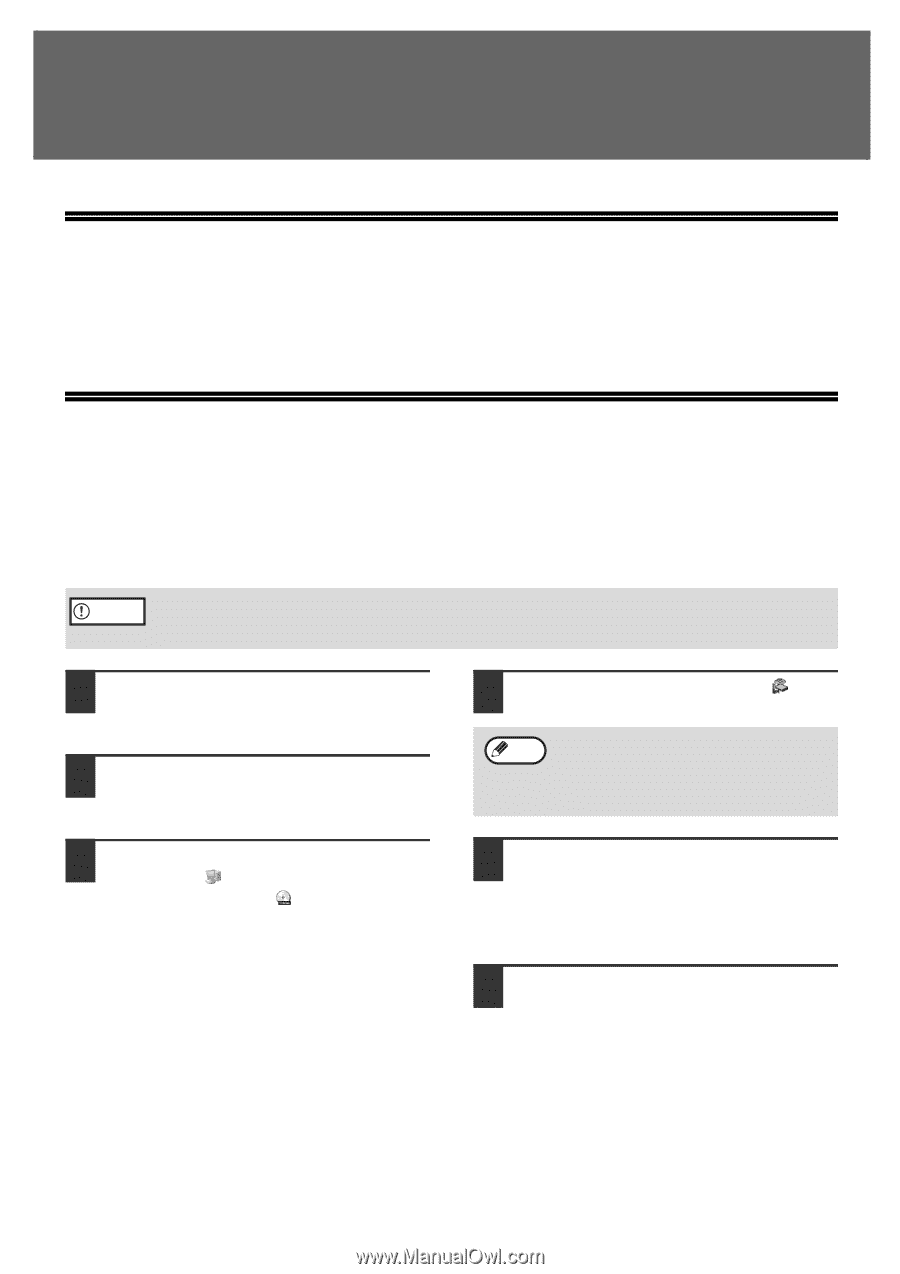
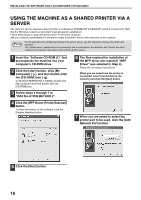
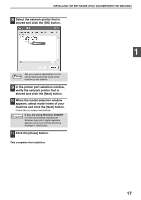
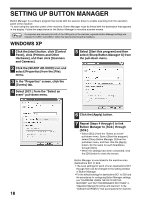
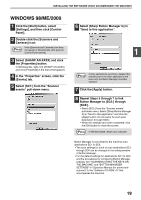
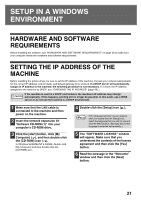
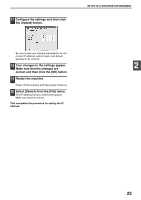
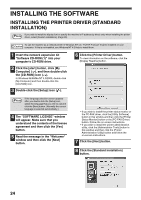
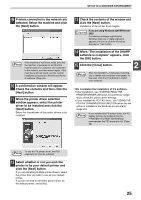
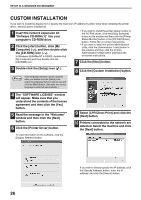
SETUP IN A WINDOWS ENVIRONMENT HARDWARE AND SOFTWARE REQUIREMENTS Before installing the software, see "HARDWARE AND SOFTWARE REQUIREMENTS" on page 43 to make sure your computer meets the hardware and software requirements. SETTING THE IP ADDRESS OF THE MACHINE Before installing the printer driver, be sure to set the IP address of the machine. Consult your network administrator for the correct IP address, subnet mask, and default gateway to be entered. If a DHCP server will automatically assign an IP address to the machine, the following procedure is not necessary. (To check the IP address assigned to the machine by DHCP, see "CHECKING THE IP ADDRESS" (page 43).) If the machine is used in a DHCP environment, the machine's IP address may change Caution automatically. If this happens, printing will no longer be possible. In this event, use a WINS server or do not use the machine in a DHCP environment. 1 Make sure that the LAN cable is connected to the machine and then power on the machine. 2 Insert the network expansion kit "Software CD-ROM (1)" into your computer's CD-ROM drive. 3 Click the [start] button, click [My Computer] ( ), and then double-click the [CD-ROM] icon ( ). In Windows 95/98/Me/NT 4.0/2000, double-click [My Computer] and then double-click the [CD-ROM] icon. 4 Double-click the [Setup] icon ( ). Note If the language selection screen appears after you double click the [Setup] icon, select the language that you wish to use and click the [Next] button. (Normally the correct language is selected automatically.) 5 The "SOFTWARE LICENSE" window will appear. Make sure that you understand the contents of the license agreement and then click the [Yes] button. 6 Read the message in the "Welcome" window and then click the [Next] button. 21
-
 1
1 -
2
-
3
-
4
-
5
-
6
-
7
-
8
-
9
-
10
-
11
-
12
-
13
-
14
-
15
-
16
-
17
-
18
-
19
-
20
-
21
-
22
-
23
-
24
-
25
-
26
-
27
-
28
-
29
-
30
-
31
-
32
-
33
-
34
-
35
-
36
-
37
-
38
-
39
-
40
-
41
-
42
-
43
-
44
-
45
-
46
-
47
-
48
-
49
-
50
-
51
-
52
-
53
-
54
-
55
-
56
-
57
-
58
-
59
-
60
-
61
-
62
-
63
-
64
-
65
-
66
-
67
-
68
-
69
-
70
-
71
-
72
-
73
-
74
-
75
-
76
-
77
-
78
-
79
-
80
-
81
-
82
-
83
-
84
-
85
-
86
-
87
-
88
-
89
-
90
-
91
-
92
-
93
-
94
-
95
-
96
-
97
-
98
-
99
-
100
-
101
-
102
-
103
-
104
-
105
-
106
-
107
-
108
-
109
-
 110
110 -
 111
111 -
 112
112 -
 113
113 -
 114
114 -
 115
115 -
 116
116 -
 117
117 -
 118
118 -
 119
119 -
 120
120 -
121
-
122
-
123
-
124
-
125
-
126
-
127
-
128
-
129
-
130
-
131
-
132
-
133
-
134
-
135
-
136
-
137
-
138
-
139
-
140
-
141
-
142
-
143
-
144
-
145
-
146
-
147
-
148
-
149
-
150
-
151
-
152
-
153
-
154
-
155
-
156
-
157
-
158
-
159
-
160
 |
 |