Sharp AR-M162E AR-M162E AR-M207E Operation Manual Suite - Page 131
MAC OS X v10.1.5
 |
View all Sharp AR-M162E manuals
Add to My Manuals
Save this manual to your list of manuals |
Page 131 highlights
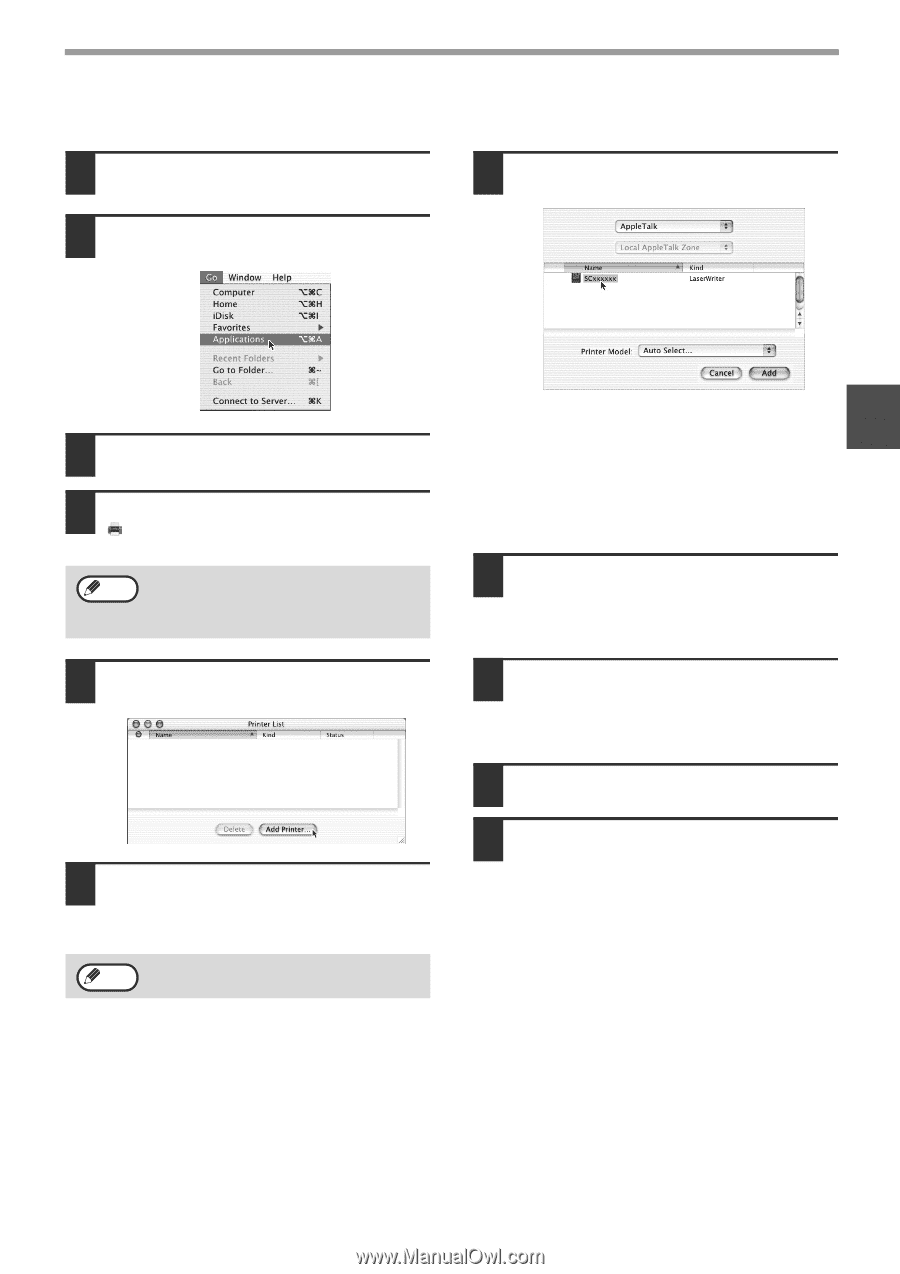
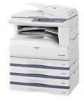
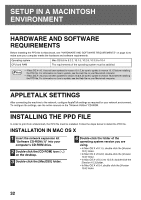
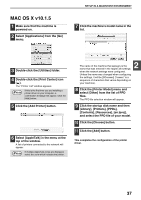
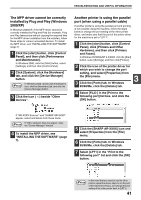
MAC OS X v10.1.5 1 Make sure that the machine is powered on. 2 Select [Applications] from the [Go] menu. SETUP IN A MACINTOSH ENVIRONMENT 7 Click the machine's model name in the list. 3 Double-click the [Utilities] folder. 4 Double-click the [Print Center] icon ( ). The "Printer List" window appears. Note If this is the first time you are installing a printer driver on your computer, a confirmation message will appear. Click the [Add] button. 5 Click the [Add Printer] button. 6 Select [AppleTalk] in the menu at the top of the window. A list of printers connected to the network will appear. If multiple AppleTalk zones are displayed, Note select the zone which includes the printer. The name of the machine that appears is the name that was entered in the AppleTalk settings when the network settings were configured. Unless the name was changed when configuring the settings, it will be [SCxxxxxx] ("xxxxxx" is a sequence of characters that varies depending on your machine). 2 8 Click the [Printer Model] menu and select [Other] from the list of PPD files. The PPD file selection window will appear. 9 Click the startup disk name and then [Library], [Printers], [PPDs], [Contents], [Resources], [en.lproj], and select the PPD file of your model. 10 Click the [Choose] button. 11 Click the [Add] button. This completes the configuration of the printer driver. 37
-
 1
1 -
2
-
3
-
4
-
5
-
6
-
7
-
8
-
9
-
10
-
11
-
12
-
13
-
14
-
15
-
16
-
17
-
18
-
19
-
20
-
21
-
22
-
23
-
24
-
25
-
26
-
27
-
28
-
29
-
30
-
31
-
32
-
33
-
34
-
35
-
36
-
37
-
38
-
39
-
40
-
41
-
42
-
43
-
44
-
45
-
46
-
47
-
48
-
49
-
50
-
51
-
52
-
53
-
54
-
55
-
56
-
57
-
58
-
59
-
60
-
61
-
62
-
63
-
64
-
65
-
66
-
67
-
68
-
69
-
70
-
71
-
72
-
73
-
74
-
75
-
76
-
77
-
78
-
79
-
80
-
81
-
82
-
83
-
84
-
85
-
86
-
87
-
88
-
89
-
90
-
91
-
92
-
93
-
94
-
95
-
96
-
97
-
98
-
99
-
100
-
101
-
102
-
103
-
104
-
105
-
106
-
107
-
108
-
109
-
110
-
111
-
112
-
113
-
114
-
115
-
116
-
117
-
118
-
119
-
120
-
121
-
122
-
123
-
124
-
125
-
 126
126 -
 127
127 -
 128
128 -
 129
129 -
 130
130 -
 131
131 -
 132
132 -
 133
133 -
 134
134 -
 135
135 -
 136
136 -
137
-
138
-
139
-
140
-
141
-
142
-
143
-
144
-
145
-
146
-
147
-
148
-
149
-
150
-
151
-
152
-
153
-
154
-
155
-
156
-
157
-
158
-
159
-
160
 |
 |