Sharp LC-50LB481U User Guide LC 32 43 50LB481U - Page 39
Guided Setup, Preparing for Internet connectivity, Starting Guided Setup
 |
View all Sharp LC-50LB481U manuals
Add to My Manuals
Save this manual to your list of manuals |
Page 39 highlights
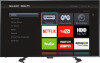
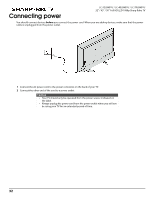
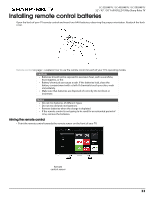
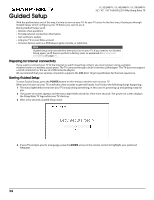
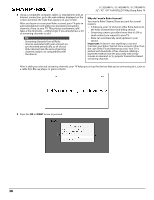
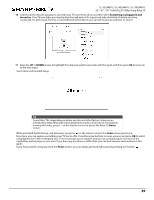
Guided Setup LC-32LB481U / LC-43LB481U / LC-50LB481U 32" / 43" / 50" Full HD LED 1080p Sharp Roku TV With the preliminaries out of the way, it's time to turn on your TV. As your TV starts for the first time, it leads you through Guided Setup, which configures your TV before you start to use it. During Guided Setup, you'll: • Answer a few questions • Provide network connection information • Get a software update • Link your TV to your Roku account. • Connect devices such as a DVD player, game console, or cable box. Note Guided Setup only runs the first time you turn on your TV. If you need to run Guided Setup again, you'll have to perform a factory reset, as explained in Factory reset everything on page 70. Preparing for Internet connectivity If you want to connect your TV to the Internet to watch streaming content, you must connect using a wireless modem/router or a wireless access point. The TV connects through a built-in wireless LAN adapter. The TV does not support a wired connection or the use of a USB network adapter. We recommend that your wireless connection supports the IEEE 802.11b/g/n specification for the best experience. Starting Guided Setup To start Guided Setup, press the POWER button on the remote control to turn on your TV. When you first turn on your TV, it will take a few seconds to get itself ready. You'll notice the following things happening: 1 The status light blinks every time your TV is busy doing something; in this case it's powering up and getting ready for you. 2 The power-on screen appears and the status light blinks slowly for a few more seconds. The power-on screen displays the Sharp Roku TV logo while your TV starts up. 3 After a few seconds, Guided Setup starts: 4 If your TV prompts you for a language, press the DOWN arrow on the remote control to highlight your preferred language. 34
-
 1
1 -
2
-
3
-
4
-
5
-
6
-
7
-
8
-
9
-
10
-
11
-
12
-
13
-
14
-
15
-
16
-
17
-
18
-
19
-
20
-
21
-
22
-
23
-
24
-
25
-
26
-
27
-
28
-
29
-
30
-
31
-
32
-
33
-
 34
34 -
 35
35 -
 36
36 -
 37
37 -
 38
38 -
 39
39 -
 40
40 -
 41
41 -
 42
42 -
 43
43 -
 44
44 -
45
-
46
-
47
-
48
-
49
-
50
-
51
-
52
-
53
-
54
-
55
-
56
-
57
-
58
-
59
-
60
-
61
-
62
-
63
-
64
-
65
-
66
-
67
-
68
-
69
-
70
-
71
-
72
-
73
-
74
-
75
-
76
-
77
-
78
-
79
-
80
-
81
-
82
-
83
-
84
-
85
-
86
-
87
-
88
-
89
-
90
-
91
-
92
-
93
-
94
 |
 |
