Sharp LC-50LB481U User Guide LC 32 43 50LB481U - Page 56
Adjusting TV settings, Settings menu, Options menu
 |
View all Sharp LC-50LB481U manuals
Add to My Manuals
Save this manual to your list of manuals |
Page 56 highlights
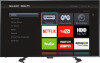
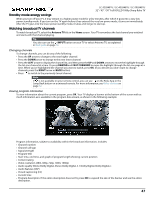
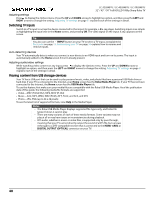
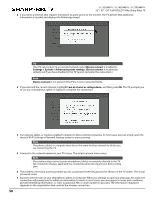
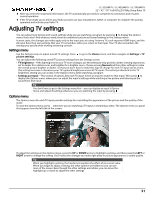
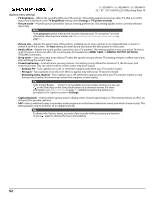
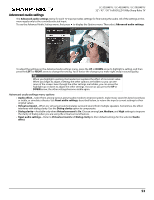
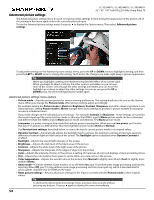
LC-32LB481U / LC-43LB481U / LC-50LB481U 32" / 43" / 50" Full HD LED 1080p Sharp Roku TV 8 After you enter the requested information, the TV automatically proceeds to complete its connection and resumes normal operation. 9 If the TV prompts you to link to your Roku account, use your smartphone, tablet, or computer to complete the pairing operation and activate your Roku TV. Adjusting TV settings You can adjust most picture and sound settings while you are watching a program by pressing to display the Options menu. If you don't find what you need, there are additional picture and sound settings in the Settings menu. In most cases, the changes you make apply only to the input you are using. Antenna TV, each separate HDMI input, and the AV input have their own settings that your TV remembers when you return to that input. Your TV also remembers the settings you specify while viewing streaming content. Settings menu Use the Settings menu to adjust overall TV settings. Press to go to the Home screen, and then navigate to Settings > TV picture settings. You can adjust the following overall TV picture settings from the Settings screen: • TV brightness-If the lighting level in your TV room changes, use this setting to help provide a better viewing experience; set to darker for a darker room, and brighter for a brighter room. Choose among Normal and four other settings to make the overall picture brighter or darker. So that you don't have to make this type of change for each TV input one at a time, this setting increases or decreases your TV's general brightness across all TV inputs. This setting is identical to the TV brightness setting you can access in the Options menu while watching a program. • Settings per input-This section of options lists each TV input. Select an input to switch to that input. Then press to display the Options menu, where you can adjust the input's settings while watching a live picture and listening to the sound from that input. Tip You don't have to go to the Settings menu first-you can display an input's Options menu and adjust its settings whenever you are watching the input by pressing . Options menu The Options menu for each TV input provides settings for controlling the appearance of the picture and the quality of the audio. To view the Options menu, press whenever you are watching a TV input or streaming a video. The Options menu is a panel that appears over the left side of the screen: To adjust the settings on the Options menu, press the UP or DOWN arrow to highlight a setting, and then press the LEFT or RIGHT arrow to change the setting. You'll notice the changes you make right away in picture appearance or audio quality. Tip When you highlight a setting, the header text explains the effect of its current value. When you begin to adjust a setting, the other options are hidden so you can see more of the screen. Even though the other settings are hidden, you can move the highlight up or down to adjust the other settings. 51
-
 1
1 -
2
-
3
-
4
-
5
-
6
-
7
-
8
-
9
-
10
-
11
-
12
-
13
-
14
-
15
-
16
-
17
-
18
-
19
-
20
-
21
-
22
-
23
-
24
-
25
-
26
-
27
-
28
-
29
-
30
-
31
-
32
-
33
-
34
-
35
-
36
-
37
-
38
-
39
-
40
-
41
-
42
-
43
-
44
-
45
-
46
-
47
-
48
-
49
-
50
-
 51
51 -
 52
52 -
 53
53 -
 54
54 -
 55
55 -
 56
56 -
 57
57 -
 58
58 -
 59
59 -
 60
60 -
 61
61 -
62
-
63
-
64
-
65
-
66
-
67
-
68
-
69
-
70
-
71
-
72
-
73
-
74
-
75
-
76
-
77
-
78
-
79
-
80
-
81
-
82
-
83
-
84
-
85
-
86
-
87
-
88
-
89
-
90
-
91
-
92
-
93
-
94
 |
 |
