Sony BDPS2000ES Operating Instructions - Page 9
Getting Started, Step 1: Unpacking - remote
 |
UPC - 027242723801
View all Sony BDPS2000ES manuals
Add to My Manuals
Save this manual to your list of manuals |
Page 9 highlights
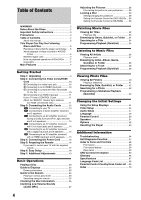
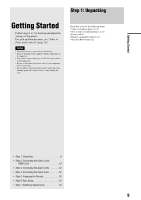
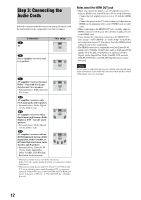
Getting Started Step 1: Unpacking Getting Started Follow steps 1 to 7 to hook up and adjust the settings of the player. For jack and button names, see "Index to Parts and Controls" (page 58). Notes • Plug cords securely to prevent unwanted noise. • Refer to the instructions supplied with the components to be connected. • You cannot connect this player to a TV that does not have a video input jack. • Be sure to disconnect the power cord of each component before connecting. • Do not apply too much pressure on the connecting cords. Pushing against the cabinet wall, etc., may damage the cord. Check that you have the following items: • Video cord (phono plug × 1) (1) • Stereo audio cord (phono plug × 2) (1) • Power cord (1) • Remote commander (remote) (1) • Size AA (R6) batteries (2) • Step 1: Unpacking 9 • Step 2: Connecting the Video Cords/ HDMI Cord 10 • Step 3: Connecting the Audio Cords 12 • Step 4: Connecting the Power Cord 16 • Step 5: Preparing the Remote 16 • Step 6: Easy Setup 18 • Step 7: Additional Adjustments 19 9
-
 1
1 -
2
-
3
-
 4
4 -
 5
5 -
 6
6 -
 7
7 -
 8
8 -
 9
9 -
 10
10 -
 11
11 -
 12
12 -
 13
13 -
 14
14 -
15
-
16
-
17
-
18
-
19
-
20
-
21
-
22
-
23
-
24
-
25
-
26
-
27
-
28
-
29
-
30
-
31
-
32
-
33
-
34
-
35
-
36
-
37
-
38
-
39
-
40
-
41
-
42
-
43
-
44
-
45
-
46
-
47
-
48
-
49
-
50
-
51
-
52
-
53
-
54
-
55
-
56
-
57
-
58
-
59
-
60
-
61
-
62
-
63
-
64
-
65
-
66
-
67
-
68
-
69
-
70
-
71
 |
 |
