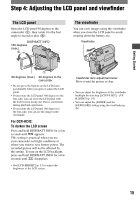
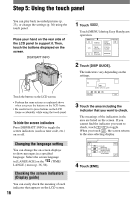
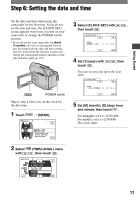
Sony DCR-HC42 Operating Guide - Page 14
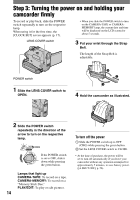
Step 3: Turning the power on and holding your camcorder firmly, To turn off the power - lcd screen
 |
UPC - 027242669758
View all Sony DCR-HC42 manuals
Add to My Manuals
Save this manual to your list of manuals |
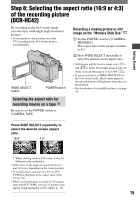
Page 14 highlights
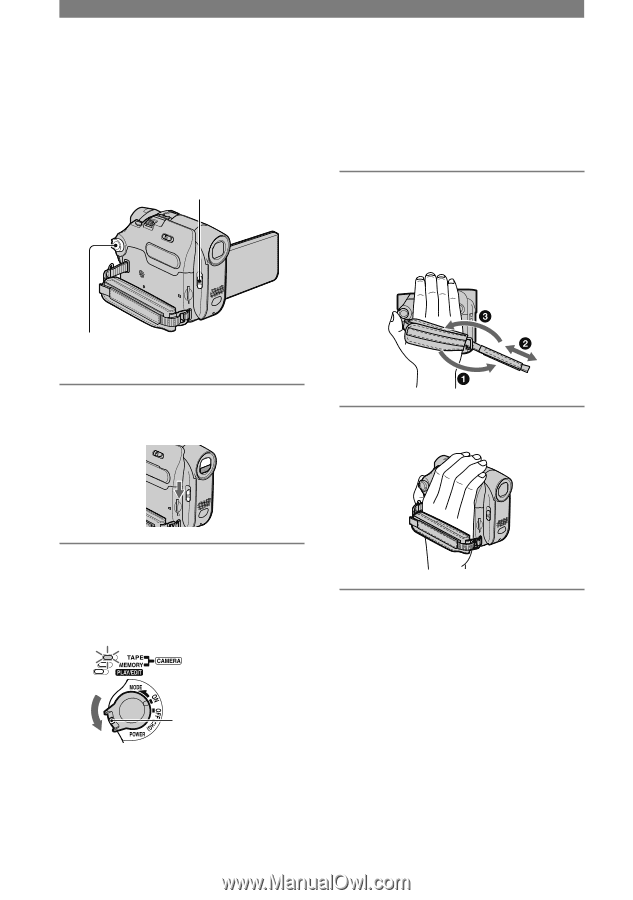
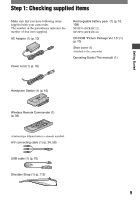
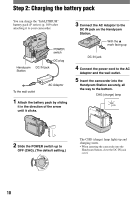
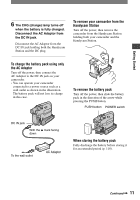
Step 3: Turning the power on and holding your camcorder firmly To record or play back, slide the POWER switch repeatedly to turn on the respective lamp. When using it for the first time, the [CLOCK SET] screen appears (p. 17). • When you slide the POWER switch to turn on the CAMERA-TAPE or CAMERAMEMORY lamp, the current date and time will be displayed on the LCD screen for about 5 seconds. LENS COVER switch 3 Put your wrist through the Strap Belt. The length of the Strap Belt is adjustable. POWER switch 1 Slide the LENS COVER switch to OPEN. 4 Hold the camcorder as illustrated. 2 Slide the POWER switch repeatedly in the direction of the arrow to turn on the respective lamp. If the POWER switch is set to OFF, slide it down while pressing the green button. Lamps that light up CAMERA-TAPE: To record on a tape. CAMERA-MEMORY: To record on a "Memory Stick Duo." PLAY/EDIT: To play or edit pictures. 14 To turn off the power Slide the POWER switch up to OFF (CHG) while pressing the green button. Set the LENS COVER switch to CLOSE. • At the time of purchase, the power will be set to turn off automatically if you leave your camcorder without any operation attempted for approximately 5 minutes, to save battery power. ([A.SHUT OFF], p. 56).
-
 1
1 -
2
-
3
-
4
-
5
-
6
-
7
-
8
-
 9
9 -
 10
10 -
 11
11 -
 12
12 -
 13
13 -
 14
14 -
 15
15 -
 16
16 -
 17
17 -
 18
18 -
 19
19 -
20
-
21
-
22
-
23
-
24
-
25
-
26
-
27
-
28
-
29
-
30
-
31
-
32
-
33
-
34
-
35
-
36
-
37
-
38
-
39
-
40
-
41
-
42
-
43
-
44
-
45
-
46
-
47
-
48
-
49
-
50
-
51
-
52
-
53
-
54
-
55
-
56
-
57
-
58
-
59
-
60
-
61
-
62
-
63
-
64
-
65
-
66
-
67
-
68
-
69
-
70
-
71
-
72
-
73
-
74
-
75
-
76
-
77
-
78
-
79
-
80
-
81
-
82
-
83
-
84
-
85
-
86
-
87
-
88
-
89
-
90
-
91
-
92
-
93
-
94
-
95
-
96
-
97
-
98
-
99
-
100
-
101
-
102
-
103
-
104
-
105
-
106
-
107
-
108
-
109
-
110
-
111
-
112
-
113
-
114
-
115
-
116
-
117
-
118
-
119
-
120
-
121
-
122
-
123
 |
 |