Sony FWD-42PV1 Operating Instructions - Page 42
Setting an IP address and, communication speed - s 42
 |
View all Sony FWD-42PV1 manuals
Add to My Manuals
Save this manual to your list of manuals |
Page 42 highlights
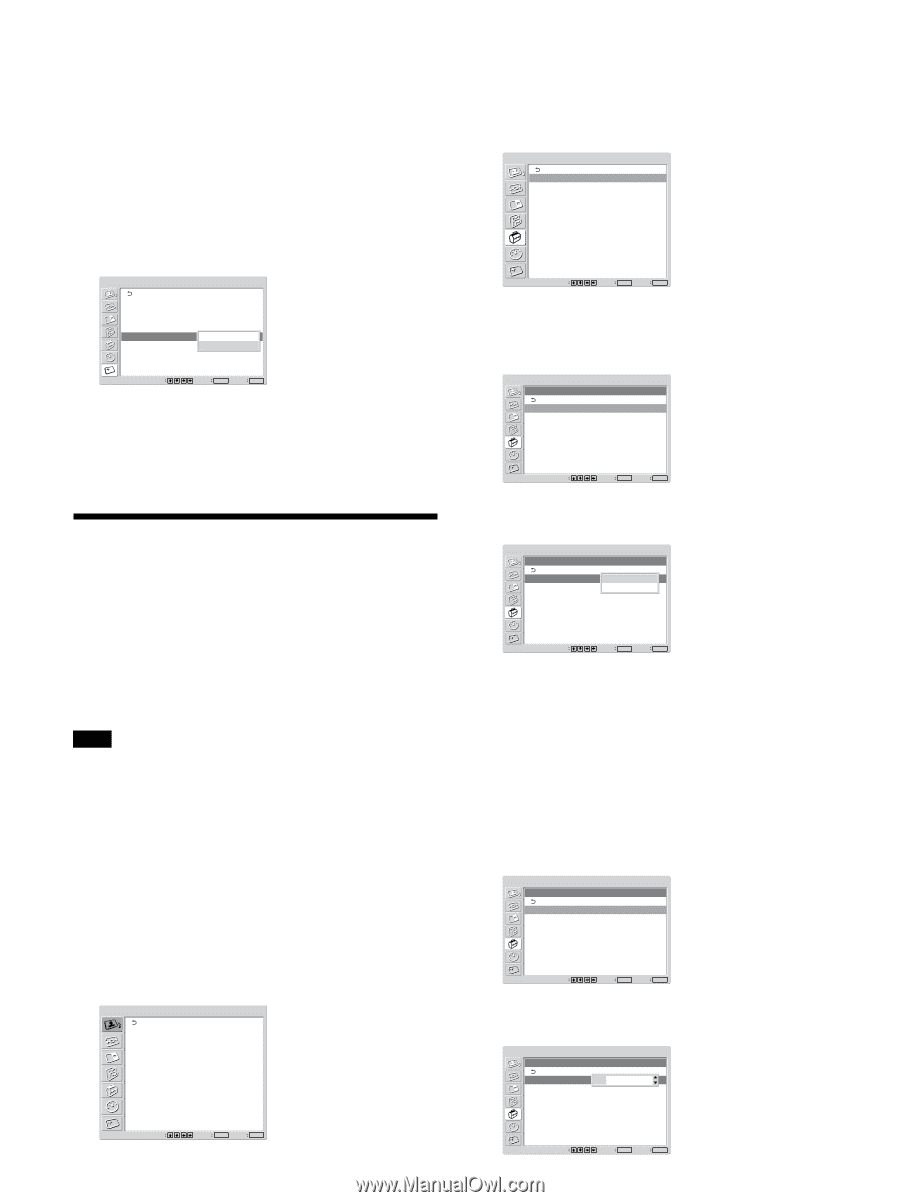
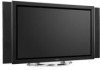
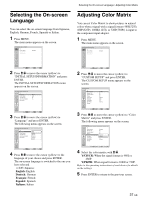
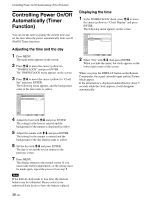
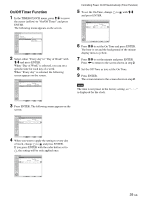
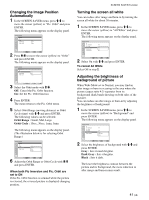
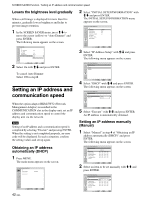
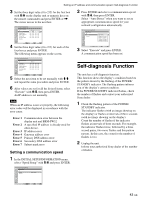
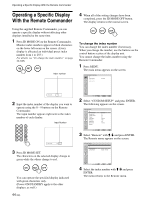
SCREEN SAVER Function / Setting an IP address and communication speed Lowers the brightness level gradually When a still image is displayed for more than five minutes, gradually lowers brightness and helps to prevent image retention. 1 In the SCREEN SAVER menu, press M/m to move the cursor (yellow) to "Auto Dimmer" and press ENTER. The following menu appears on the screen. SCREEN SAVER Pic. Inversion: Off Pic. Orbit All White: Off Background: Gray Auto Dimmer: Ofnf On Select Set ENTER Exit MENU 2 Select On with M/m and press ENTER. To cancel Auto Dimmer Select Off in step 2. Setting an IP address and communication speed 2 Select "INITIAL SETUP/INFORMATION" with M/m and press ENTER. The INITIAL SETUP/INFORMATION menu appears on the screen. INITIAL SETUP/INFORMATION Language: Color System: Auto Shut Off: Auto Screen Adjust: Information IP Address Setup Speed Setup English Auto Off On Select Set ENTER Exit MENU 3 Select "IP Address Setup" with M/m and press ENTER. The following menu appears on the screen. INITIAL SETUP/INFORMATION IP Address Setup DHCP Manual Select Set ENTER Exit MENU 4 Select "DHCP" with M/m and press ENTER. The following menu appears on the screen. INITIAL SETUP/INFORMATION IP Address Setup DHCP Manual Cancel Execute When the option adaptor BKM-FW32 (Network Management Adaptor) is installed in the COMMUNICATION slot in the display unit, set an IP address and communication speed to control the display unit via the network. Note Setting of an IP address and a communication speed is completed by selecting "Execute" and pressing ENTER. When the setting is not completed properly, an error code will be displayed. In such a situation, confirm the setting values and set up again. Obtaining an IP address automatically (DHCP) 1 Press MENU. The main menu appears on the screen. PICTURE/SOUND CONTROL Picture Mode: Adjust Picture Adjust Sound Standard Select 42 (GB) Set ENTER Exit MENU Select Set ENTER Exit MENU 5 Select "Execute" with M/m and press ENTER. An IP address is automatically obtained. Setting an IP address manually (Manual) 1 Select "Manual" in step 4 of "Obtaining an IP address automatically (DHCP)" and press ENTER. The following menu appears on the screen. INITIAL SETUP/INFORMATION IP Address Setup IP Address: Subnet Mask: Gateway Address: Primay DNS: Secondary DNS: Execute Manual 000 . 000 . 000 . 000 000 . 000 . 000 . 000 000 . 000 . 000 . 000 000 . 000 . 000 . 000 000 . 000 . 000 . 000 Select Set ENTER Exit MENU 2 Select an item to be set manually with M/m and press ENTER. INITIAL SETUP/INFORMATION IP Address Setup IP Address: Subnet Mask: Gateway Address: Primay DNS: Secondary DNS: Execute Manual 000 . 000 . 000 . 000 000 . 000 . 000 . 000 000 . 000 . 000 . 000 000 . 000 . 000 . 000 000 . 000 . 000 . 000 Select Set ENTER Exit MENU
-
 1
1 -
2
-
3
-
4
-
5
-
6
-
7
-
8
-
9
-
10
-
11
-
12
-
13
-
14
-
15
-
16
-
17
-
18
-
19
-
20
-
21
-
22
-
23
-
24
-
25
-
26
-
27
-
28
-
29
-
30
-
31
-
32
-
33
-
34
-
35
-
36
-
 37
37 -
 38
38 -
 39
39 -
 40
40 -
 41
41 -
 42
42 -
 43
43 -
 44
44 -
 45
45 -
 46
46 -
 47
47
 |
 |