Sony ICD-BP150 Operating Instructions (primary manual) - Page 47
Uninstalling the software, Click [Start] and select [Programs], [Sony Digital Voice Editor] - software windows 7
 |
View all Sony ICD-BP150 manuals
Add to My Manuals
Save this manual to your list of manuals |
Page 47 highlights
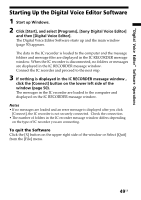
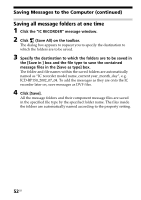
"Digital Voice Editor" Software Operations About the Digital Voice Player When the Digital Voice Editor is installed, the Digital Voice Player software is installed at the same time. Digital Voice Player enables you to play back the sound files saved to the computer in DVF, ICS, MSV or WAV file format. You can still play back the messages and change the file format without starting up the Digital Voice Player. If you transfer the messages in the IC recorder to the computer using the Digital Voice Editor and wish to attach the sound files to your e-mail, you can also attach the Digital Voice Player setup program, so that the receiver of the e-mail can install the Digital Voice Player in his(her) computer and easily play back the attached sound file. To attach the Digital Voice Player setup program •When using the supplied Digital Voice Mail Click the check box in the [Attach Digital Voice Player] on the Digital Voice Mail window. •When using other e-mail software Attach [DVP setup exe.] in the folder that the Digital Voice Editor has been installed. You can also open [English], [Digital Voice Player] in sequence to attach [DVP setup exe.] in that folder. Uninstalling the software When you wish to uninstall the software, follow the steps below. 1 Click [Start] and select [Programs], [Sony Digital Voice Editor] and then [Uninstall]. The uninstaller starts up. 2 Follow the displayed instructions. Note If you wish to move the software to another drive or directory after it is installed, you need to uninstall the software and then reinstall it. The software does not work properly if you just move the files. 1 Tip You can also start up the uninstaller by clicking [Start] and then selecting [Settings], [Control Panel], and [Add/Remove Programs]. 47GB
-
 1
1 -
2
-
3
-
4
-
5
-
6
-
7
-
8
-
9
-
10
-
11
-
12
-
13
-
14
-
15
-
16
-
17
-
18
-
19
-
20
-
21
-
22
-
23
-
24
-
25
-
26
-
27
-
28
-
29
-
30
-
31
-
32
-
33
-
34
-
35
-
36
-
37
-
38
-
39
-
40
-
41
-
 42
42 -
 43
43 -
 44
44 -
 45
45 -
 46
46 -
 47
47 -
 48
48 -
 49
49 -
 50
50 -
 51
51 -
 52
52 -
53
-
54
-
55
-
56
-
57
-
58
-
59
-
60
-
61
-
62
-
63
-
64
-
65
-
66
-
67
-
68
 |
 |