Sony ICD-BP150 Operating Instructions (primary manual) - Page 48
Connecting the IC Recorder to Your Computer - usb cable
 |
View all Sony ICD-BP150 manuals
Add to My Manuals
Save this manual to your list of manuals |
Page 48 highlights
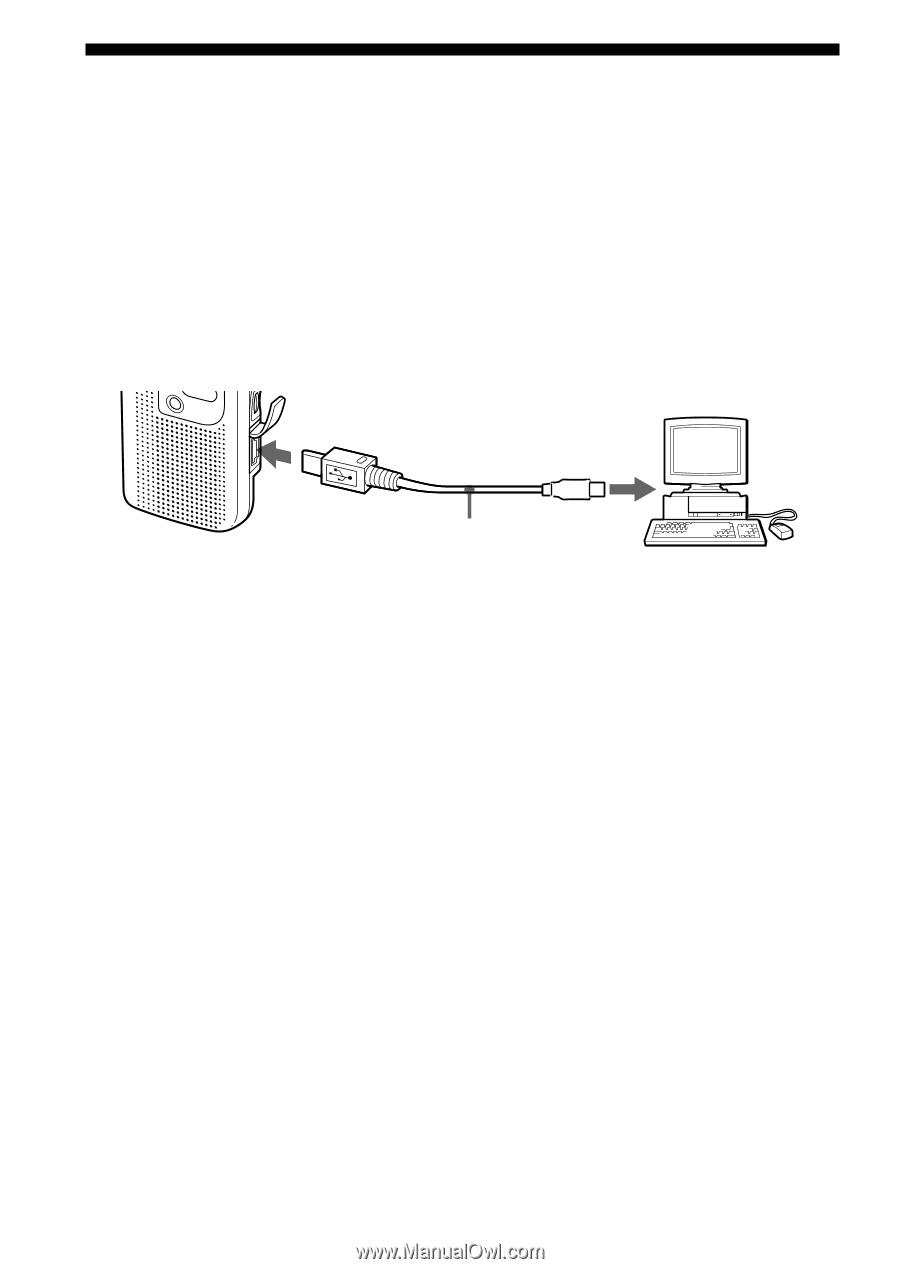
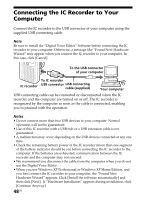
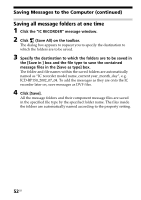
Connecting the IC Recorder to Your Computer Connect the IC recorder to the USB connector of your computer using the supplied USB connecting cable. Note Be sure to install the "Digital Voice Editor" Software before connecting the IC recorder to your computer. Otherwise, a message like "Found New Hardware Wizard" may appear when you connect the IC recorder to your computer. In this case, click [Cancel]. To the USB connector of your computer To IC recorder IC recorder USB connector USB connecting cable (supplied) Your computer USB connecting cable can be connected or disconnected when the IC recorder and the computer are turned on or off. The IC recorder is recognized by the computer as soon as the cable is connected, enabling you to proceed with the operation. Notes • Do not connect more than two USB devices to your computer. Normal operation will not be guaranteed. • Use of this IC recorder with a USB hub or a USB extension cable is not guaranteed. • A malfunction may occur depending on the USB devices connected at any one time. • Check the remaining battery power of the IC recorder (more than one segment of the battery indicator should be on) before connecting the IC recorder to the computer. If the batteries are exhausted, communication between the IC recorder and the computer may not succeed. • We recommend you disconnect the cable from the computer when you do not use the Digital Voice Editor. • When you use Windows XP Professional or Windows XP Home Edition, and you first connect the IC recorder to your computer, the "Found New Hardware Wizard" appears. Click [Install the softwrae automatically] and then click [Next]. If "Hardware Installation" appears during installation, click [Continue Anyway]. 48GB
-
 1
1 -
2
-
3
-
4
-
5
-
6
-
7
-
8
-
9
-
10
-
11
-
12
-
13
-
14
-
15
-
16
-
17
-
18
-
19
-
20
-
21
-
22
-
23
-
24
-
25
-
26
-
27
-
28
-
29
-
30
-
31
-
32
-
33
-
34
-
35
-
36
-
37
-
38
-
39
-
40
-
41
-
42
-
 43
43 -
 44
44 -
 45
45 -
 46
46 -
 47
47 -
 48
48 -
 49
49 -
 50
50 -
 51
51 -
 52
52 -
 53
53 -
54
-
55
-
56
-
57
-
58
-
59
-
60
-
61
-
62
-
63
-
64
-
65
-
66
-
67
-
68
 |
 |