Sony LBT-SH2000 Operating Instructions - Page 24
Changing the display, DJ CONTROL knob
 |
View all Sony LBT-SH2000 manuals
Add to My Manuals
Save this manual to your list of manuals |
Page 24 highlights
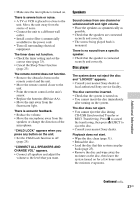
Changing the display Changing the display mode Press DISPLAY on the remote control repeatedly while the system is turned off. Demonstration The display changes and the indicator flashes even when the system is turned off. No display (Power Saving Mode) The display is turned off to conserve power. The timer and clock continue to operate. You cannot turn on the system by pressing the function buttons. Clock The clock display automatically turns to Power Saving Mode after a few seconds. Changing the spectrum pattern of the display panel 1 Press OPTIONS. 2 Press / repeatedly to select "SPECTRUM", then press ENTER. 3 Press / repeatedly to select the spectrum pattern you want, then press ENTER. To exit the OPTIONS menu, press OPTIONS. 24US Changing the illumination pattern around VOLUME/ DJ CONTROL knob 1 Press OPTIONS. 2 Press / repeatedly to select "ILLUM", then press ENTER. 3 Press / repeatedly to select the illumination pattern you want, then press ENTER. To exit the OPTIONS menu, press OPTIONS. Changing the brightness of the display panel 1 Press OPTIONS. 2 Press / repeatedly to select "DIMMER", then press ENTER. 3 Press / repeatedly to select the brightness setting you want, then press ENTER. To exit the OPTIONS menu, press OPTIONS. Viewing information in the display panel Press DISPLAY on the remote control repeatedly when the system is turned on. You can view the information as follows: • For AUDIO CD: - The elapsed playing time, remaining playing time and total remaining playing time during playback. - The total playing time when playback is stopped. • For audio files: - The elapsed playing time, file name and folder name. - The title, artist and album information.
-
 1
1 -
2
-
3
-
4
-
5
-
6
-
7
-
8
-
9
-
10
-
11
-
12
-
13
-
14
-
15
-
16
-
17
-
18
-
 19
19 -
 20
20 -
 21
21 -
 22
22 -
 23
23 -
 24
24 -
 25
25 -
 26
26 -
 27
27 -
 28
28 -
 29
29 -
30
-
31
-
32
-
33
-
34
-
35
-
36
-
37
-
38
-
39
-
40
-
41
-
42
-
43
-
44
-
45
-
46
-
47
-
48
-
49
-
50
-
51
-
52
-
53
-
54
-
55
-
56
-
57
-
58
-
59
-
60
-
61
-
62
-
63
-
64
-
65
-
66
-
67
-
68
-
69
-
70
-
71
-
72
 |
 |