Sony LF-X1 LFAPC1 Software Instructions - Page 21
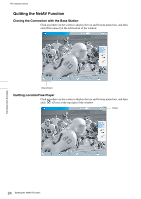
Configuring the Remote Control for Video 1 and Video 2, Click [TV/Video Settings], [Remote Settings] - model
 |
View all Sony LF-X1 manuals
Add to My Manuals
Save this manual to your list of manuals |
Page 21 highlights
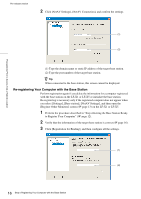
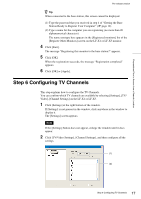
Remote Location Setup Pre-release version (1) Select the [External TV tuner] option, and then select the appropriate channel from the pull-down list. (2) Select the make of the connected device. (3) Select the type of the connected device. (4) If the configuration above is correct, each time you click [Power], your TV should turn on or off. After clicking [Power], it takes five seconds or more for the TV to respond. If it does not work, make sure that the make and model are correct, and then try again. Also, check the connection between the base station and connected device, and make sure the IR Blaster is installed properly. Notes • Even if the power turns on and off correctly with [Power], other buttons may not be enabled. If this happens, select [TV] from the Index. With the on screen-remote, confirm that the buttons are enabled. • Some devices may not have a [Power] button (e.g. DVR). In this case, as well, use the on-screen remote to display [TV] and confirm that the buttons are enabled. 5 Click [OK] or [Apply]. Configuring the Remote Control for Video 1 and Video 2 Before performing the following steps, click [Connect] to connect to the base station. 1 Click anywhere inside the window. The index appears. 2 Click the feed for which you want to setup the remote control. 3 Click [Settings] at the right bottom of the window. The [Settings] screen appears. Note If the [Settings] button does not appear, enlarge the window until it does appear. 4 Click [TV/Video Settings], [Remote Settings], and then [Video 1] or [Video 2]. 21 Step 9 Configuring the On-screen Remote Control
-
 1
1 -
2
-
3
-
4
-
5
-
6
-
7
-
8
-
9
-
10
-
11
-
12
-
13
-
14
-
15
-
 16
16 -
 17
17 -
 18
18 -
 19
19 -
 20
20 -
 21
21 -
 22
22 -
 23
23 -
 24
24 -
 25
25 -
 26
26 -
27
-
28
-
29
-
30
-
31
-
32
-
33
-
34
-
35
-
36
-
37
-
38
-
39
-
40
 |
 |
