Sony MDR DS6000 Operating Instructions - Page 12
lights up., meets the processor's contact pin, and make sure that the CHG indicator
 |
UPC - 027242680722
View all Sony MDR DS6000 manuals
Add to My Manuals
Save this manual to your list of manuals |
Page 12 highlights
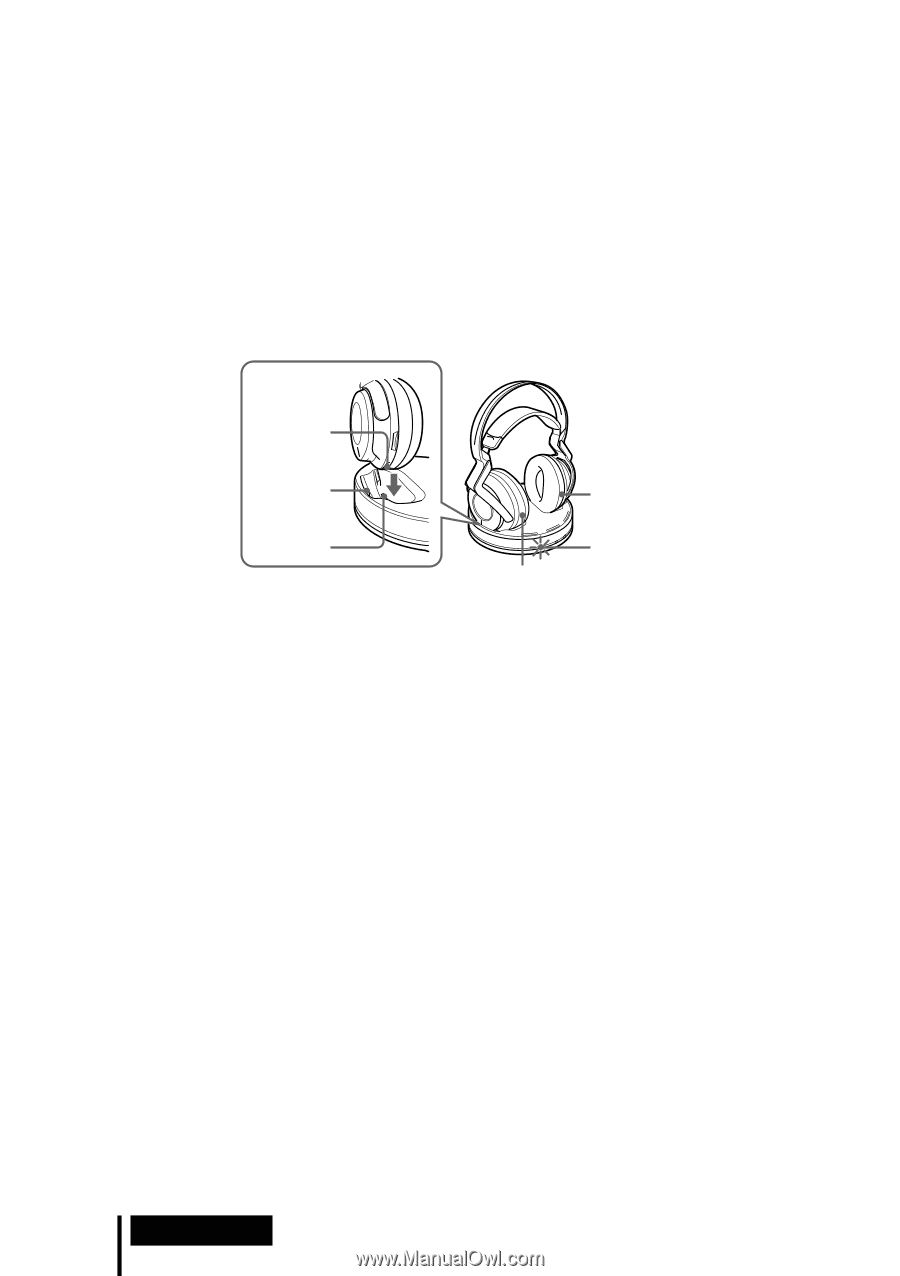
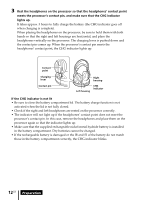
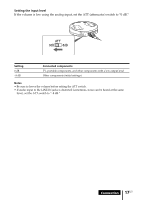
3 Rest the headphones on the processor so that the headphones' contact point meets the processor's contact pin, and make sure that the CHG indicator lights up. It takes approx. 3 hours to fully charge the battery (the CHG indicator goes off when charging is complete). When placing the headphones on the processor, be sure to hold them with both hands so that the right and left housings are horizontal, and place the headphones vertically on the processor. The charging lever is pushed down and the contact pin comes up. When the processor's contact pin meets the headphones' contact point, the CHG indicator lights up. Contact point Charging lever Contact pin Right housing CHG indicator Left housing If the CHG indicator is not lit • Be sure to close the battery compartment lid. The battery charge function is not activated when the lid is not fully closed. • Check if the right and left headphones are rested on the processor correctly. • The indicator will not light up if the headphones' contact point does not meet the processor's contact pin. In this case, remove the headphones and place them on the processor again so that the indicator lights up. • Make sure that the supplied rechargeable nickel-metal hydride battery is installed in the battery compartment. Dry batteries cannot be charged. • If the rechargeable battery is damaged or the 3 and # of the battery do not match those in the battery compartment correctly, the CHG indicator blinks. 12US Preparation
-
 1
1 -
2
-
3
-
4
-
5
-
6
-
 7
7 -
 8
8 -
 9
9 -
 10
10 -
 11
11 -
 12
12 -
 13
13 -
 14
14 -
 15
15 -
 16
16 -
 17
17 -
18
-
19
-
20
-
21
-
22
-
23
-
24
-
25
-
26
-
27
-
28
-
29
-
30
-
31
-
32
-
33
-
34
-
35
-
36
-
37
-
38
-
39
-
40
-
41
-
42
-
43
-
44
-
45
-
46
-
47
-
48
-
49
-
50
-
51
-
52
-
53
-
54
-
55
-
56
-
57
-
58
-
59
-
60
-
61
-
62
-
63
-
64
-
65
-
66
-
67
-
68
-
69
-
70
-
71
-
72
-
73
-
74
-
75
-
76
-
77
-
78
-
79
-
80
-
81
-
82
-
83
-
84
-
85
-
86
-
87
-
88
-
89
-
90
-
91
-
92
 |
 |