Sony MDR DS6000 Operating Instructions - Page 18
Listening to a Connected Component, Operation - wireless
 |
UPC - 027242680722
View all Sony MDR DS6000 manuals
Add to My Manuals
Save this manual to your list of manuals |
Page 18 highlights
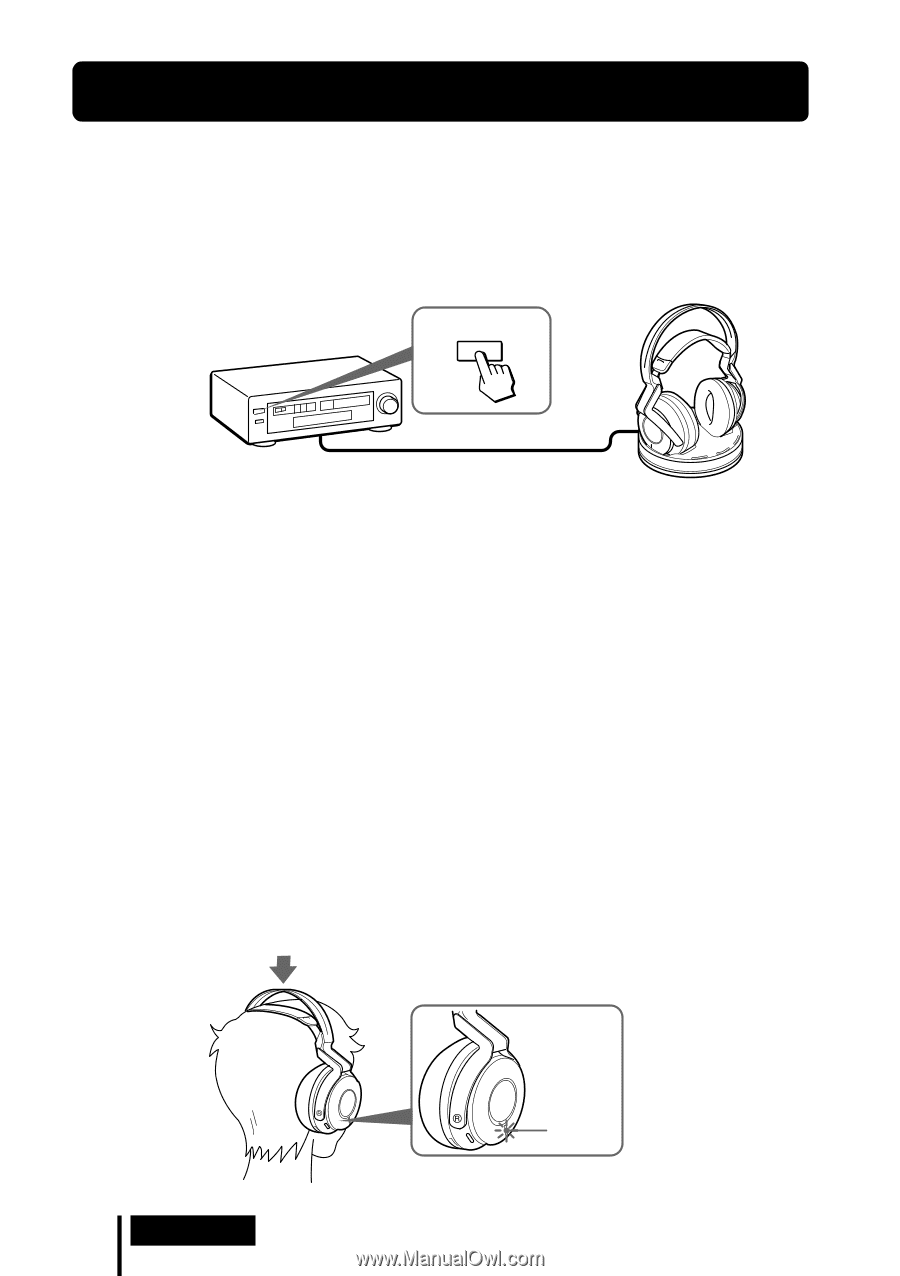
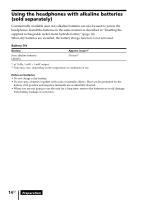
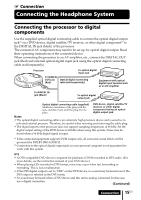
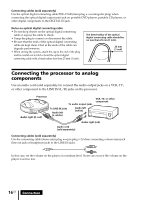
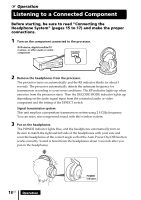
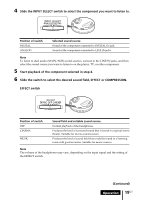
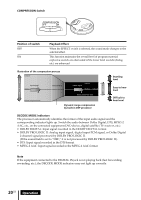
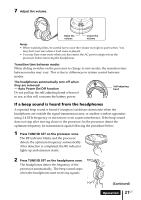
1 Operation Listening to a Connected Component Before starting, be sure to read "Connecting the Headphone System" (pages 15 to 17) and make the proper connections. 1 Turn on the component connected to the processor. DVD device, digital satellite/TV receiver, or other audio or video component POWER 2 Remove the headphones from the processor. The processor turns on automatically and the RF indicator blinks for about 5 seconds. The processor automatically detects the optimum frequency for transmission according to your room conditions. The RF indicator lights up when emission from the processor starts. Then the DECODE MODE indicator lights up, depending on the audio signal input from the connected audio or video component and the setting of the EFFECT switch. Signal transmission system This unit employs a proprietary transmission system using 2.4 GHz frequency. You can enjoy non-compressed sound with this wireless system. 3 Put on the headphones. The POWER indicator lights blue, and the headphones automatically turn on. Be sure to match the right and left side of the headphones with your ears and wear the headphones at the correct angle so that the Auto Power On/Off function works correctly. Sound is heard from the headphones about 3 seconds after you put on the headphones. 18US Operation POWER indicator
-
 1
1 -
2
-
3
-
4
-
5
-
6
-
7
-
8
-
9
-
10
-
11
-
12
-
 13
13 -
 14
14 -
 15
15 -
 16
16 -
 17
17 -
 18
18 -
 19
19 -
 20
20 -
 21
21 -
 22
22 -
 23
23 -
24
-
25
-
26
-
27
-
28
-
29
-
30
-
31
-
32
-
33
-
34
-
35
-
36
-
37
-
38
-
39
-
40
-
41
-
42
-
43
-
44
-
45
-
46
-
47
-
48
-
49
-
50
-
51
-
52
-
53
-
54
-
55
-
56
-
57
-
58
-
59
-
60
-
61
-
62
-
63
-
64
-
65
-
66
-
67
-
68
-
69
-
70
-
71
-
72
-
73
-
74
-
75
-
76
-
77
-
78
-
79
-
80
-
81
-
82
-
83
-
84
-
85
-
86
-
87
-
88
-
89
-
90
-
91
-
92
 |
 |