Sony NW-MS70D Operating Instructions - Page 21
Basic Operations, When synchro-recording is cancelled, To cancel recording, Start recording.
 |
UPC - 027242604247
View all Sony NW-MS70D manuals
Add to My Manuals
Save this manual to your list of manuals |
Page 21 highlights
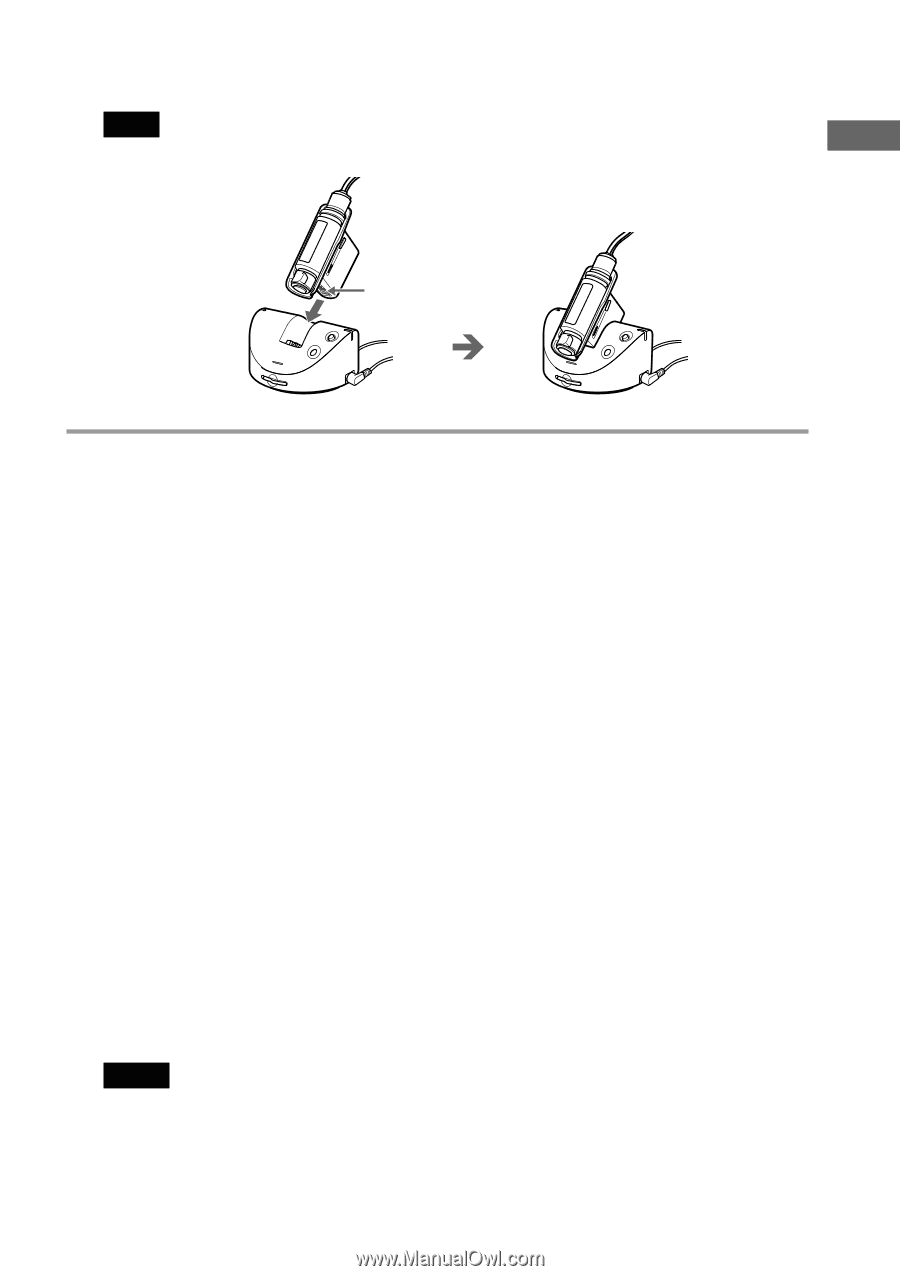
4 Attach the Network Walkman to the recording USB cradle. Note Be sure to attach your Network Walkman in the direction of the arrow as illustrated below. Basic Operations Recording USB cradle USB cradle connector 3 Start recording. When synchro-recording is cancelled 1 Pause the playback of the CD, etc., that you want to record. 2 Press the REC/PAUSE button on the recording USB cradle. The recording LED on the recording USB cradle lights up, and recording starts. The REC icon is displayed on the left side of the display, followed by the track name*, displayed to the right. The remaining recordable time will then be displayed (Remaining counter). 3 Start playback of the CD, etc. When synchro-recording is activated 1 Press the REC/PAUSE button on the recording USB cradle. The recording LED on the recording USB cradle flashes, and recording enters standby mode. The REC icon, the icon which indicates synchro-recording, and the recording bit rate and remaining recordable time flash. 2 Start playback of the CD, etc. After playback starts, the recording LED on the recording USB cradle lights up, and recording starts. In the display, after the track name* is displayed, the remaining recordable time will be displayed (Remaining counter). * The track name is displayed as "GxxxTxxx" (the group number and the track name). To cancel recording Press the STOP button on the recording cradle. To pause recording Press the REC/PAUSE button on the recording USB cradle. The recording LED flashes while paused. Press the REC/PAUSE button again to continue recording. z Tip To activate/cancel synchro-recording, refer to "Changing the setting of synchro-recording" on page 38. Notes • Synchro-recording is available only when recording from a digital audio device using an optical digital cable. • If you pause recording, the remaining part of the current track from that point will be recorded as a new track, and the track number will be renewed. 21
-
 1
1 -
2
-
3
-
4
-
5
-
6
-
7
-
8
-
9
-
10
-
11
-
12
-
13
-
14
-
15
-
 16
16 -
 17
17 -
 18
18 -
 19
19 -
 20
20 -
 21
21 -
 22
22 -
 23
23 -
 24
24 -
 25
25 -
 26
26 -
27
-
28
-
29
-
30
-
31
-
32
-
33
-
34
-
35
-
36
-
37
-
38
-
39
-
40
-
41
-
42
-
43
-
44
-
45
-
46
-
47
-
48
-
49
-
50
-
51
-
52
-
53
-
54
-
55
-
56
-
57
-
58
-
59
-
60
-
61
-
62
-
63
-
64
 |
 |