Sony SRPC4 Product Manual (SRMASTER: SRPC4 / SRPC5 Operation Manual) - Page 13
Proxy Settings, To unmount the server
 |
View all Sony SRPC4 manuals
Add to My Manuals
Save this manual to your list of manuals |
Page 13 highlights
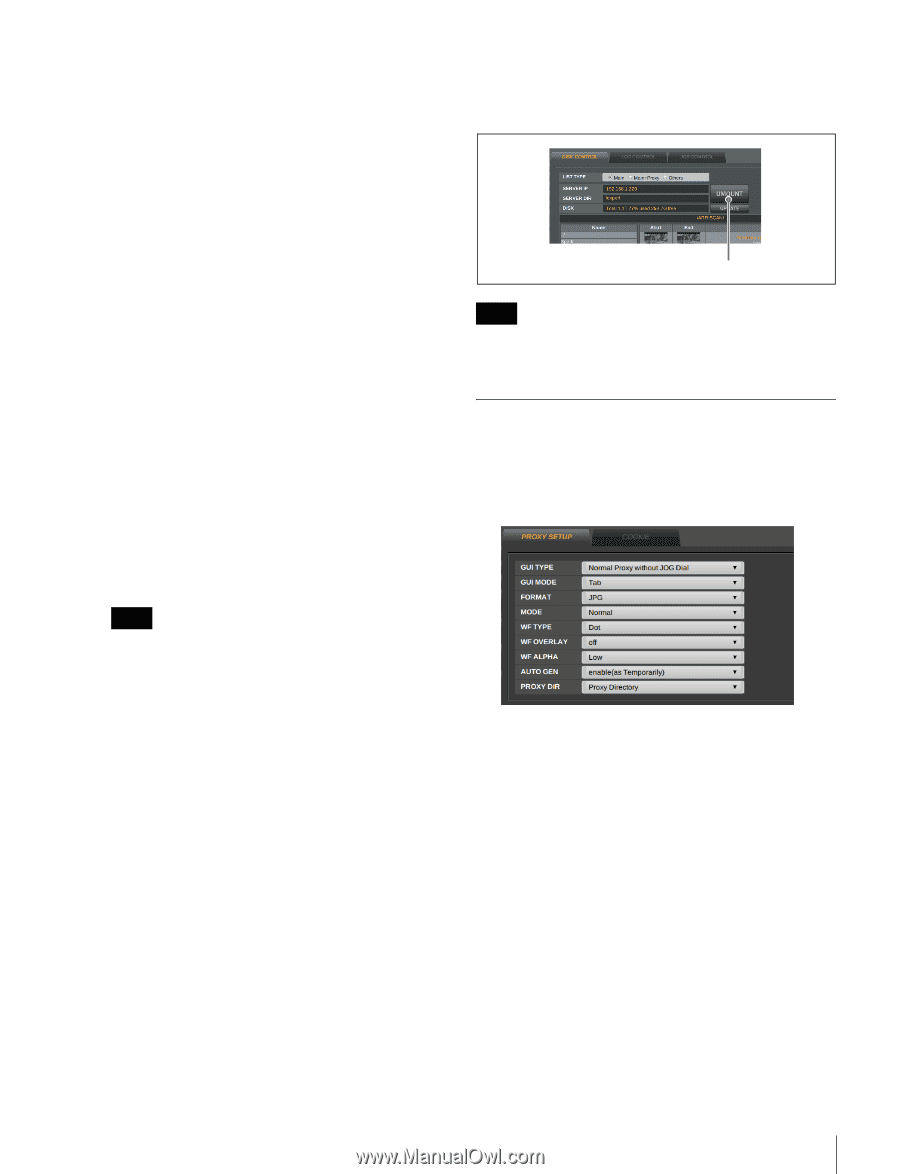
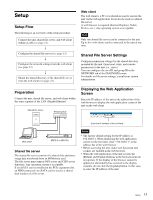
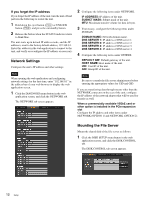
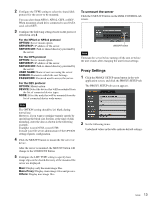
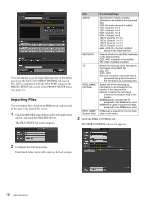
2 Configure the TYPE setting to select the shared disk protocol for the server to be mounted. You can select from NFSv3, NFSv2, CIFS, or DEV. When mounting a hard drive connected to an eSATA card, select DEV. 3 Configure the following settings based on the protocol selected in step 2. For the NFSv3 or NFSv2 protocol OPTION: Server mount option. SERVER IP: IP address of the server. SERVER DIR: Path to shared directory provided by the server. For the CIFS protocol OPTION: Server mount option. SERVER IP: IP address of the server. SERVER DIR: Path to shared directory provided by the server. USER NAME: Name of user accessing the server. DOMAIN: Domain to which the user belongs. PASSWORD: Password used to access the server. For the DEV protocol OPTION: Mount option. DEVICE: Select the device that will be mounted from the list of connected device types. NODE: Select the node that will be mounted from the list of connected device node names. To unmount the server Click the UMOUNT button on the DISK CONTROL tab screen. UMOUNT button Note Unmount the server before turning off the unit or before the unit restarts after changing the unit format settings. Proxy Settings 1 Click the PROXY SETUP menu button in the web application screen, and click the PROXY SETUP tab. The PROXY SETUP tab screen appears. Note The OPTION setting should be left blank during normal use. However, if you want to optimize transfer speeds by specifying the block size for files at the time of disk mounting, enter the data as shown in the following example. Example) wsize=32768, rsize=32768 Consult your file server administrator if the OPTION setting requires configuration. 4 Click the MOUNT button to mount the file server or device. After the server is mounted, the MOUNT button will change to the UNMOUNT button. 5 Configure the LIST TYPE setting to specify how image clips on the shared directory of the mounted file server are displayed. Main: Display only the main image files. Main+Proxy: Display main image files and proxies. Others: Display non-image files. 2 Set the following items. Underlined values in the table indicate default settings. Setup 13
-
 1
1 -
2
-
3
-
4
-
5
-
6
-
7
-
 8
8 -
 9
9 -
 10
10 -
 11
11 -
 12
12 -
 13
13 -
 14
14 -
 15
15 -
 16
16 -
 17
17 -
 18
18 -
19
-
20
-
21
-
22
-
23
-
24
-
25
-
26
-
27
-
28
-
29
-
30
-
31
 |
 |