Sony SRPC4 Product Manual (SRMASTER: SRPC4 / SRPC5 Operation Manual) - Page 15
Saving and Recalling GUI Configuration Data, Configuring the Monitor Output Signal
 |
View all Sony SRPC4 manuals
Add to My Manuals
Save this manual to your list of manuals |
Page 15 highlights
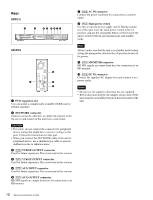
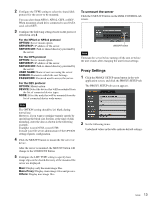
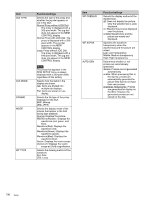
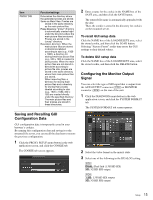
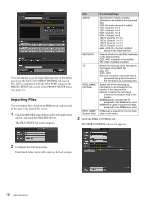
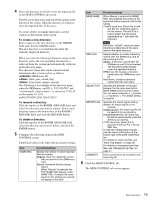
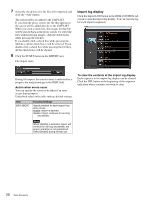
Item PROXY DIR Function/settings Determines the directory where the generated proxies are stored. Same as Main Files: Proxies are stored in the same directory as the main picture files. Proxy Directory: "proxy/" directory is automatically created right under the directory where the main picture files are stored. Proxies are stored in the "proxy/" directory. Resolution directory: When the main picture files are stored in directories labeled according to size (e.g., 1920 × 1080), a directory for storing small-size picture files (e.g., 320 × 180) is created to store proxies. When the main picture files are not stored in directories according to picture file size, proxies are stored in the same directory where their main picture files are stored. When importing files, a directory for storing main picture files and a directory for storing their proxies labeled according to size (e.g., 1920 × 1080, 320 × 180) are created directly under the specified directory. The main picture files and their proxies are stored in these directories. Saving and Recalling GUI Configuration Data GUI configuration data is temporarily saved in your browser's cookies. By naming this configuration data and saving it to the mounted file server, you can recall the data later to restore the previous configuration. 1 Click the PROXY SETUP menu button in the web application screen, and click the COOKIE tab. The COOKIE tab screen appears. 2 Enter a name for the cookie in the NAME box of the SAVE area, and then click the SAVE button. The entered file name is automatically appended with the date. Then, the cookie is stored in the directory for cookies on the mounted server. To recall GUI setup data Click the NAME box of the LOAD/DELETE area, select the stored cookie, and then click the LOAD button. Selecting "Factory Preset" at this time resets the GUI settings to their default values. To delete GUI setup data Click the NAME box of the LOAD/DELETE area, select the stored cookie, and then click the DELETE button. Configuring the Monitor Output Signal You can select the type of SDI signal that is output from the AUX OUTPUT connector ([PC5]) or MONITOR connector ([PC4]) on the rear of the unit. 1 Click the DIAGNOSIS menu button in the web application screen, and click the SYSTEM FORMAT tab. The SYSTEM FORMAT tab screen appears. 2 Select the video format in the matrix table. 3 Select one of the following in the DUAL/3G setting. [PC5] DUAL: Dual link (1.5G HD SDI) 3G: 3G HD SDI output [PC4] 1.5G: 1.5G HD SDI output 3G: 3G HD SDI output Setup 15
-
 1
1 -
2
-
3
-
4
-
5
-
6
-
7
-
8
-
9
-
 10
10 -
 11
11 -
 12
12 -
 13
13 -
 14
14 -
 15
15 -
 16
16 -
 17
17 -
 18
18 -
 19
19 -
 20
20 -
21
-
22
-
23
-
24
-
25
-
26
-
27
-
28
-
29
-
30
-
31
 |
 |
