Sony SRPC4 Product Manual (SRMASTER: SRPC4 / SRPC5 Operation Manual) - Page 25
Salvaging SRMemory Cards for which File Content was Lost, List of Keyboard Shortcuts
 |
View all Sony SRPC4 manuals
Add to My Manuals
Save this manual to your list of manuals |
Page 25 highlights
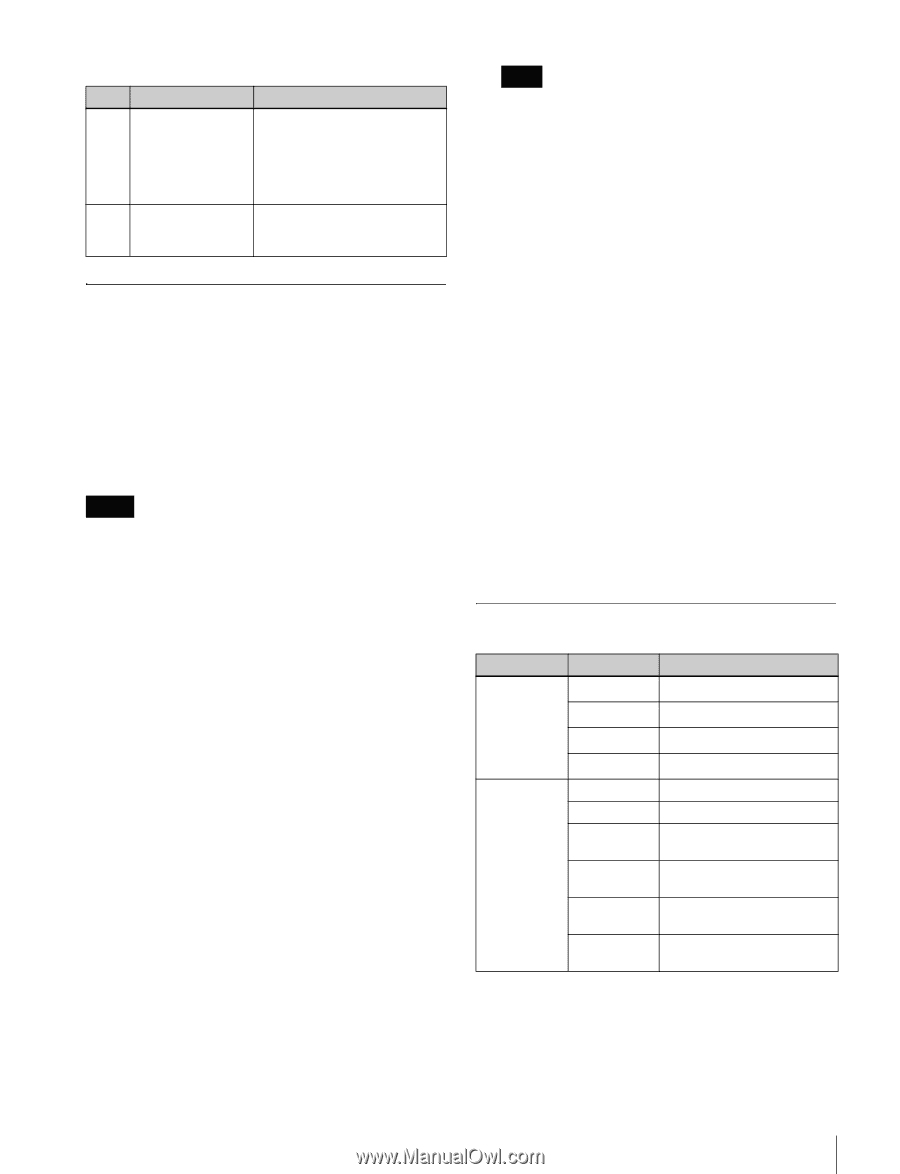
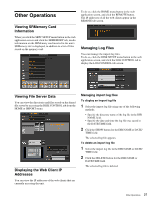
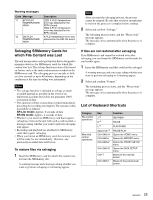
Warning messages Code Message 11 EPR PLD1 TEMPERATURE HIGH 12 DM PLD1 TEMPERATURE HIGH Description [PC5] A PLD1 temperature error was detected for the EPR-3 board. [PC4] A PLD1 temperature error was detected for the EPR-4 board. A PLD1 temperature error was detected for the DM-145 board. Salvaging SRMemory Cards for which File Content was Lost The unit incorporates a salvage function that is designed to minimize data loss for SRMemory cards for which file content was lost. The salvage function restores files based on factors such as the maker information recorded on the SRMemory card. The salvaging process can take as little as a few seconds or up to 60 minutes, depending on the conditions at the time recording was interrupted. Notes • The salvage function is intended to salvage as much recorded material as possible in the event of an unforeseen accident, but it does not guarantee 100% restoration of data. • This function will not restore data recorded immediately preceding the recording interruption. The amount of data lost will be as follows. SR-Lite mode: Approx. 8 seconds of data SR-SQ mode: Approx. 4 seconds of data • Whenever you insert an SRMemory card that requires salvaging or turn on the unit with such a card inserted, a message asking whether you want to perform salvaging will appear. • Recording and playback are disabled for SRMemory cards that require salvaging. • When you format an SRMemory card, the memory card will be ready for use immediately. However, any previously recorded data will be lost. To restore files via salvaging 1 Insert the SRMemory card for which file content was lost into the SRMemory slot. A warning massage and a message asking whether you want to perform salvaging or formatting appear. Note After you start the salvaging process, the process cannot be stopped. Be sure that you have enough time to wait for the process to complete before starting. 2 Select and confirm "Salvage." The salvaging process starts, and the "Please wait." message appears. The message closes automatically when the process is complete. If files are not restored after salvaging If an SRMemory card cannot be restored even after salvaging, you can format the SRMemory card to make the card usable again. 1 Insert the SRMemory card that could not be salvaged. A warning massage and a message asking whether you want to perform salvaging or formatting appear. 2 Select and confirm "Format." The formatting process starts, and the "Please wait." message appears. The message closes automatically when the process is complete. List of Keyboard Shortcuts Category File control operations Menu/tab control operations Key J a) K a) L a) Space bar a) Ctrl+Shift+H Ctrl+Shift+I Ctrl+Shift+P Ctrl+Shift+D Ctrl+T Ctrl+Shift+T Function REV/REW PAUSE PLAY/FFWD PAUSE/PLAY Opens the HOME menu. Opens the IMPORT menu. Opens the PROXY SETUP menu. Opens the DISK SETUP menu. Moves to the next tab screen. Moves to the previous tab screen. 25 Appendix
-
 1
1 -
2
-
3
-
4
-
5
-
6
-
7
-
8
-
9
-
10
-
11
-
12
-
13
-
14
-
15
-
16
-
17
-
18
-
19
-
 20
20 -
 21
21 -
 22
22 -
 23
23 -
 24
24 -
 25
25 -
 26
26 -
 27
27 -
 28
28 -
 29
29 -
 30
30 -
31
 |
 |