Sony SRPC4 Product Manual (SRMASTER: SRPC4 / SRPC5 Operation Manual) - Page 18
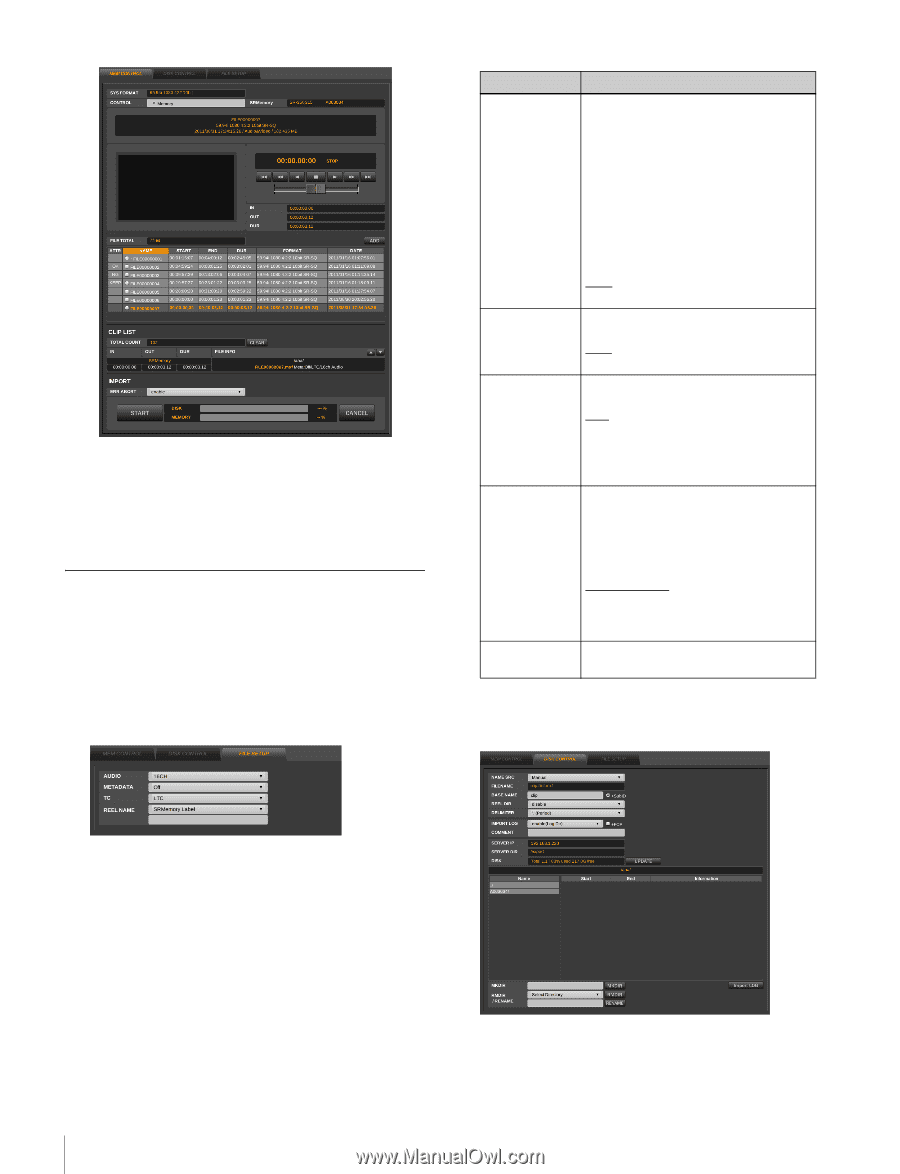
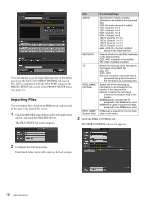
Importing Files, Click the DISK CONTROL tab.
 |
View all Sony SRPC4 manuals
Add to My Manuals
Save this manual to your list of manuals |
Page 18 highlights
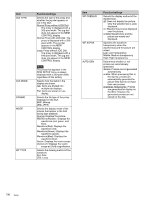
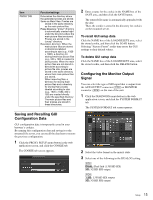
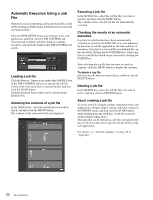
You can display a jog dial and adjust the size of the proxy screen for the GUI of the MEM CONTROL tab screen. The GUI is configured with the GUI TYPE setting in the PROXY SETUP tab screen of the PROXY SETUP menu (see page 13). Importing Files You can import files stored on an SRMemory card inserted in the unit to the shared file server. 1 Click the IMPORT menu button in the web application screen, and click the FILE SETUP tab. The FILE SETUP tab screen appears. Item Function/settings AUDIO Specifies the number of audio channels to be added to the imported files. 0CH: No audio channel is added. 2CH: Channel 1 to 2 4CH: Channel 1 to 4 6CH: Channel 1 to 6 8CH: Channel 1 to 8 10CH: Channel 1 to 10 12CH: Channel 1 to 12 14CH: Channel 1 to 14 16CH: Channel 1 to 16 Auto: Adds the channel numbers stored in the imported files. METADATA Selects whether to add ANC metadata to the imported files. OFF: ANC metadata is not added. ON: ANC metadata is added. TC Select the timecode to be included in the header of the MXF file. LTC: LTC VITC: VITC Recount: Includes a timecode that is generated using the timecode of the first frame as a starting point. REEL NAME (top field) Select one of the following as information to be included in the header of the imported file. Manual: Includes the reel name entered in the bottom field in the header. SRMemory ID: Includes the ID assigned to the SRMemory card. SRMemory Label: Includes the label assigned to the SRMemory card. REEL NAME If [Manual] is selected in the top field, (bottom field) enter a reel name. 3 Click the DISK CONTROL tab. The DISK CONTROL tab screen appears. 2 Configure the following items. Underlined values in the table indicate default settings. 18 Basic Operations
-
 1
1 -
2
-
3
-
4
-
5
-
6
-
7
-
8
-
9
-
10
-
11
-
12
-
 13
13 -
 14
14 -
 15
15 -
 16
16 -
 17
17 -
 18
18 -
 19
19 -
 20
20 -
 21
21 -
 22
22 -
 23
23 -
24
-
25
-
26
-
27
-
28
-
29
-
30
-
31
 |
 |