Sony VPL-CS7 User Manual - Page 19
Connecting with a Monitor Equipment (VPL-CS7 only), Projecting, Connecting with a Monitor - remote
 |
View all Sony VPL-CS7 manuals
Add to My Manuals
Save this manual to your list of manuals |
Page 19 highlights
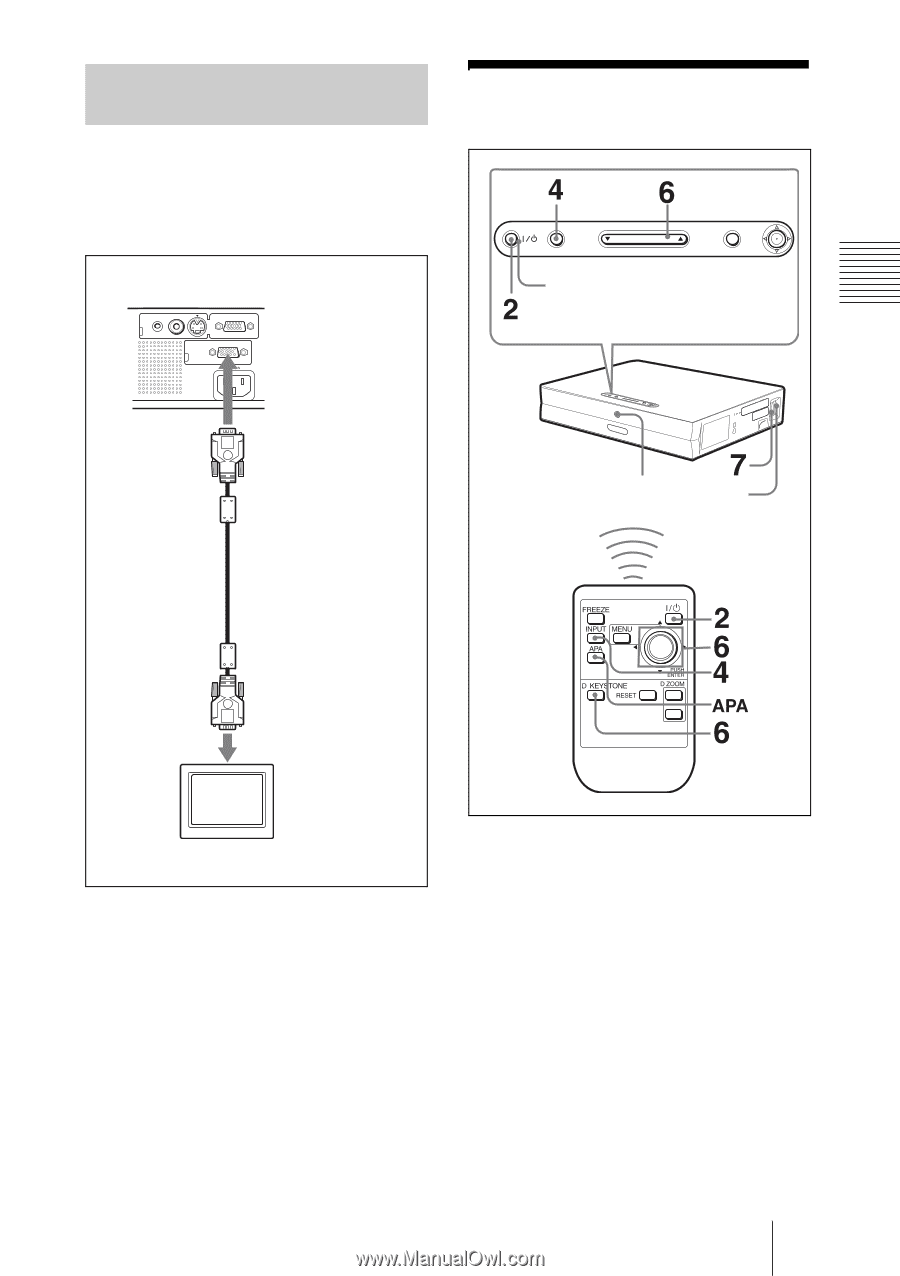
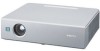
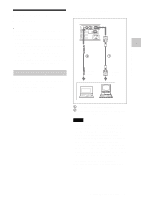
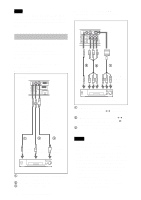
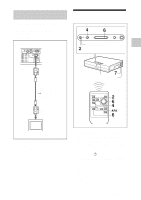
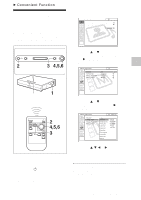
Projecting the Picture Connecting with a Monitor Equipment (VPL-CS7 only) This section describes how to connect the projector to a monitor equipment. For more information, refer to the instruction manuals of the equipment you are connecting. Left side AUDIO VIDEO S VIDEO INPUT A MONITOR OUT Projecting INPUT TILT MENU PUSH ENTER ON/STANDBY indicators Monitor cable (not supplied) HD D-sub 15-pin (male) ↔ HD D-sub 15-pin (male) to monitor input Remote control detector 8 Monitor equipment * This projector is not guaranteed for connecting more than 2 monitors in loopthrough connection. 1 Plug the AC power cord into a wall outlet, then connect all equipment. The ON/STANDBY indicator lights in red and the projector goes into standby mode. 2 Press the I / 1 key. The ON/STANDBY indicator lights in green and the Intelligent Auto-setup starts. The lens protector opens, and the powered tilt adjuster rises and stops at the previously adjusted position. 3 Turn on the equipment connected to the projector. Projecting 19
-
 1
1 -
2
-
3
-
4
-
5
-
6
-
7
-
8
-
9
-
10
-
11
-
12
-
13
-
 14
14 -
 15
15 -
 16
16 -
 17
17 -
 18
18 -
 19
19 -
 20
20 -
 21
21 -
 22
22 -
 23
23 -
 24
24 -
25
-
26
-
27
-
28
-
29
-
30
-
31
-
32
-
33
-
34
-
35
-
36
-
37
-
38
-
39
-
40
-
41
-
42
-
43
-
44
-
45
-
46
-
47
-
48
-
49
-
50
-
51
-
52
-
53
-
54
 |
 |