Stihl MSA 200 C-BQ Instruction Manual
Stihl MSA 200 C-BQ Manual
 |
View all Stihl MSA 200 C-BQ manuals
Add to My Manuals
Save this manual to your list of manuals |
Stihl MSA 200 C-BQ manual content summary:
- Stihl MSA 200 C-BQ | Instruction Manual - Page 1
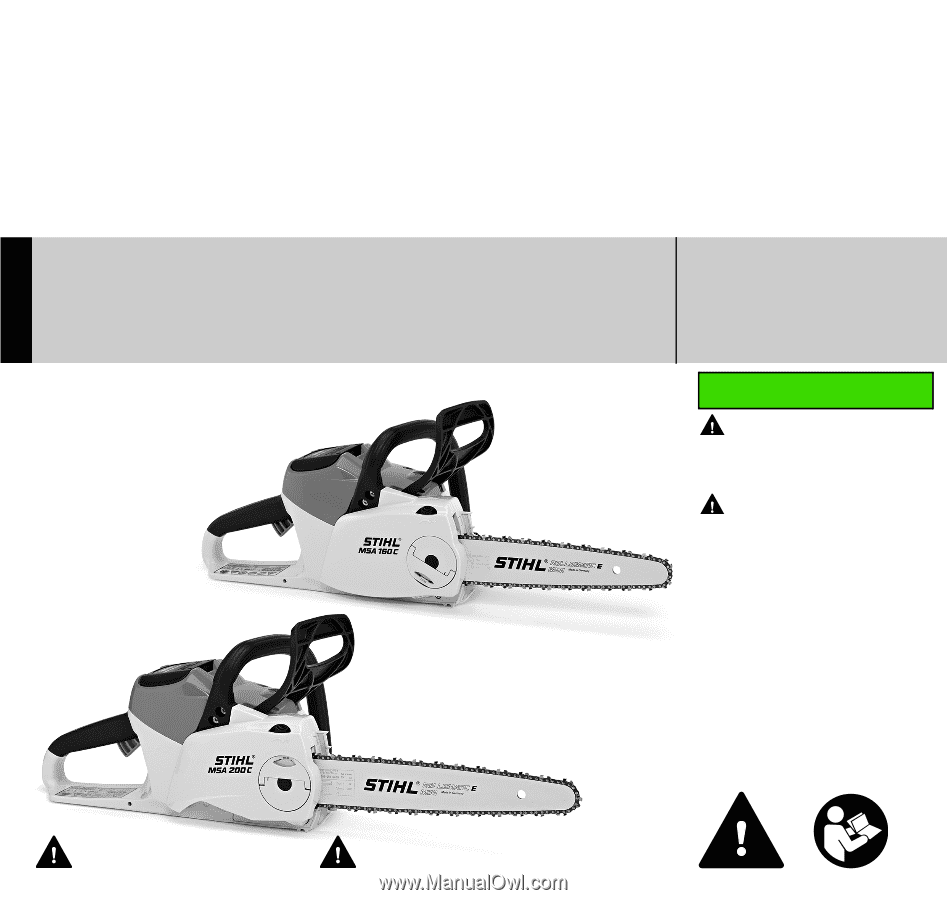
STIHL MSA 160 C, 200 C { Instruction Manual Manual de instrucciones WARNING To reduce the risk of kickback injury use STIHL reduced kickback bar and STIHL low kickback chain as specified in this manual or other available low kickback components. ADVERTENCIA Para reducir el riesgo de lesionarse como - Stihl MSA 200 C-BQ | Instruction Manual - Page 2
Instruction Manual 1 - 56 Manual de instrucciones 57 - 117 - Stihl MSA 200 C-BQ | Instruction Manual - Page 3
Battery 35 Light Emitting Diodes (LED) on Charger 36 Switching On 37 Switching Off 38 Operating Instructions 39 Taking Care of the Guide Bar 39 Storing the Machine 40 Checking and Replacing the Chain Sprocket 41 Maintaining and Sharpening the Saw Chain 41 { MSA 160 C, MSA 200 - Stihl MSA 200 C-BQ | Instruction Manual - Page 4
English Guide to Using this Manual This Instruction Manual refers to a STIHL cordless chain saw, also called a chain saw, engine-driven device or machine in this Instruction Manual. Pictograms The meanings of the pictograms attached to or embossed on the machine are explained in this manual. - Stihl MSA 200 C-BQ | Instruction Manual - Page 5
Techniques Because a chain saw is a high-speed, fast-cutting power tool, special safety precautions must be observed to reduce the risk of personal injury. It is important that you read, fully understand and observe the following safety precautions and warnings. Read the instruction manual and the - Stihl MSA 200 C-BQ | Instruction Manual - Page 6
of a chain saw (or other power tools) exposing immediately. WARNING According to STIHL's current knowledge, the electric motor of this chain saw should not interfere with chain saw and the cutting tool. Heavy-duty, nonslip gloves improve your grip and help to protect your hands. MSA 160 C, MSA 200 C - Stihl MSA 200 C-BQ | Instruction Manual - Page 7
handle; the chain guard (scabbard) should be over the chain and guide bar, which should point backwards, away from the direction in which you are walking. By vehicle: When transporting in a vehicle, keep saw chain and bar covered with the chain guard (scabbard). 001BA272 KN MSA 160 C, MSA 200 C 5 - Stihl MSA 200 C-BQ | Instruction Manual - Page 8
until the problem has been rectified. For proper assembly of the bar and chain follow the procedure described in the chapter "Mounting the Bar and Chain" of your instruction manual. STIHL Oilomatic saw chain, guide bar and sprocket must match each other in gauge and pitch. Before replacing any bar - Stihl MSA 200 C-BQ | Instruction Manual - Page 9
14 °F (-10 °C) up to no more than 122 °F (+ 50 °C). Protect the battery from direct sunlight. WARNING Use STIHL batteries only with STIHL power tools, and charge them only with STIHL chargers. Replace battery with STIHL battery only. Use only genuine STIHL rechargeable batteries. Charge the battery - Stihl MSA 200 C-BQ | Instruction Manual - Page 10
supply cord and plug is in good condition. Unplug the power supply cord from the outlet when charger is not in use. Never store a battery in the charger. Holding and Controlling the Chain Saw Always hold the chain saw firmly with both hands when you are working. Place your left hand on the front - Stihl MSA 200 C-BQ | Instruction Manual - Page 11
weather is windy, stormy or rainfall is heavy. MSA 160 C, MSA 200 C WARNING To reduce the risk of injury from loss of control, never work on a ladder or any other insecure support. Never hold the machine above shoulder height. Do not overreach. Position the chain saw in such a way that your body is - Stihl MSA 200 C-BQ | Instruction Manual - Page 12
a chain catcher. It is designed to reduce the risk of personal injury in the event of a thrown or broken chain. From time to time, the catcher may be damaged or removed. To reduce the risk of personal injury, do not operate a chain saw with a damaged or missing chain catcher. MSA 160 C, MSA 200 C - Stihl MSA 200 C-BQ | Instruction Manual - Page 13
Reactive forces may occur any time the chain is rotating. Reactive forces can cause serious personal injury. The powerful force used to cut wood can be reversed and work against the operator. If the rotating saw chain is suddenly and significantly slowed or 001BA257 KN MSA 160 C, MSA 200 C 11 - Stihl MSA 200 C-BQ | Instruction Manual - Page 14
saw chain speed, the speed at which the bar and saw chain contact the object, the angle of contact, the condition of the saw chain and other factors. The type of bar and saw chain you use is an important factor in the occurrence and force of the kickback reaction. Some STIHL bar and saw chain types - Stihl MSA 200 C-BQ | Instruction Manual - Page 15
Take the saw to your local STIHL servicing dealer. Do not use the saw until the problem has been rectified. English There are two mechanisms for activating the chain brake if it is in a properly maintained condition: - manual activation: If a kickback occurs, the chain saw moves upwards towards the - Stihl MSA 200 C-BQ | Instruction Manual - Page 16
See the chapter of your instruction manual entitled "Chain Brake" and the section " tested according to the provisions specified in ANSI/OPEI B175.1-2012. WARNING There are potential chain saw and bar combinations with which low kickback saw chains can be used which have not 14 MSA 160 C, MSA 200 - Stihl MSA 200 C-BQ | Instruction Manual - Page 17
saw chain pulls the chain saw forward and may cause the operator to lose control. Pull-in frequently occurs when the bumper spike of the chain saw is not held securely against the tree or limb and when the saw chain is not rotating at full speed before it contacts the wood. MSA 160 C, MSA 200 C 15 - Stihl MSA 200 C-BQ | Instruction Manual - Page 18
with the saw chain rotating at full speed and the bumper electric chain saw, it is imperative to observe the following instructions. Limbing guide bar. Do not stand on a log while limbing it - you may slip or the log may roll. Start limbing by leaving the lower limbs to support MSA 160 C, MSA 200 C - Stihl MSA 200 C-BQ | Instruction Manual - Page 19
operator of the saw. When cutting small logs, place log through "V"-shaped supports on top of a sawhorse. Never permit another person to hold the log the intended direction of fall, e.g. wind direction and speed, lean of tree, surrounding trees and obstacles, sloping ground MSA 160 C, MSA 200 C 17 - Stihl MSA 200 C-BQ | Instruction Manual - Page 20
Instructions Escape Path Buttress Roots B 001BA146 KN 001BA088 LÄ 1 1/2 1 21/2 A When felling, maintain a distance of at least 2 1/2 tree lengths from the nearest person. When felling in the vicinity of roads, railways and power angle. Place all tools and equipment a MSA 160 C, MSA 200 C - Stihl MSA 200 C-BQ | Instruction Manual - Page 21
or larger trees make cuts at both sides of the trunk, at same height as subsequent felling cut. N Cut to no more than width of guide bar. This is especially important in softwood in summer - it helps prevent sapwood splintering when the tree falls. MSA 160 C, MSA 200 C 19 - Stihl MSA 200 C-BQ | Instruction Manual - Page 22
. Wedges should be of wood or plastic - never steel, which can damage the chain. N Helps control the falling tree. N Do not cut through the hinge - control of the direction of the fall. Engage the bumper spikes of the chain saw directly behind the location of the intended hinge and pivot the saw - Stihl MSA 200 C-BQ | Instruction Manual - Page 23
Avoid repositioning the saw more than necessary. When repositioning for the next cut, keep the guide bar fully engaged in the kerf to keep the felling cut straight. If the saw begins with a chain saw, plunge-cutting should not be attempted. Seek the help of a professional. MSA 160 C, MSA 200 C 21 - Stihl MSA 200 C-BQ | Instruction Manual - Page 24
work, such as replacing the cutting attachment, or cleaning the power tool. This avoids the risk of the motor starting unintentionally. WARNING Do not attempt any maintenance or repair work not described in your instruction manual. Have such work performed by your STIHL servicing dealer only. Wear - Stihl MSA 200 C-BQ | Instruction Manual - Page 25
detergents. They may damage the plastic. Store chain saw in a dry, locked location with the front hand guard on ƒ, the battery removed and out of reach of children (see chapter "Storing the Machine" in the instruction manual). General Power Tool Safety Warnings This chapter relays the prescribed - Stihl MSA 200 C-BQ | Instruction Manual - Page 26
the manufacturer. A charger that is suitable for one type of battery pack may create a risk of fire when used with another battery pack. b) Use power tools only with specifically designated battery packs. Use of any other battery packs may create a risk of injury and fire. 24 MSA 160 C, MSA 200 C - Stihl MSA 200 C-BQ | Instruction Manual - Page 27
medical help. Liquid ejected from the battery may cause irritation or burns. 6) Service a) Have your power tool serviced by a qualified repair person using only identical replacement parts. This will ensure that the safety of the power tool is maintained. Chain saw safety warnings - Keep all parts - Stihl MSA 200 C-BQ | Instruction Manual - Page 28
and charger communicate with each other. The charger charges the battery and the battery supplies the necessary power only if the data exchange functions properly. For this reason you should operate your power tool only with the approved STIHL batteries and STIHL chargers. 26 MSA 160 C, MSA 200 C - Stihl MSA 200 C-BQ | Instruction Manual - Page 29
N Remove the battery from the machine 1 3 2 N Swing grip (1) into position (until it engages) N Turn the wing nut (2) to the left until it hangs loosely in the chain sprocket cover (3) N Remove chain sprocket cover (3) Mounting the tensioning gear 1 3999BA029 KN MSA 160 C, MSA 200 C N Remove - Stihl MSA 200 C-BQ | Instruction Manual - Page 30
possible N Turn the guide bar so that the tensioning gear faces the user 3 2 N Place the saw chain on the chain sprocket (2) N Slide the guide bar over the cutters N Guide the drive link into the bar groove (arrow) and turn the tensioning gear to the left as far as possible MSA 160 C, MSA 200 C - Stihl MSA 200 C-BQ | Instruction Manual - Page 31
it must be possible to pull it across the guide bar by hand N if necessary, retension saw chain A new saw chain must be retensioned more frequently than one that has been in use already for an extended period. N Check chain tension frequently, see "Operating Instructions" MSA 160 C, MSA 200 C 29 - Stihl MSA 200 C-BQ | Instruction Manual - Page 32
battery is changed If the oil tank is still partly full, the reason may be a problem in the oil supply system: Check chain lubrication, clean the oil passages, contact your servicing dealer for assistance if necessary. STIHL on housing must align. 001BA232 KN 001BA234 KN 30 MSA 160 C, MSA 200 C - Stihl MSA 200 C-BQ | Instruction Manual - Page 33
English 001BA241 KN 001BA233 KN 001BA237 KN 001BA238 KN N Remove the filler cap. Filling Chain Oil Tank Take care not to spill chain oil during refilling and do not overfill the tank - leave approx. 1/2" (13 below the clip. It does not align with the exterior marking. MSA 160 C, MSA 200 C 31 - Stihl MSA 200 C-BQ | Instruction Manual - Page 34
in for about 2 to 3 minutes. After breaking in the chain, check chain tension and adjust if necessary - see "Checking Chain Tension". 1 2 The coasting brake stops the rotating saw chain when the trigger switch is released. 1 Coasting brake inactive 2 Coasting brake active 32 MSA 160 C, MSA 200 C - Stihl MSA 200 C-BQ | Instruction Manual - Page 35
2 1 N Insert the plug (1) in the wall outlet (2). 1 A self test is performed after the charger is connected to the power supply. During this process, the light emitting diode (1) on the charger lights up green for about 1 second, then red and goes off again. 3901BA019 KN MSA 160 C, MSA 200 C 33 - Stihl MSA 200 C-BQ | Instruction Manual - Page 36
can be extended by the cooling off period. The battery and the charger warm up during the charging process. Chargers AL 300, AL 500 AL 100 charger The charger waits with the charging procedure until the battery has cooled off on its own. The battery is cooled by the heat emitted to the ambient air - Stihl MSA 200 C-BQ | Instruction Manual - Page 37
Light Emitting Diodes (LED) on Battery Four light emitting diodes show the battery's state of charge and any problems that occur with the battery or power tool. During Charging Process The light emitting diodes glow continuously or flash to indicate the progress of charge. A green flashing light - Stihl MSA 200 C-BQ | Instruction Manual - Page 38
in the battery compartment. Refit the battery. Switch on the power tool - if the light emitting diodes still flash, the power tool is malfunctioning and must be checked by a servicing dealer - STIHL recommends an authorized STIHL servicing dealer. Light Emitting Diodes (LED) on Charger 1 The light - Stihl MSA 200 C-BQ | Instruction Manual - Page 39
guard towards the front handle until it engages audibly and the hand guard is in the position , - chain brake is released 3999BA010 KN 3999BA015 KN 3999BA016 KN MSA 160 C, MSA 200 C 1 N Insert battery in the battery compartment of the machine - press gently until it clicks into place - top of - Stihl MSA 200 C-BQ | Instruction Manual - Page 40
The more the trigger switch is depressed, the higher the motor speed. Switching Off 1 Removing the battery 4 3 3999BA017 KN 2 N Release trigger switch (2) so hand guard to ƒ - the saw chain is blocked During breaks and after work, remove the battery from the machine. 38 MSA 160 C, MSA 200 C - Stihl MSA 200 C-BQ | Instruction Manual - Page 41
groove (3) N Measure groove depth - using the measuring tool on the file gauge (special accessory) - in the area with the greatest wear Chain type Chain pitch Picco 1/4" P Minimum groove depth 0.16" (4.0 mm) If the groove is not at least this deep: N Replace guide bar MSA 160 C, MSA 200 C 39 - Stihl MSA 200 C-BQ | Instruction Manual - Page 42
and shake it out - remove chips from the battery compartment N Remove saw chain and guide bar; clean and spray with protective oil N Thoroughly clean the machine, especially the ventilation slots N When using biological chain oil (e. g., STIHL BioPlus), fill the lubricant oil tank N Store the - Stihl MSA 200 C-BQ | Instruction Manual - Page 43
and Replacing the Chain Sprocket N Remove battery N Remove chain sprocket cover, saw chain and guide bar N Release chain brake - set hand guard to, Fit new chain sprocket - after use of two saw chains or earlier - if the wear marks (arrows) are deeper than 0.02 in (0.5 mm) - otherwise the service - Stihl MSA 200 C-BQ | Instruction Manual - Page 44
with chain pitch N Clamp guide bar if necessary N To advance the saw chain, set the chain saw hand guard to , - chain brake is released N Sharpen frequently, removing little material - two or three strokes of the file are usually sufficient for simple resharpening 42 MSA 160 C, MSA 200 C - Stihl MSA 200 C-BQ | Instruction Manual - Page 45
to the side surface of the guide bar) in accordance with the the cutter heights also vary and cause rough running of the saw chain and chain breakage. N All cutters must be filed down equal to the service mark (see arrow) - when 689BA044 KN 689BA051 KN 689BA047 KN MSA 160 C, MSA 200 C 43 - Stihl MSA 200 C-BQ | Instruction Manual - Page 46
) Chain pitch Round file ^ Round file File holder File gauge Inches (mm) mm (Inches) Part number Part number Part number 1/4 P (6.35) 3.2 (1/8) 5605 771 3206 5605 750 4300 0000 893 4005 Taper square file Sharpening set Part number Part number 0814 252 3356 - 44 MSA 160 C, MSA 200 C - Stihl MSA 200 C-BQ | Instruction Manual - Page 47
turn over Deburr Replace Chain sprocket Check Cooling air intake slits Visual inspection Clean Battery Visual inspection Battery compartment Clean Check operation (battery ejection) X X X X X X X X X X X X X X X X X X X X X X X X X XX X XX X MSA 160 C, MSA 200 C 45 - Stihl MSA 200 C-BQ | Instruction Manual - Page 48
Retighten Check X Chain catcher Replace Safety information label Replace 1) STIHL recommends STIHL servicing dealers Before starting work At the end of work and/or daily Each time the battery is changed Weekly Monthly Yearly If faulty If damaged As required X X X 46 MSA 160 C, MSA 200 C - Stihl MSA 200 C-BQ | Instruction Manual - Page 49
) 14 Trigger Switch Lockout 15 Trigger Switch 16 Rear Handle 17 Rear Hand Guard 18 Battery Locking Tabs 19 Battery 20 Push Button 21 Light Emitting Diodes (LED) on Battery 22 Charger 23 Light Emiting Diode (LED) on Charger 24 Power Supply Cord # Serial Number 3999BA023 KN MSA 160 C, MSA 200 - Stihl MSA 200 C-BQ | Instruction Manual - Page 50
) on Battery Indicate the state of charge and operating condition of the battery. 22. Charger Charges the battery. 23. Light Emitting Diode (LED) on Charger Indicates charger operating mode and certain problems. 24. Power Supply Cord Supplies electric current to charger. 48 MSA 160 C, MSA 200 C - Stihl MSA 200 C-BQ | Instruction Manual - Page 51
-ion AP, AR The unit can be operated only with original STIHL rechargeable batteries. Running time is dependent on the energy content of the battery. Charger AL 100 Power supply: Rated current: Power consumption: Charge current: Insulation: AL 300 Power supply: Rated current: Power consumption - Stihl MSA 200 C-BQ | Instruction Manual - Page 52
STIHL batteries by road to the power tool's operating site. Check and comply with any special regulations that may apply to your situation. FCC 15 Compliance Statement for power tool and charger allowed in this manual, since this could void your authority to operate it. 50 MSA 160 C, MSA 200 C - Stihl MSA 200 C-BQ | Instruction Manual - Page 53
and tear. When purchasing these parts, always quote the saw model, the part numbers and names of the parts. Model Serial number Guide bar part number Chain part number See "Specifications" in this manual for the recommended reduced kickback cutting attachments. English MSA 160 C, MSA 200 C 51 - Stihl MSA 200 C-BQ | Instruction Manual - Page 54
by a servicing dealer 1) Moisture in the machine and/or battery Let the machine/battery dry Battery or machine electronics too hot Remove battery from the machine, let battery and machine cool off Electrical or electromagnetic malfunction Remove battery and reinsert it 52 MSA 160 C, MSA 200 C - Stihl MSA 200 C-BQ | Instruction Manual - Page 55
. 5 seconds) Remove the battery from the machine and reinsert it. Turn on the machine - if the LEDs still flash, the battery is faulty and must be replaced Malfunction in charger 1) STIHL recommends STIHL servicing dealers Have charger checked by a servicing dealer1) MSA 160 C, MSA 200 C 53 - Stihl MSA 200 C-BQ | Instruction Manual - Page 56
by an authorized STIHL servicing dealer using genuine STIHL replacement parts. Genuine STIHL parts can be identified by the STIHL part number, the { logo and, in some cases, by the STIHL parts symbol K. The symbol may appear alone on small parts. Battery Recycling Information STIHL is committed to - Stihl MSA 200 C-BQ | Instruction Manual - Page 57
iCademy® MAGNUM® MasterWrench Service® MotoMix® MSA 160 C, MSA 200 C 4-MIX ™ BioPlus ™ Easy2Start ™ EasySpool ™ ElastoStart ™ Ematic ™ FixCut ™ HT Plus ™ IntelliCarb ™ Master Control Lever ™ Micro ™ Pro Mark ™ English Quad Power ™ Quiet Line ™ STIHL Arctic ™ STIHL Compact ™ STIHL HomeScaper Series - Stihl MSA 200 C-BQ | Instruction Manual - Page 58
English Addresses STIHL Inc. 536 Viking Drive P.O. Box 2015 Virginia Beach, VA 23452-2015 56 MSA 160 C, MSA 200 C - Stihl MSA 200 C-BQ | Instruction Manual - Page 59
92 Freno de la cadena 92 Conexión del cargador al suministro de energía eléctrica 93 Carga de la bater STIHL o el distribuidor de STIHL para su zona si no se entiende alguna de las instrucciones dadas en el presente manual incluso mortales. { MSA 160 C, MSA 200 C Este manual de instrucciones est - Stihl MSA 200 C-BQ | Instruction Manual - Page 60
una situación de peligro que, al no evitarse, puede resultar en lesiones manual. Si las características de funcionamiento o la apariencia de su máquina difieren de las descritas en este manual, comuníquese con el concesionario STIHL para obtener la ayuda que requiera. 58 MSA 160 C, MSA 200 - Stihl MSA 200 C-BQ | Instruction Manual - Page 61
avisos contenidos en este manual se refieren al uso de todas las motosierras de STIHL. Los distintos modelos pueden STIHL recomienda el uso piezas de repuesto originales de STIHL. Estas han sido diseñadas específicamente para su modelo y satisfacen sus necesidades de rendimiento. MSA 160 C, MSA 200 - Stihl MSA 200 C-BQ | Instruction Manual - Page 62
dedos. Si aparece alguno de los síntomas arriba mencionados, consulte inmediatamente al médico. ADVERTENCIA Según los datos obtenidos por STIHL en la actualidad, el motor eléctrico de esta motosierra no debe interferir Sujétese el pelo de modo que quede sobre los hombros. 60 MSA 160 C, MSA 200 C - Stihl MSA 200 C-BQ | Instruction Manual - Page 63
al desgaste) para manipular la motosierra y la herramienta de corte. Los guantes gruesos y antideslizantes mejoran el manejo y ayudan a proteger las manos. MSA 160 C, MSA 200 correspondiente). Si existe el riesgo de lesionarse el rostro, STIHL recomienda que también se use una careta o protector - Stihl MSA 200 C-BQ | Instruction Manual - Page 64
centro de servicio de STIHL en su localidad. manual de instrucciones, la sección "Fuerzas reactivas incluido el contragolpe." Ya que las espadas más largas son pesadas y pueden ser más difíciles de manejar, seleccione la espada más corta que satisfaga sus necesidades de corte. 62 MSA 160 C, MSA 200 - Stihl MSA 200 C-BQ | Instruction Manual - Page 65
. Para evitar el ajuste inadecuado, ejecute los procedimientos de tensado tal como se describen en su manual. Para fijar la espada en su lugar, siempre asegúrese que la tuerca o tuercas hexagonales para haya enfriado lo suficiente para actuar en caso de que el fuego vuelva a MSA 160 C, MSA 200 C 63 - Stihl MSA 200 C-BQ | Instruction Manual - Page 66
la guarda, emana un olor poco habitual, está caliente al tacto o tiene un aspecto anormal. ADVERTENCIA Puede haber fuga 14 °F - 122 °F)]. Cargador Utilice sólo cargadores STIHL originales. Utilícelo únicamente para cargar baterías con forma geométrica correspondiente STIHL 64 MSA 160 C, MSA 200 C - Stihl MSA 200 C-BQ | Instruction Manual - Page 67
fuerzas de empuje y tirones, así como las fuerzas de contragolpe de la sierra, sin perder el control (vea la sección sobre fuerzas reactivas). 3999BA000 KN MSA 160 C, MSA 200 C 65 - Stihl MSA 200 C-BQ | Instruction Manual - Page 68
hace impacto en otro objeto, una fuerza reactiva puede hacer que la cadena golpee al operador. STIHL recomienda que los usuarios inexpertos realicen los cortes de troncos sobre un caballete de aserrar hay líquidos, gases o polvos inflamables presentes. 001BA082 KN 66 MSA 160 C, MSA 200 C - Stihl MSA 200 C-BQ | Instruction Manual - Page 69
en marcha desatendida. Cuando no está en uso (por ejemplo durante un descanso), apáguela y asegúrese de que las personas no autorizadas no puedan usarla. Para asociaciones de trabajo y los sindicatos con respecto al polvo ("materia particulada"). Cuando sea imposible eliminar MSA 160 C, MSA 200 C 67 - Stihl MSA 200 C-BQ | Instruction Manual - Page 70
esta motosierra si está dañada. En caso de dudas, pida que el concesionario de servicio de STIHL la revise. La motosierra no está diseñada para ser utilizada como palanca o pala en las ramas o en lugares muy húmedos o mojados. No deje la máquina al aire libre bajo la lluvia. 68 MSA 160 C, MSA 200 C - Stihl MSA 200 C-BQ | Instruction Manual - Page 71
causando lesiones graves o mortales al operador. 001BA035 KN ADVERTENCIA Contragolpe: Puede ocurrir un contragolpe, por ejemplo, cuando la cadena cerca del cuadrante superior de la punta de la espada entre en contacto con la madera o quede aprisionada al cortar una rama, MSA 160 C, MSA 200 C 69 - Stihl MSA 200 C-BQ | Instruction Manual - Page 72
STIHL en las motosierras con espadas de contragolpe reducido y cadenas de bajo contragolpe con etiquetas verdes. ADVERTENCIA Para reducir el riesgo de lesionarse, no usar la motosierra si el freno de la cadena no funciona correctamente. Lleve la motosierra a un centro de 70 MSA 160 C, MSA 200 - Stihl MSA 200 C-BQ | Instruction Manual - Page 73
STIHL STIHL manual: Si se produce un contragolpe, la motosierra se moverá hacia arriba en dirección al manual de instrucciones intitulado "Freno de la cadena" y la sección "Mantenimiento, reparación y almacenamiento" al reducido STIHL ofrece de STIHL est al contragolpe. STIHL contragolpe. Al combinar - Stihl MSA 200 C-BQ | Instruction Manual - Page 74
de aserrado que también cumplan con las normas al ser utilizadas con ciertas motosierras. Consulte con su concesionario STIHL acerca de dichas combinaciones. ADVERTENCIA Las espadas de equilibrada y cumplir con la norma sobre motosierras, utilice solamente espadas 72 MSA 160 C, MSA 200 C - Stihl MSA 200 C-BQ | Instruction Manual - Page 75
manual especial atención al trabajar cerca de vallas de alambre y al cortar ramas peque de corte. 10. Esté atento al desplazamiento del tronco o a la ninguna de las motosierras de STIHL. Toda motosierra equipada con una madera. ADVERTENCIA Tenga sumo cuidado al cortar arbolitos y matorrales peque - Stihl MSA 200 C-BQ | Instruction Manual - Page 76
la cadena de aserrado. 2. No corte más de un tronco a la vez. 3. No tuerza la motosierra al retirar la espada de un corte con penetración o un corte por debajo, ya que la cadena de aserrado operador y causar la pérdida de control de la sierra y lesiones graves o mortales. 74 MSA 160 C, MSA 200 C - Stihl MSA 200 C-BQ | Instruction Manual - Page 77
LÄ 001BA033 KN El tronzado consiste en cortar un tronco en secciones. ADVERTENCIA Durante el tronzado, no se suba al tronco. Asegúrese que el tronco no vaya a rodar cerro abajo. Si se encuentra en una ladera, sit Tala La tala consiste en cortar un árbol hasta que caiga. MSA 160 C, MSA 200 C 75 - Stihl MSA 200 C-BQ | Instruction Manual - Page 78
que estos árboles se partan o rasguen durante el corte y causen lesiones graves o mortales al operador u otras personas en las inmediaciones. Siempre busque las ramas quebradas o muertas que puedan soltarse distancia segura lejos del árbol, pero no en las rutas de escape. 76 MSA 160 C, MSA 200 C - Stihl MSA 200 C-BQ | Instruction Manual - Page 79
de aprox. 1/5 a 1/4 del diámetro del tronco. N Haga un segundo corte desde abajo en un ángulo de aproximadamente 40°. N Quite el pedazo de 90° resultante. MSA 160 C, MSA 200 C 77 - Stihl MSA 200 C-BQ | Instruction Manual - Page 80
Esto es especialmente importante en los casos de la madera blanda durante el verano; ayuda a evitar que se astille la albura al caer el árbol. Técnica convencional y de cara libre: N Comience de 2,5 a 5 cm (1 a 2 pulg) stico, pero jamás de acero porque se dañaría la cadena. 78 MSA 160 C, MSA 200 C - Stihl MSA 200 C-BQ | Instruction Manual - Page 81
de hacer el corte de tala. Primero, corte una entalla de tala grande y ancha. Haga un corte por penetración en el centro de la entalla. MSA 160 C, MSA 200 C 79 - Stihl MSA 200 C-BQ | Instruction Manual - Page 82
a caer, retire la espada, apague el motor y aléjese por la ruta de escape prevista. Esté atento manual de instrucciones. Este tipo de trabajo debe ser realizado únicamente por el concesionario de servicio de STIHL. Use guantes para manipular o mantener las cadenas de aserrado. 80 MSA 160 C, MSA 200 - Stihl MSA 200 C-BQ | Instruction Manual - Page 83
STIHL, para la inspección y servicio periódicos del sistema de freno de acuerdo a los intervalos indicados a continuación: Uso intenso - cada tres meses, uso moderado - dos veces al "Almacenamiento de la máquina" en el manual de instrucciones). español / EE.UU Advertencias MSA 160 C, MSA 200 C 81 - Stihl MSA 200 C-BQ | Instruction Manual - Page 84
ctricas. 3) Seguridad personal a) Manténgase alerta, observe lo que hace y utilice buen criterio al usar una herramienta motorizada. No utilice una herramienta motorizada si está bajo la influencia de drogas de la herramienta motorizada si sucede alguna situación inesperada. 82 MSA 160 C, MSA 200 C - Stihl MSA 200 C-BQ | Instruction Manual - Page 85
de trabajo y el tipo de tarea a realizarse. El uso de una herramienta motorizada para trabajos diferentes al propósito para el cual fue diseñada puede producir una situación peligrosa. español / EE . El líquido despedido por la batería puede causar irritación o quemaduras. MSA 160 C, MSA 200 C 83 - Stihl MSA 200 C-BQ | Instruction Manual - Page 86
hacer que los componentes metálicos de la herramienta motorizada tengan corriente y darle una sacudida eléctrica al operador. - Use gafas de seguridad y protectores en los oídos. Se recomienda el uso de equipos no ha sido diseñada, se podría causar una situación peligrosa. 84 MSA 160 C, MSA 200 C - Stihl MSA 200 C-BQ | Instruction Manual - Page 87
pérdida del control de la sierra, lo cual puede causar lesiones personales graves al operador. No se confíe exclusivamente en los dispositivos de seguridad incorporados en su motosierra la herramienta motorizada únicamente con baterías y cargadores STIHL apropiados. MSA 160 C, MSA 200 C 85 - Stihl MSA 200 C-BQ | Instruction Manual - Page 88
sierra incluye como equipo estándar una funda para la espada que corresponde al accesorio de corte. Para reducir el riesgo de lesiones al usar espadas de largos diferentes en la misma motosierra, asegúrese que el la cadena (3) N Retire la cubierta del piñón (3) de la cadena 86 MSA 160 C, MSA 200 C - Stihl MSA 200 C-BQ | Instruction Manual - Page 89
engranaje tensor y los bordes cortantes N Gire el engranaje tensor (1) hacia la derecha hasta su tope N Gire la espada para que el engranaje tensor quede frente al usuario MSA 160 C, MSA 200 C 87 - Stihl MSA 200 C-BQ | Instruction Manual - Page 90
la ranura de la espada (flecha) y gire el engranaje tensor hacia la izquierda hasta su tope 3999BA004 KN Al colocar la cubierta del piñón de la cadena, los dientes de la rueda de ajuste y el engranaje tensor las orejetas guía en las aberturas de la caja del motor 88 MSA 160 C, MSA 200 C - Stihl MSA 200 C-BQ | Instruction Manual - Page 91
El aceite de cadena biodegradable debe ser resistente al envejecimiento (por ejemplo, STIHL BioPlus), pues de lo contrario se convertiría ser necesario. STIHL recomienda que un concesionario de servicio STIHL autorizado efectúe los trabajos de mantenimiento y reparación. MSA 160 C, MSA 200 C 89 - Stihl MSA 200 C-BQ | Instruction Manual - Page 92
Limpie a fondo la tapa de llenado y la zona alrededor de la misma para evitar la entrada de suciedad al depósito. N Siempre coloque la máquina de modo que la tapa de llenado apunte hacia arriba. Apertura depósito. - deje un espacio de aire de aproximadamente 13 mm (1/2 pulg). MSA 160 C, MSA 200 C - Stihl MSA 200 C-BQ | Instruction Manual - Page 93
enganchar la tapa de llenado en la caja del depósito La base de la tapa de llenado está inclinada con respecto a la parte superior. MSA 160 C, MSA 200 C 91 - Stihl MSA 200 C-BQ | Instruction Manual - Page 94
ñado para ser activado también por la inercia del protector delantero de la mano si las fuerzas son suficientes. El protector es 3999BA010 KN 92 MSA 160 C, MSA 200 C - Stihl MSA 200 C-BQ | Instruction Manual - Page 95
libremente. Mantenimiento del freno de la cadena Conexión del cargador al suministro de energía eléctrica El voltaje de la red hacerlo revisar en un lugar con personal competente, como el concesionario STIHL, cada vez que se cumplan los siguientes intervalos: Uso continuo . MSA 160 C, MSA 200 C 93 - Stihl MSA 200 C-BQ | Instruction Manual - Page 96
odo de enfriamiento. La batería y el cargador se calientan durante el proceso de carga. Cargadores AL 300, AL 500 Cargador AL 100 El cargador espera con el procedimiento de carga hasta que la batería se haya enfriado por á provisto de un ventilador para enfriar la batería. 94 MSA 160 C, MSA 200 C - Stihl MSA 200 C-BQ | Instruction Manual - Page 97
está muy se iluminan caliente. Espere continuamente un momento en rojo: hasta que se enfríe. D Tres diodos fotoemisores destellan en rojo Herramienta eléctrica averiada 4) MSA 160 C, MSA 200 C 95 - Stihl MSA 200 C-BQ | Instruction Manual - Page 98
- quite la batería y vuelva a colocarla. - Batería averiada (consulte también "Diodos fotoemisores (LED) de la batería"). - Cargador averiado - solicite a un concesionario de servicio que lo revise. STIHL recomienda acudir a un concesionario STIHL para servicio. 96 MSA 160 C, MSA 200 C - Stihl MSA 200 C-BQ | Instruction Manual - Page 99
si la tiene; para hacerlo, presione los dos ganchoes de seguridad al mismo tiempo para soltar la cubierta y retírela Colocación de la haya colocado en la posición , y el bloqueo (1) y el gatillo (2) se opriman al mismo tiempo. Gatillo La velocidad del motor se controla con el gatillo. Cuanto más se - Stihl MSA 200 C-BQ | Instruction Manual - Page 100
de la espada - de lo contrario la cadena puede saltarse de la espada. Vuelva a tensar la cadena - Vea "Tensado de la cadena de aserrado" 98 MSA 160 C, MSA 200 C - Stihl MSA 200 C-BQ | Instruction Manual - Page 101
de la cadena después de terminar los trabajos. La cadena se contrae al enfriarse. Si no se suelta la tensión, se podría dañar P Profundidad mínima de ranura 4,0 mm (0,16 pulg) Si la ranura no tiene al menos esta profundidad: N Reemplazo de la espada De lo contrario los eslabones impulsores se - Stihl MSA 200 C-BQ | Instruction Manual - Page 102
N Limpie la máquina a fondo, especialmente las ranuras de ventilación N Al utilizar aceite de cadena biodegradable (por ejemplo, STIHL BioPlus), llene el tanque de aceite lubricante N Guarde la máquina en un el uso desautorizado (por ejemplo, por los niños) y la suciedad 100 MSA 160 C, MSA 200 C - Stihl MSA 200 C-BQ | Instruction Manual - Page 103
especial) para comprobar Al usar dos cadenas de aserrado en forma alternada se ayuda a conservar el piñón. STIHL recomienda el uso de piñones de cadena originales de STIHL para asegurar un rendimiento la propensidad a contragolpes de la motosierra - ¡riesgo de lesionarse! MSA 160 C, MSA 200 C 101 - Stihl MSA 200 C-BQ | Instruction Manual - Page 104
(accesorio especial, vea la tabla de "Herramientas de afilado") al afilar las cadenas de aserrado a mano. Los portalimas tienen marcas 689BA025 KN Comprobación de los ángulos El calibrador de afilado STIHL (accesorio especial, consulte la tabla "Herramientas de afilado") - MSA 160 C, MSA 200 C - Stihl MSA 200 C-BQ | Instruction Manual - Page 105
afilado, será necesario modificar el calibrador de profundidad N Modifique el calibrador de profundidad de modo que quede a ras con el calibrador de afilado 689BA051 KN MSA 160 C, MSA 200 C 103 - Stihl MSA 200 C-BQ | Instruction Manual - Page 106
calibrador de profundidad hasta dejarlo paralelo con respecto a la marca de servicio (vea la flecha) - al hacer esto, tenga cuidado de no bajar el punto más alto del calibrador de profundidad N Coloque ) 3,2 (1/8) 5605 771 3206 5605 750 4300 0000 893 4005 0814 252 3356 - 104 MSA 160 C, MSA 200 C - Stihl MSA 200 C-BQ | Instruction Manual - Page 107
X X Freno de la cadena, freno de rueda libre Pruebas funcionales X Solicite al concesionario especializado su revisión1) Lubricación del tanque de aceite Limpiar X Lubricación Limpiar X Revise el funcionamiento (expulsión de batería) X X X X X X XX X XX X MSA 160 C, MSA 200 C 105 - Stihl MSA 200 C-BQ | Instruction Manual - Page 108
Reemplazar 1) STIHL recomienda acudir a un concesionario STIHL para servicio Antes de empezar a trabajar Al final del trabajo y/o diariamente Cada vez que se cambie la batería Semanalmente Mensualmente Anualmente Si falla Si tiene daños Según se requiera X X X 106 MSA 160 C, MSA 200 C - Stihl MSA 200 C-BQ | Instruction Manual - Page 109
de tope 11 Tapa de llenado de aceite 12 Protector delantero de la mano 13 Mango delantero (manillar) 14 Bloqueo del gatillo 15 Gatillo 16 Mango trasero 17 Protector trasero de la mano 18 Lengüetas de traba ) del cargador 24 Cordón eléctrico N.º Número de serie 3999BA023 KN MSA 160 C, MSA 200 C 107 - Stihl MSA 200 C-BQ | Instruction Manual - Page 110
manillar) Barra de empuñadura para la mano izquierda ubicada en la parte delantera de la sierra. 14. Bloqueo del gatillo Hay que oprimirlo antes de poder activar el gatillo. 15. Gatillo Apaga y enciende . 24. Cordón eléctrico Suministra corriente eléctrica al cargador. 108 MSA 160 C, MSA 200 C - Stihl MSA 200 C-BQ | Instruction Manual - Page 111
100 % de capacidad: con AP 180: - hasta el 80 % de capacidad: - hasta el 100 % de capacidad: AL 500 con AP 80: - hasta el 80 % de capacidad: - hasta el 100 % de capacidad: 25 min 50 min 25 min 55 min 35 min 60 min 40 min 70 min 25 min 50 min MSA 160 C, MSA 200 C 109 - Stihl MSA 200 C-BQ | Instruction Manual - Page 112
Por lo general, el usuario no necesita cumplir con ninguna condición adicional para poder transportar baterías STIHL por carretera hasta el sitio donde se encuentra la herramienta eléctrica. Verifique y respete cualquier norma especial que pudiera aplicarse a su situación. 110 MSA 160 C, MSA 200 C - Stihl MSA 200 C-BQ | Instruction Manual - Page 113
, se recomienda al usuario a corregir manual, puesto que el hacerlo podría anular la autoridad de usarlo. español / EE.UU Accesorios especiales Comuníquese con su concesionario STIHL para información acerca de accesorios especiales que pueden estar disponibles para su producto. MSA 160 C, MSA 200 - Stihl MSA 200 C-BQ | Instruction Manual - Page 114
á el pedido. La espada y la cadena de aserrado están expuestas a desgaste normal. Al comprar estas piezas, indique siempre el modelo de la sierra y los números y nombres "Especificaciones", en este manual, para los accesorios de corte de contragolpe reducido recomendados. 112 MSA 160 C, MSA 200 C - Stihl MSA 200 C-BQ | Instruction Manual - Page 115
máquina están excesivamente que la batería y la máquina se enfríen calientes Avería de tipo eléctrico o electromagnético Retire la batería y vuélvala a insertar MSA 160 C, MSA 200 C 113 - Stihl MSA 200 C-BQ | Instruction Manual - Page 116
ía se atora al insertarla en la STIHL para servicio Retire la batería de la máquina y vuélvala a insertar. Encienda la máquina - si los LED continúan destellando, la batería está averiada y hay que reemplazarla Solicite al concesionario de servicio1) que revise el cargador 114 MSA 160 C, MSA 200 - Stihl MSA 200 C-BQ | Instruction Manual - Page 117
descritos en este manual. STIHL recomienda que un concesionario de servicio STIHL efectúe los dem al cuidado del medio ambiente. Comuníquese con un concesionario de servicio de STIHL para obtener la información más actualizada sobre la eliminación de desechos. 000BA073 KN MSA 160 C, MSA 200 - Stihl MSA 200 C-BQ | Instruction Manual - Page 118
™ STIHL RAPID ™ STIHL SuperCut ™ STIHL Territory ™ TapAction ™ TrimCut ™ Esta lista de marcas comerciales está sujeta a cambios. Queda terminantemente prohibido todo uso de estas marcas comerciales sin el consentimiento expreso por escrito de ANDREAS STIHL AG & Co. KG, Waiblingen. MSA 160 C, MSA 200 - Stihl MSA 200 C-BQ | Instruction Manual - Page 119
Direcciones STIHL Inc. 536 Viking Drive P.O. Box 2015 Virginia Beach, VA 23452-2015 español / EE.UU MSA 160 C, MSA 200 C 117 - Stihl MSA 200 C-BQ | Instruction Manual - Page 120
to the State of California to cause cancer, birth defects or other reproductive harm. 0458-701-8621-B eenngglliisscchh // ssppaanniisscchh UUSSAA U G U www.stihl.com ADVERTENCIA Este producto contiene sustancias químicas consideradas por el Estado de California como causantes de cáncer, defectos de
-
 1
1 -
 2
2 -
 3
3 -
 4
4 -
 5
5 -
 6
6 -
 7
7 -
8
-
9
-
10
-
11
-
12
-
13
-
14
-
15
-
16
-
17
-
18
-
19
-
20
-
21
-
22
-
23
-
24
-
25
-
26
-
27
-
28
-
29
-
30
-
31
-
32
-
33
-
34
-
35
-
36
-
37
-
38
-
39
-
40
-
41
-
42
-
43
-
44
-
45
-
46
-
47
-
48
-
49
-
50
-
51
-
52
-
53
-
54
-
55
-
56
-
57
-
58
-
59
-
60
-
61
-
62
-
63
-
64
-
65
-
66
-
67
-
68
-
69
-
70
-
71
-
72
-
73
-
74
-
75
-
76
-
77
-
78
-
79
-
80
-
81
-
82
-
83
-
84
-
85
-
86
-
87
-
88
-
89
-
90
-
91
-
92
-
93
-
94
-
95
-
96
-
97
-
98
-
99
-
100
-
101
-
102
-
103
-
104
-
105
-
106
-
107
-
108
-
109
-
110
-
111
-
112
-
113
-
114
-
115
-
116
-
117
-
118
-
119
-
120
 |
 |
{
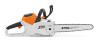
STIHL MSA 160 C, 200 C
WARNING
To reduce the risk of
kickback injury use STIHL reduced kickback bar
and STIHL low kickback chain as specified in
this manual or other available low kickback
components.
ADVERTENCIA
Para reducir el
riesgo de lesionarse como resultado de un
culatazo, utilice la barra y la cadena de
contragolpe reducido de la forma especificada
en este manual o de otros componentes
reductores de contragolpe.
Read Instruction Manual thoroughly before
use and follow all safety precautions –
improper use can cause serious or fatal injury.
Antes de usar la máquina lea y siga todas las precauciones
de seguridad dadas en el manual de instrucciones – el uso
incorrecto puede causar lesiones graves o mortales.
Instruction Manual
Manual de instrucciones