TP-Link AC750 Archer C20i V1 User Guide - Page 63
Archer C20i, Step 2, Step 3, Step 4, Enter the client device's PIN on the router, Step 1, Enabled,
 |
View all TP-Link AC750 manuals
Add to My Manuals
Save this manual to your list of manuals |
Page 63 highlights
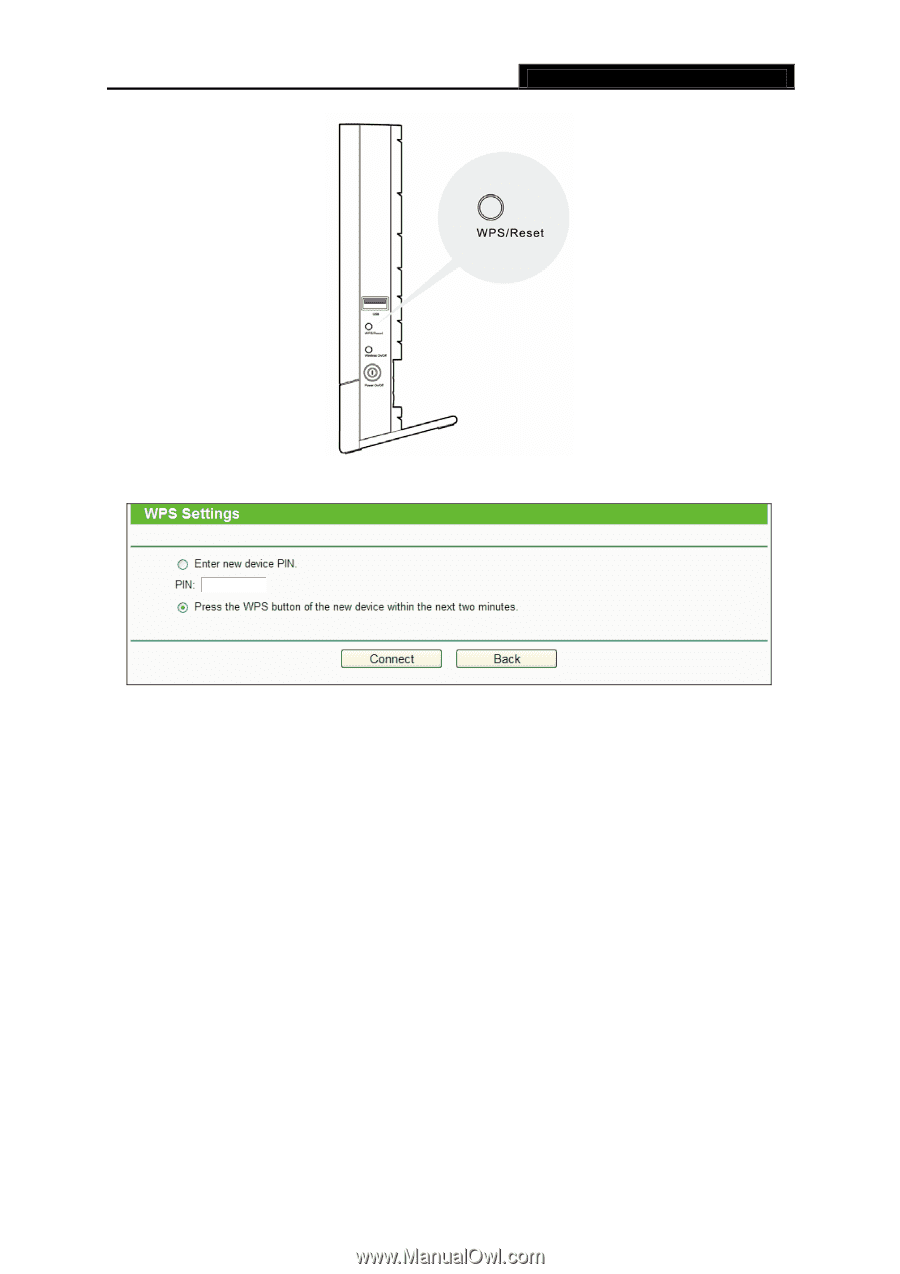
Archer C20i AC750 Wireless Dual Band Router Figure 4-32 Figure 4-33 Add A New Device Step 2: Press and hold the WPS button of the client device directly. Step 3: The Wi-Fi Protected Setup LED flashes for two minutes during the Wi-Fi Protected Setup process. Step 4: When the WPS LED is on, the client device has successfully connected to the router. II. Enter the client device's PIN on the router Use this method if your client device does not have the WPS button, but has a Wi-Fi Protected Setup PIN number. Step 1: Keep the default WPS status as Enabled and click the Add device button in Figure 4-31, then Figure 4-34 will appear. - 52 -
-
 1
1 -
2
-
3
-
4
-
5
-
6
-
7
-
8
-
9
-
10
-
11
-
12
-
13
-
14
-
15
-
16
-
17
-
18
-
19
-
20
-
21
-
22
-
23
-
24
-
25
-
26
-
27
-
28
-
29
-
30
-
31
-
32
-
33
-
34
-
35
-
36
-
37
-
38
-
39
-
40
-
41
-
42
-
43
-
44
-
45
-
46
-
47
-
48
-
49
-
50
-
51
-
52
-
53
-
54
-
55
-
56
-
57
-
 58
58 -
 59
59 -
 60
60 -
 61
61 -
 62
62 -
 63
63 -
 64
64 -
 65
65 -
 66
66 -
 67
67 -
 68
68 -
69
-
70
-
71
-
72
-
73
-
74
-
75
-
76
-
77
-
78
-
79
-
80
-
81
-
82
-
83
-
84
-
85
-
86
-
87
-
88
-
89
-
90
-
91
-
92
-
93
-
94
-
95
-
96
-
97
-
98
-
99
-
100
-
101
-
102
-
103
-
104
-
105
-
106
-
107
-
108
-
109
-
110
-
111
-
112
-
113
-
114
-
115
-
116
-
117
-
118
-
119
-
120
-
121
-
122
-
123
-
124
-
125
-
126
-
127
-
128
-
129
-
130
-
131
-
132
-
133
-
134
-
135
-
136
-
137
-
138
-
139
-
140
-
141
-
142
 |
 |
Archer C20i
AC750 Wireless Dual Band Router
- 52 -
Figure 4-32
Figure 4-33 Add A New Device
Step 2:
Press and hold the WPS button of the client device directly.
Step 3:
The Wi-Fi Protected Setup LED flashes for two minutes during the Wi-Fi Protected Setup
process.
Step 4:
When the WPS LED is on, the client device has successfully connected to the router.
II.
Enter the client device’s PIN on the router
Use this method if your client device does not have the WPS button, but has a Wi-Fi Protected
Setup PIN number.
Step 1:
Keep the default WPS status as
Enabled
and click the
Add device
button in Figure 4-31,
then Figure 4-34 will appear.