TP-Link TD-VG5612 TD-VG5612 V1 User Guide - Page 21
Quick Installation Guide, Quick Setup
 |
View all TP-Link TD-VG5612 manuals
Add to My Manuals
Save this manual to your list of manuals |
Page 21 highlights
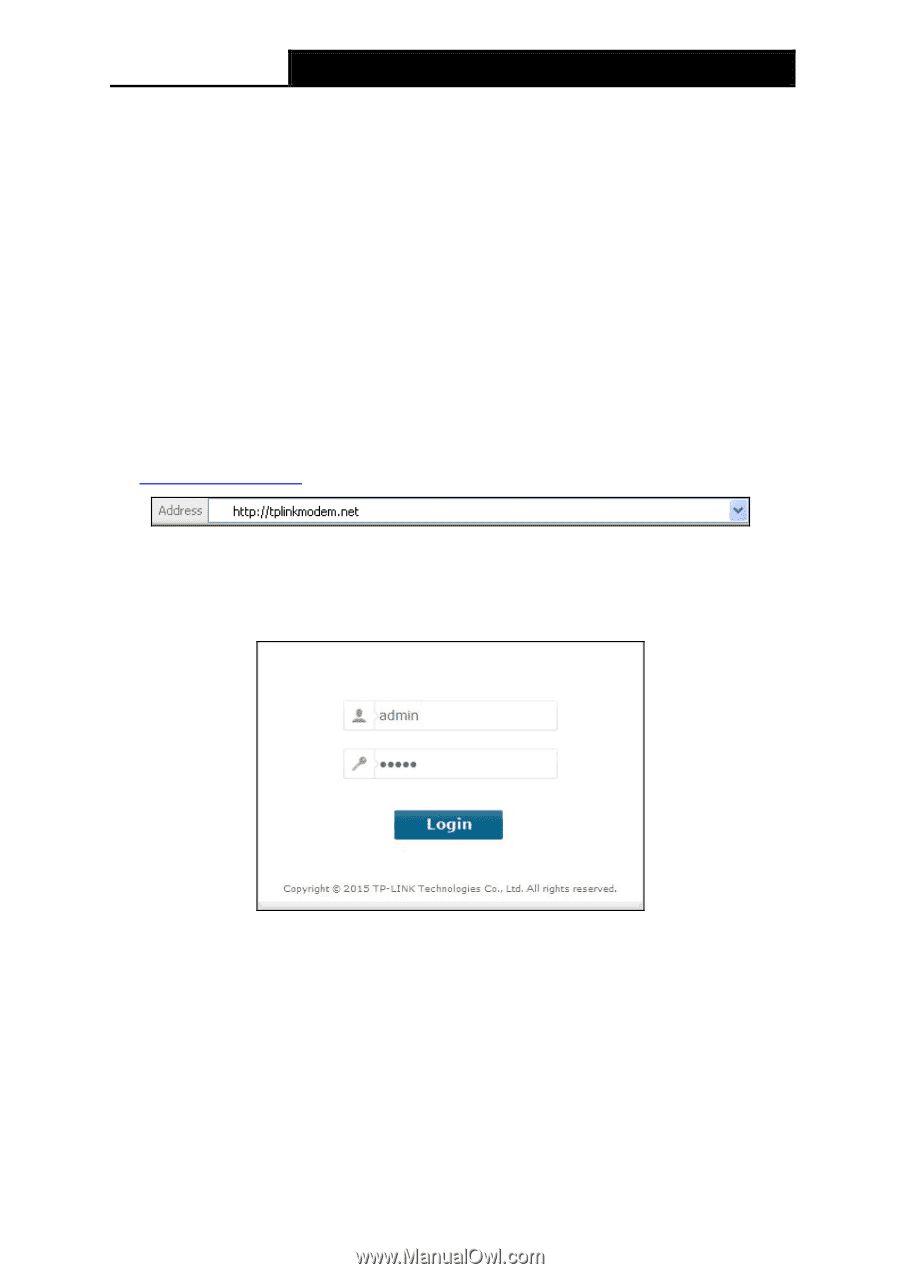
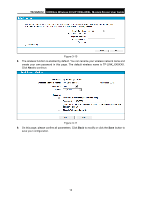
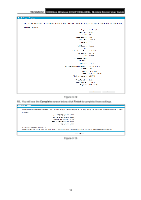
TD-VG5612 300Mbps Wireless N VoIP VDSL/ADSL Modem Router User Guide You can check it following the steps below: 1) Is the connection between your PC and the modem router correct? The LEDs of LAN port which you link to the device and the LEDs on your PC's adapter should be lit. 2) Is the TCP/IP configuration for your PC correct? If the modem router's IP address is 192.168.1.1, your PC's IP address must be within the range of 192.168.1.2 ~ 192.168.1.254. 3.2 Quick Installation Guide With a Web-based management page, it is easy to configure and manage the TD-VG5612 300Mbps Wireless N VoIP VDSL/ADSL Modem Router. The Web-based management page can be used on any Windows, Macintosh or UNIX OS with a Web browser, such as Microsoft Internet Explorer, Mozilla Firefox or Apple Safari. 1. To access the configuration utility, open a web-browser and type the default address http://tplinkmodem.net/ in the address field of the browser. Figure 3-3 After a moment, a login window will appear, similar to the Figure 3-4. Enter admin for the User Name and Password, both in lower case letters. Then click the Login button or press the Enter key. Figure 3-4 Note: 1) Do not mix up the user name and password with your DSL account user name and password which are needed for PPP connections. 2) If the above screen does not pop up, it means that your Web-browser has been set to a proxy. Go to Tools menu→Internet Options→Connections→LAN Settings, in the screen that appears, cancel the Using Proxy checkbox, and click OK to finish it. 2. After your successful login, you will see the Login screen as shown in Figure 3-5. Click Quick Setup menu to access Quick Setup Wizard and then click Next. 10
-
 1
1 -
2
-
3
-
4
-
5
-
6
-
7
-
8
-
9
-
10
-
11
-
12
-
13
-
14
-
15
-
 16
16 -
 17
17 -
 18
18 -
 19
19 -
 20
20 -
 21
21 -
 22
22 -
 23
23 -
 24
24 -
 25
25 -
 26
26 -
27
-
28
-
29
-
30
-
31
-
32
-
33
-
34
-
35
-
36
-
37
-
38
-
39
-
40
-
41
-
42
-
43
-
44
-
45
-
46
-
47
-
48
-
49
-
50
-
51
-
52
-
53
-
54
-
55
-
56
-
57
-
58
-
59
-
60
-
61
-
62
-
63
-
64
-
65
-
66
-
67
-
68
-
69
-
70
-
71
-
72
-
73
-
74
-
75
-
76
-
77
-
78
-
79
-
80
-
81
-
82
-
83
-
84
-
85
-
86
-
87
-
88
-
89
-
90
-
91
-
92
-
93
-
94
-
95
-
96
-
97
-
98
-
99
-
100
-
101
-
102
-
103
-
104
-
105
-
106
-
107
-
108
-
109
-
110
-
111
-
112
-
113
-
114
-
115
-
116
-
117
-
118
-
119
-
120
-
121
-
122
-
123
-
124
-
125
-
126
-
127
-
128
-
129
-
130
-
131
-
132
-
133
-
134
-
135
-
136
-
137
-
138
-
139
-
140
-
141
-
142
-
143
-
144
-
145
 |
 |