TP-Link TL-R4299G User Guide - Page 33
Additional IP Address dispatch rules - port forwarding
 |
UPC - 845973040260
View all TP-Link TL-R4299G manuals
Add to My Manuals
Save this manual to your list of manuals |
Page 33 highlights
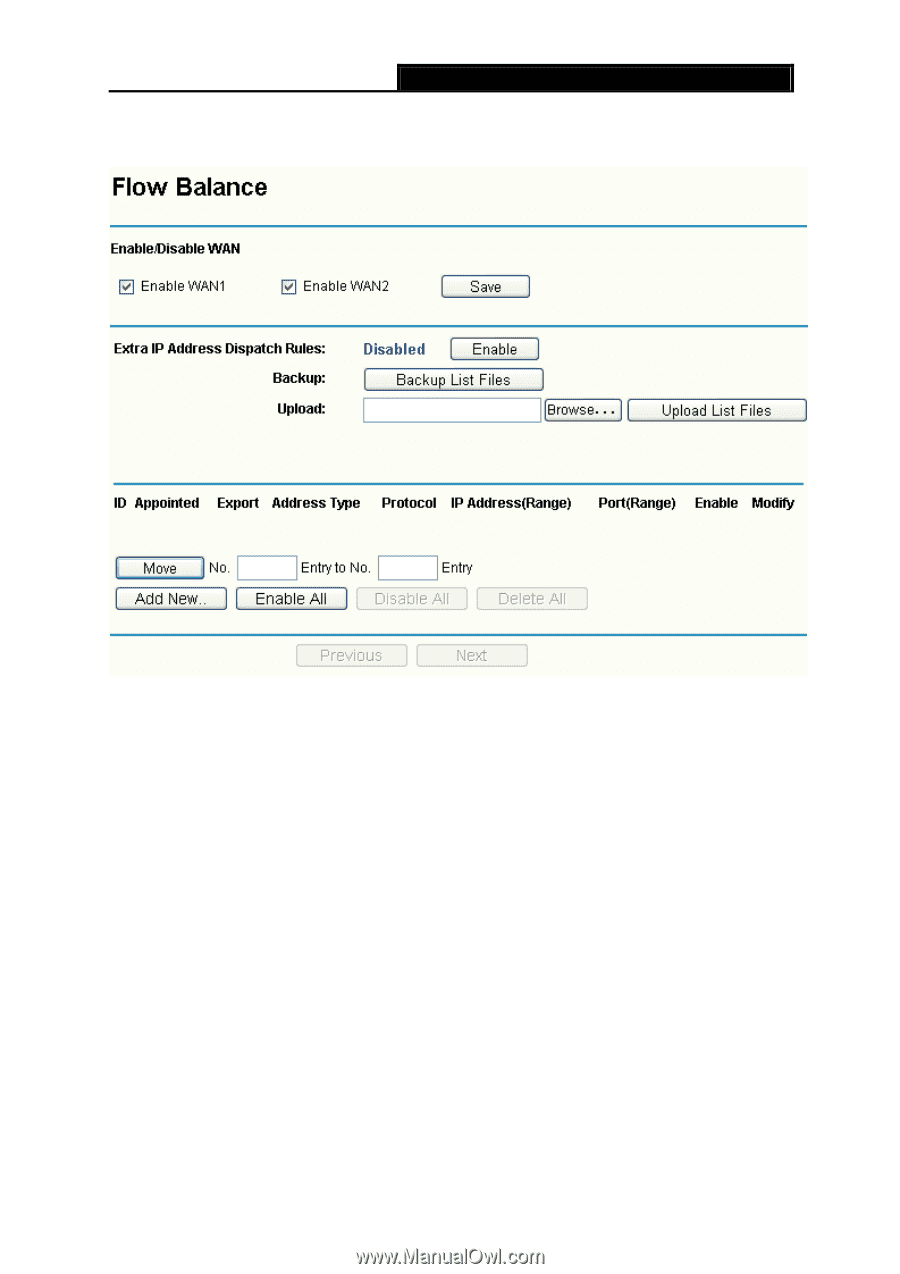
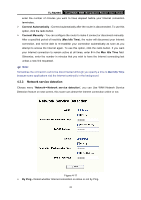
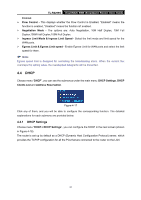
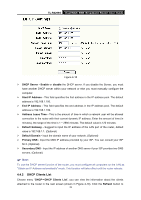
TL-R4299G Dual-WAN SMB Broadband Router User Guide ISPs. For example, you can specify some packets prior forwarding from WAN port 1, which depend on specified source or destination IP addresses. Figure 4-13 ¾ Enable/Disable WAN - Enable the WAN port you want to use, then click Save to make it effective. ¾ Additional IP Address dispatch rules - Enable the function and then make the dispatch rules. ¾ Backup - Click the button to backup the list files. ¾ Upload - Click the button to upload an existed file. You can click Browse to locate the specific file first, and then click the Upload List Files to complete the process. ¾ Rules list - This table displays the current dispatch rules. To add a dispatch rule: Step 1: Click Add New button shown in Figure 4-13, you will see a new screen shown in Figure 4-14. Step 2: Select the Rules select, protocol, Datagram Pass Policy and Transmit Path, enter IP address and Port like the next screen shows. 27
-
 1
1 -
2
-
3
-
4
-
5
-
6
-
7
-
8
-
9
-
10
-
11
-
12
-
13
-
14
-
15
-
16
-
17
-
18
-
19
-
20
-
21
-
22
-
23
-
24
-
25
-
26
-
27
-
 28
28 -
 29
29 -
 30
30 -
 31
31 -
 32
32 -
 33
33 -
 34
34 -
 35
35 -
 36
36 -
 37
37 -
 38
38 -
39
-
40
-
41
-
42
-
43
-
44
-
45
-
46
-
47
-
48
-
49
-
50
-
51
-
52
-
53
-
54
-
55
-
56
-
57
-
58
-
59
-
60
-
61
-
62
-
63
-
64
-
65
-
66
-
67
-
68
-
69
-
70
-
71
-
72
-
73
-
74
-
75
-
76
-
77
-
78
-
79
-
80
-
81
-
82
-
83
-
84
-
85
-
86
 |
 |