Toshiba Qosmio F60 PQF65C-00M02D Users Manual Canada; English - Page 46
Touch Pad On/Off, LCD Sensor switch
 |
View all Toshiba Qosmio F60 PQF65C-00M02D manuals
Add to My Manuals
Save this manual to your list of manuals |
Page 46 highlights
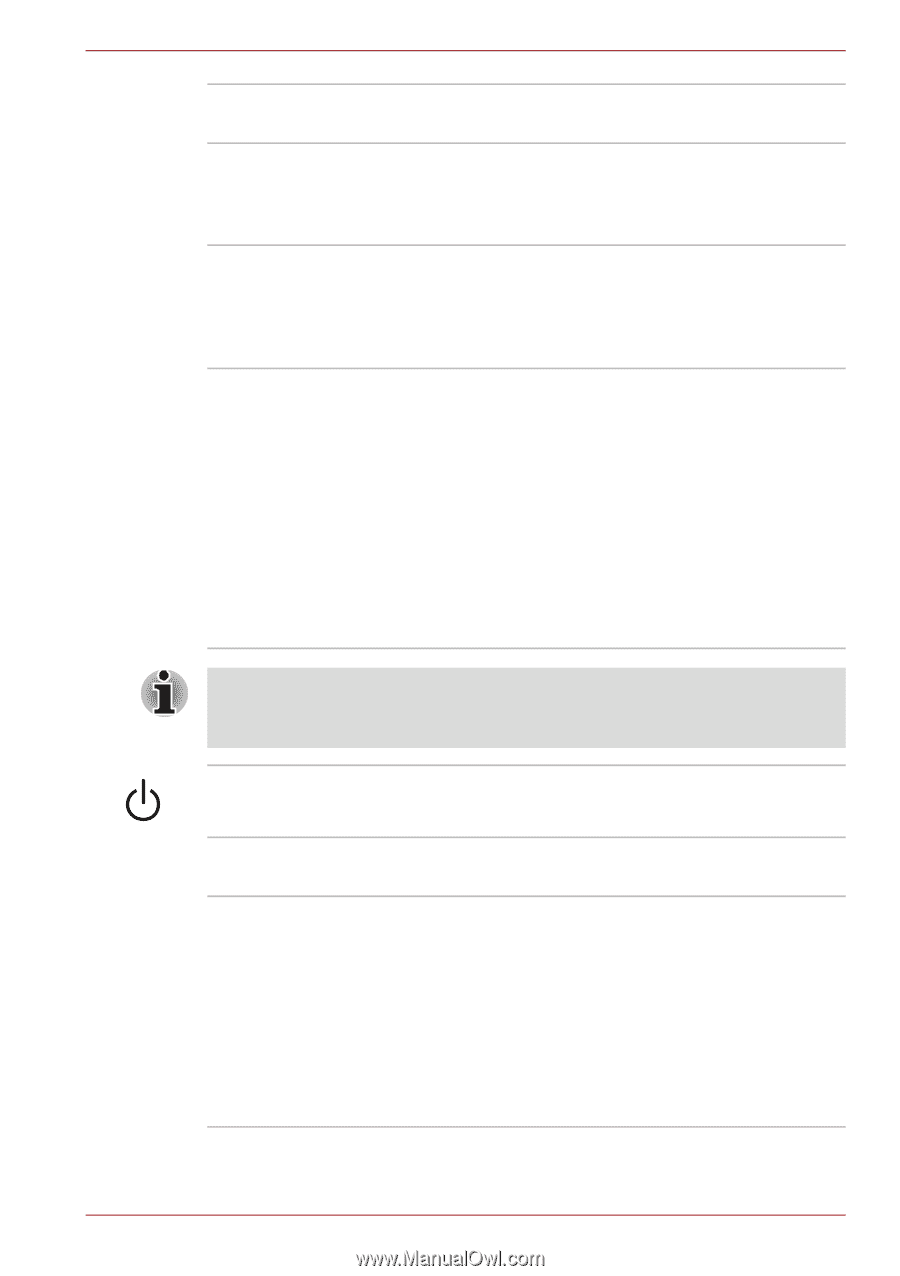
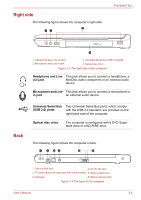
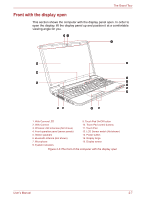
The Grand Tour Touch Pad On/Off button Touch Pad control buttons Touch Pad LCD Sensor switch Press this button to enable or disable the Touch Pad function. The control buttons located below the Touch Pad allow you to select menu items or manipulate text and graphics as designated by the on-screen pointer. The Touch Pad located in the center of the palm rest is used to control the movement of the onscreen pointer. For more information, please refer to the Using the Touch Pad section in Chapter 4, Operating Basics. This switch senses when the display panel is either closed or opened and activates the Panel Power Off/On feature as appropriate. For example, when you close the display panel the computer enters Hibernation Mode and shuts itself down and then, when you next open the display, the computer will automatically start up and return you to the application you were previously working on. You can specify within the Power Options. To access it, click Start -> Control Panel -> System and Security -> Power Options. Do not put any magnetic objects close to this switch as they may cause the computer to automatically enter Hibernation Mode and shut down even if the Panel Power Off feature is disabled. Power button Display hinge Display screen Press this button to turn the computer's power on and off. The display hinge allows the display panel to be position at a variety of easy-to-view angles. Please be aware that, when the computer is operating on the AC adaptor, the image displayed on the internal screen will be somewhat brighter than when it operates on battery power. This difference in brightness levels is intended to save power when operating on batteries. For more information on the computer's display, please refer to the Display Controller and Video mode section in Appendix B. User's Manual 2-9
-
 1
1 -
2
-
3
-
4
-
5
-
6
-
7
-
8
-
9
-
10
-
11
-
12
-
13
-
14
-
15
-
16
-
17
-
18
-
19
-
20
-
21
-
22
-
23
-
24
-
25
-
26
-
27
-
28
-
29
-
30
-
31
-
32
-
33
-
34
-
35
-
36
-
37
-
38
-
39
-
40
-
 41
41 -
 42
42 -
 43
43 -
 44
44 -
 45
45 -
 46
46 -
 47
47 -
 48
48 -
 49
49 -
 50
50 -
 51
51 -
52
-
53
-
54
-
55
-
56
-
57
-
58
-
59
-
60
-
61
-
62
-
63
-
64
-
65
-
66
-
67
-
68
-
69
-
70
-
71
-
72
-
73
-
74
-
75
-
76
-
77
-
78
-
79
-
80
-
81
-
82
-
83
-
84
-
85
-
86
-
87
-
88
-
89
-
90
-
91
-
92
-
93
-
94
-
95
-
96
-
97
-
98
-
99
-
100
-
101
-
102
-
103
-
104
-
105
-
106
-
107
-
108
-
109
-
110
-
111
-
112
-
113
-
114
-
115
-
116
-
117
-
118
-
119
-
120
-
121
-
122
-
123
-
124
-
125
-
126
-
127
-
128
-
129
-
130
-
131
-
132
-
133
-
134
-
135
-
136
-
137
-
138
-
139
-
140
-
141
-
142
-
143
-
144
-
145
-
146
-
147
-
148
-
149
-
150
-
151
-
152
-
153
-
154
-
155
-
156
-
157
-
158
-
159
-
160
-
161
-
162
-
163
-
164
-
165
-
166
-
167
-
168
-
169
-
170
-
171
-
172
-
173
-
174
-
175
-
176
-
177
-
178
-
179
-
180
-
181
-
182
-
183
-
184
-
185
-
186
-
187
-
188
-
189
-
190
-
191
-
192
-
193
-
194
-
195
-
196
-
197
-
198
-
199
-
200
-
201
-
202
-
203
-
204
-
205
-
206
-
207
-
208
-
209
-
210
-
211
-
212
-
213
-
214
-
215
-
216
-
217
-
218
-
219
-
220
-
221
-
222
-
223
-
224
-
225
-
226
-
227
-
228
-
229
-
230
-
231
-
232
-
233
-
234
-
235
-
236
-
237
-
238
-
239
 |
 |