Toshiba SD5970 Owners Manual - Page 20
Connecting, Continued
 |
View all Toshiba SD5970 manuals
Add to My Manuals
Save this manual to your list of manuals |
Page 20 highlights
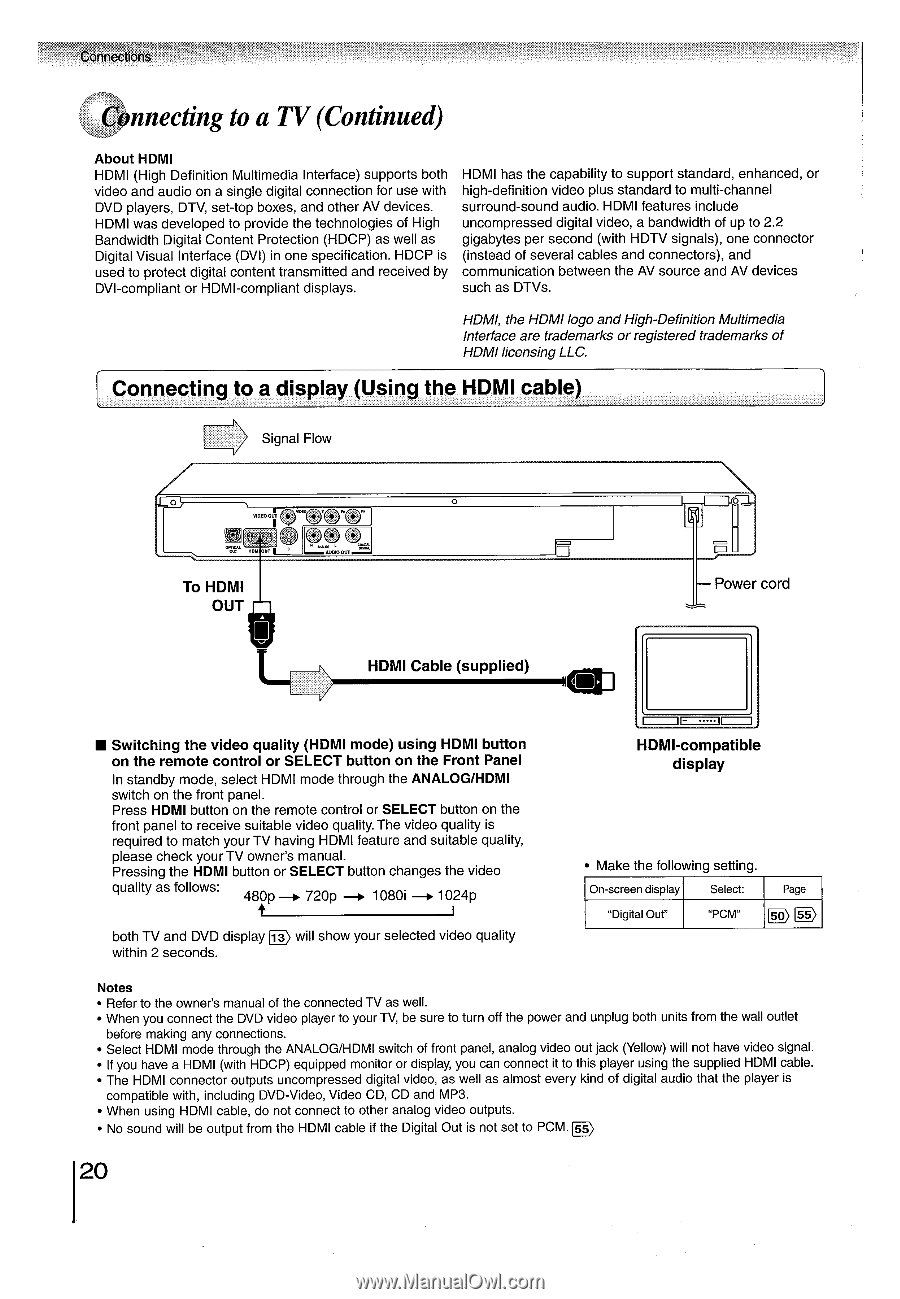
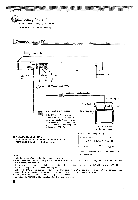
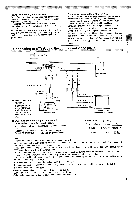
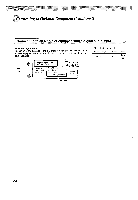
Connecting to a TV (Continued) About HDMI HDMI (High Definition Multimedia Interface) supports both video and audio on a single digital connection for use with DVD players, DTV, set-top boxes, and other AV devices. HDMI was developed to provide the technologies of High Bandwidth Digital Content Protection (HDCP) as well as Digital Visual Interface (DVI) in one specification. HDCP is used to protect digital content transmitted and received by DVI-compliant or HDMI-compliant displays. HDMI has the capability to support standard, enhanced, or high-definition video plus standard to multi-channel surround-sound audio. HDMI features include uncompressed digital video, a bandwidth of up to 2.2 gigabytes per second (with HDTV signals), one connector (instead of several cables and connectors), and communication between the AV source and AV devices such as DTVs. HDMI, the HDMI logo andHigh-Definition Multimedia Interface are trademarks or registered trademarks of HDMI licensing LLC. Connecting to a display Using the HDMI cable) Signal Flow To HDMI OUT HDMI Cable (supplied) - Power cord ■ Switching the video quality (HDMI mode) using HDMI button on the remote control or SELECT button on the Front Panel In standby mode, select HDMI mode through the ANALOG/HDMI switch on the front panel. Press HDMI button on the remote control or SELECT button on the front panel to receive suitable video quality. The video quality is required to match your TV having HDMI feature and suitable quality, please check your TV owner's manual. Pressing the HDMI button or SELECT button changes the video quality as follows: 480p -* 720p 1080i 1024p both TV and DVD display is , will show your selected video quality within 2 seconds. HDMI-compatible display • Make the following setting. On-screen display Select: Page "Digital Out" "PCM" L>55 Notes • Refer to the owner's manual of the connected TV as well. • When you connect the DVD video player to your TV, be sure to turn off the power and unplug both units from the wall outlet before making any connections. • Select HDMI mode through the ANALOG/HDMI switch of front panel, analog video out jack (Yellow) will not have video signal. • If you have a HDMI (with HDCP) equipped monitor or display, you can connect it to this player using the supplied HDMI cable. • The HDMI connector outputs uncompressed digital video, as well as almost every kind of digital audio that the player is compatible with, including DVD-Video, Video CD, CD and MP3. • When using HDMI cable, do not connect to other analog video outputs. • No sound will be output from the HDMI cable if the Digital Out is not set to PCM. ss 20
-
 1
1 -
2
-
3
-
4
-
5
-
6
-
7
-
8
-
9
-
10
-
11
-
12
-
13
-
14
-
 15
15 -
 16
16 -
 17
17 -
 18
18 -
 19
19 -
 20
20 -
 21
21 -
 22
22 -
 23
23 -
 24
24 -
 25
25 -
26
-
27
-
28
-
29
-
30
-
31
-
32
-
33
-
34
-
35
-
36
-
37
-
38
-
39
-
40
-
41
-
42
-
43
-
44
-
45
-
46
-
47
-
48
-
49
-
50
-
51
-
52
-
53
-
54
-
55
-
56
-
57
-
58
-
59
-
60
-
61
-
62
-
63
-
64
-
65
-
66
-
67
-
68
-
69
-
70
-
71
-
72
-
73
-
74
 |
 |