Toshiba TLP-250 Owners Manual - Page 18
Floor-mounted projector placement continued
 |
View all Toshiba TLP-250 manuals
Add to My Manuals
Save this manual to your list of manuals |
Page 18 highlights
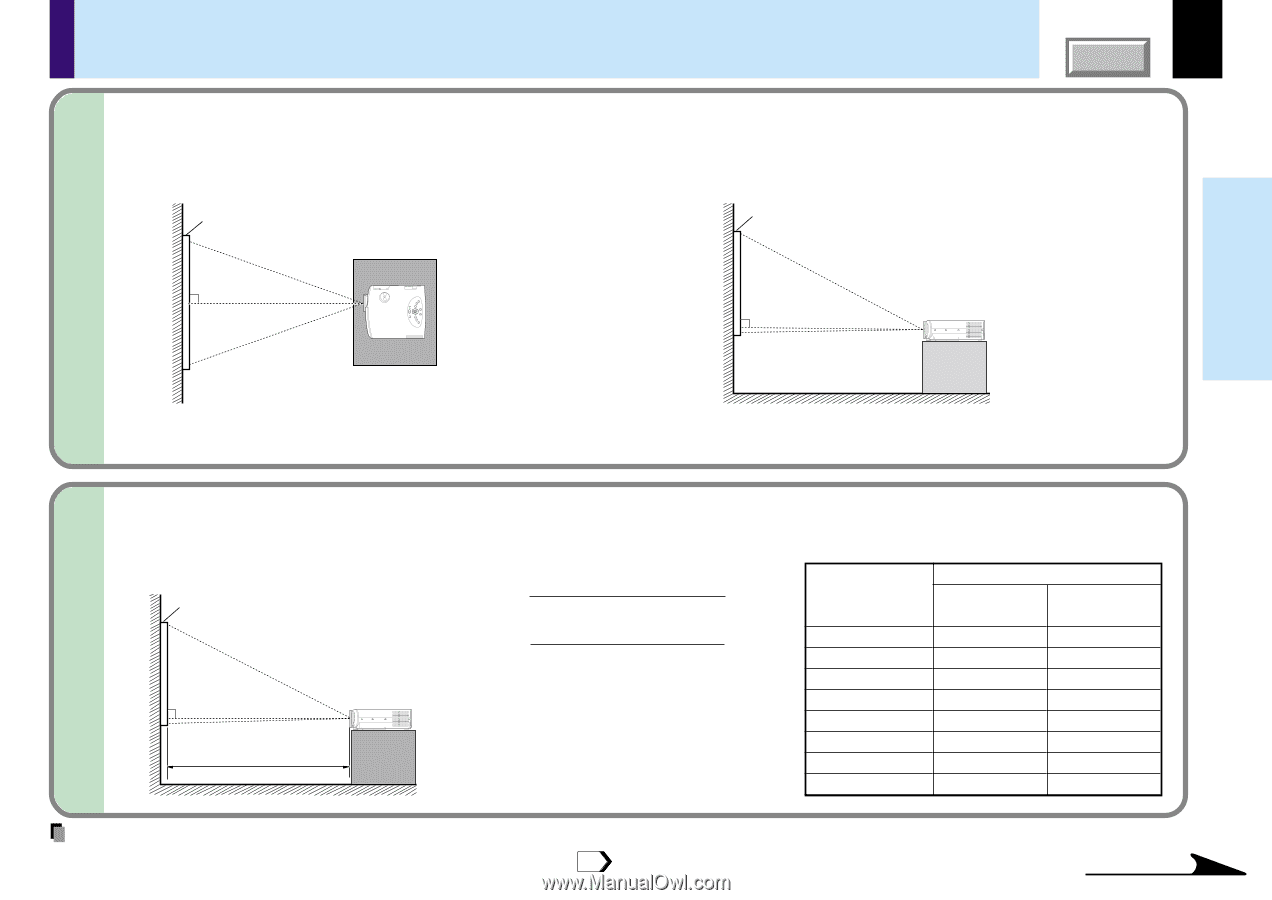
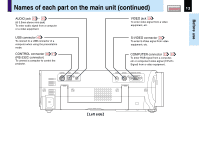
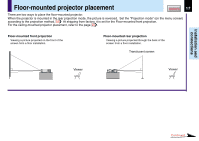
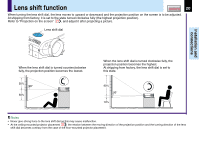
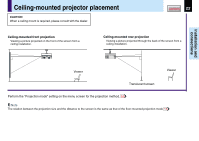
Floor-mounted projector placement (continued) 1 Place the projector on a steady, level surface such as a table. To obtain proper screen projection, place the projector so that the light beam hits the screen squarely. Top view Side view Screen Screen 90° KEYSTONE ON / STANDBY ON LAMP TEMP FAN ENTER EXIT AUTO SET VOL / ADJ 90° CONTENTS 18 Installation and connections MENU INPUT Point the lens straight at the center of the screen as above. Place the projector horizontally so that the projecting light hits the screen squarely. 2 Determine the screen size projected on the screen. The projection size depends on the distance between the lens and the screen. Adjust the projection size by changing the distances as shown below. Screen Projection size x 20.32 - 31 a (min.) = 1000 Projection size x 24.38 - 32 a (max.) = 1000 a: Distance between the lens and the screen (m) 90° Limit: 0.70m < a < 3.63m a • The values are approximations. Projection size (inches) 30 36 50 80 100 120 150 180 a (m) Minimum Maximum (At maximum zoom) (At minimum zoom) - 0.70 0.70 0.85 0.98 1.19 1.59 1.92 2.00 2.41 2.41 2.89 3.02 3.63 3.63 - Note You can adjust the vertical projection position with the lens shift dial. 20 Continued
-
 1
1 -
2
-
3
-
4
-
5
-
6
-
7
-
8
-
9
-
10
-
11
-
12
-
 13
13 -
 14
14 -
 15
15 -
 16
16 -
 17
17 -
 18
18 -
 19
19 -
 20
20 -
 21
21 -
 22
22 -
 23
23 -
24
-
25
-
26
-
27
-
28
-
29
-
30
-
31
-
32
-
33
-
34
-
35
-
36
-
37
-
38
-
39
-
40
-
41
-
42
-
43
-
44
-
45
-
46
-
47
-
48
-
49
-
50
-
51
-
52
-
53
-
54
-
55
-
56
-
57
-
58
-
59
-
60
-
61
-
62
-
63
-
64
-
65
-
66
-
67
-
68
-
69
-
70
-
71
-
72
-
73
-
74
-
75
-
76
-
77
 |
 |