Toshiba TLP-250 Owners Manual - Page 31
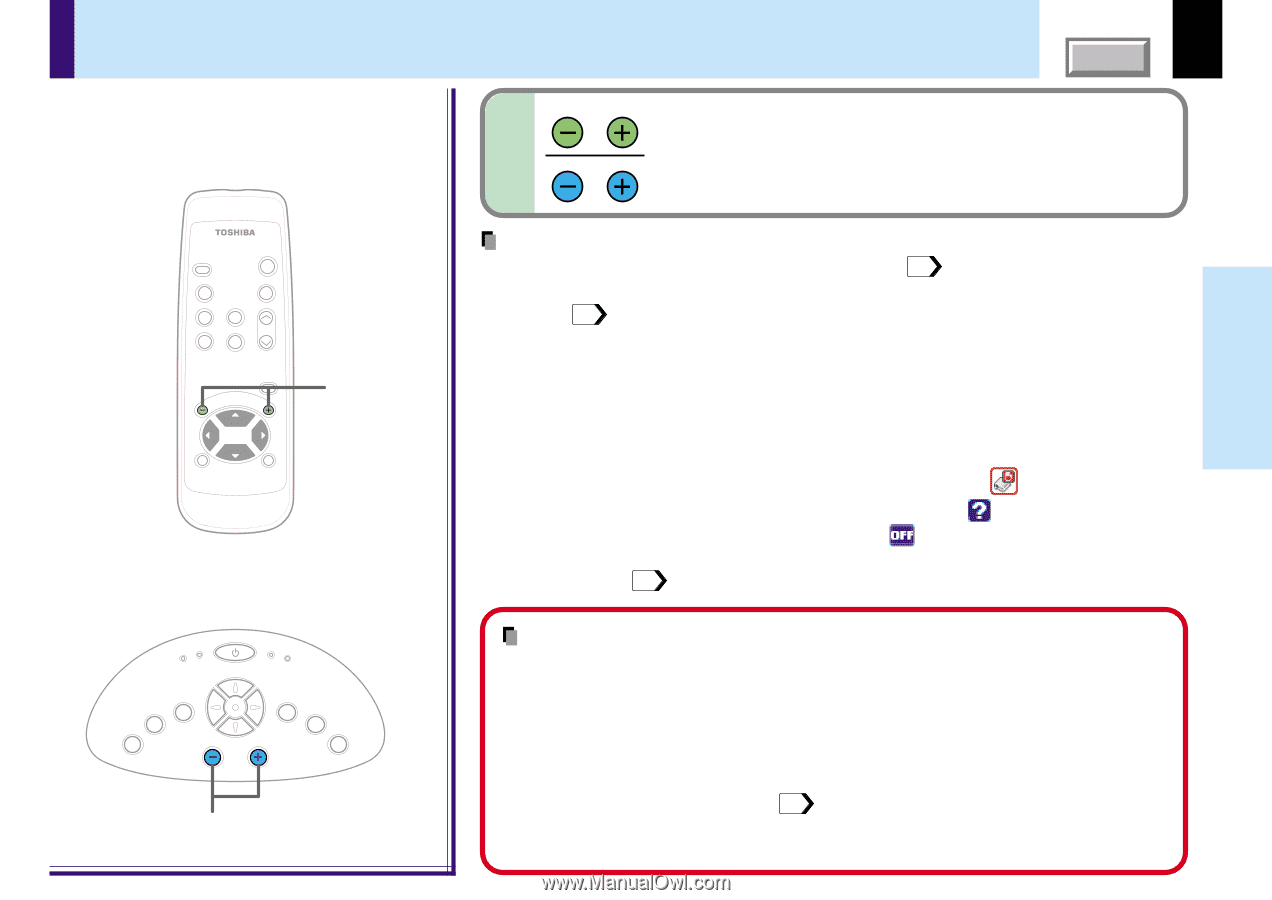
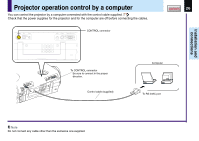
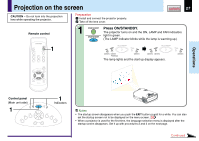
Press VOL/ADJ, to adjust volume., Remote control, Control panel
 |
View all Toshiba TLP-250 manuals
Add to My Manuals
Save this manual to your list of manuals |
Page 31 highlights
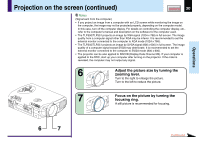
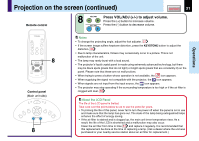
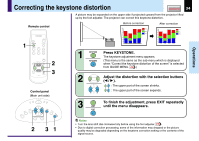
Projection on the screen (continued) CONTENTS 31 Remote control 8 VOL/ADJ Press VOL/ADJ (+/-) to adjust volume. Press the (+) button to increase volume. VOL/ADJ Press the (-) button to decrease volume. Operations KEYSTONE INPUT KEYSTONE ON / STANDBY AUTO SET FREEZE MUTE PIP CALL RESIZE MENU VOL / ADJ 8 ENTER CT-90106 EXIT / P.MODE Control panel (Main unit side) ON LAMP ON / STANDBY TEMP FAN MENU ENTER VOL / ADJ EXIT AUTO SET 8 Notes • To change the projecting angle, adjust the foot adjuster. 21 • If the screen image suffers keystone distortion, press the KEYSTONE button to adjust the distortion. 34 • Due to lamp characteristics, flickers may occasionally occur in a picture. This is not malfunction of the unit. • The lamp may rarely burst with a loud sound. • The projector's liquid crystal panel is made using extremely advanced technology, but there may be black spots (pixels that do not light) or bright spots (pixels that are constantly lit) on the panel. Please note that these are not malfunctions. • When trying to press a button whose operation is not available, the icon appears. • When supplying the signal not compatible with the projector, the icon appears. • When signals are not input from the input source, the icon appears. • The projector may stop operating if the surrounding temperature is too high or if the air filter is clogged with dust. 60 About the LCD Panel The life of the LCD panel is limited. Take care over the points below so as to use the panel for years. • To prolong the life of this panel, never fail to turn the power off when the panel is not in use and make sure that the lamp has gone out. The state of the lamp being extinguished helps enhance the effect of energy saving. • If the air filter is stained and is clogged up, the main unit inner temperature rises. As a result, the life of the LCD is shortened and a malfunction may also occur. Clean the air filter from time to time 61 and replace it regularly. It is recommended that this replacement be done at the time of replacing a lamp. (Ask a dealer where the unit was purchased or your nearby service station about an air filter for replacement.) INPUT
-
 1
1 -
2
-
3
-
4
-
5
-
6
-
7
-
8
-
9
-
10
-
11
-
12
-
13
-
14
-
15
-
16
-
17
-
18
-
19
-
20
-
21
-
22
-
23
-
24
-
25
-
 26
26 -
 27
27 -
 28
28 -
 29
29 -
 30
30 -
 31
31 -
 32
32 -
 33
33 -
 34
34 -
 35
35 -
 36
36 -
37
-
38
-
39
-
40
-
41
-
42
-
43
-
44
-
45
-
46
-
47
-
48
-
49
-
50
-
51
-
52
-
53
-
54
-
55
-
56
-
57
-
58
-
59
-
60
-
61
-
62
-
63
-
64
-
65
-
66
-
67
-
68
-
69
-
70
-
71
-
72
-
73
-
74
-
75
-
76
-
77
 |
 |