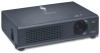
ViewSonic PJ452 Service Manual - Page 39
Notice
 |
UPC - 766907174311
View all ViewSonic PJ452 manuals
Add to My Manuals
Save this manual to your list of manuals |
Page 39 highlights
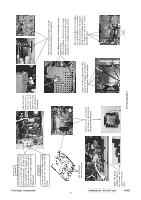
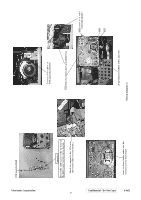
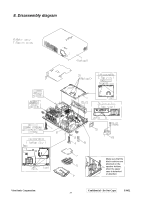
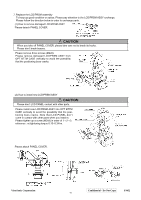
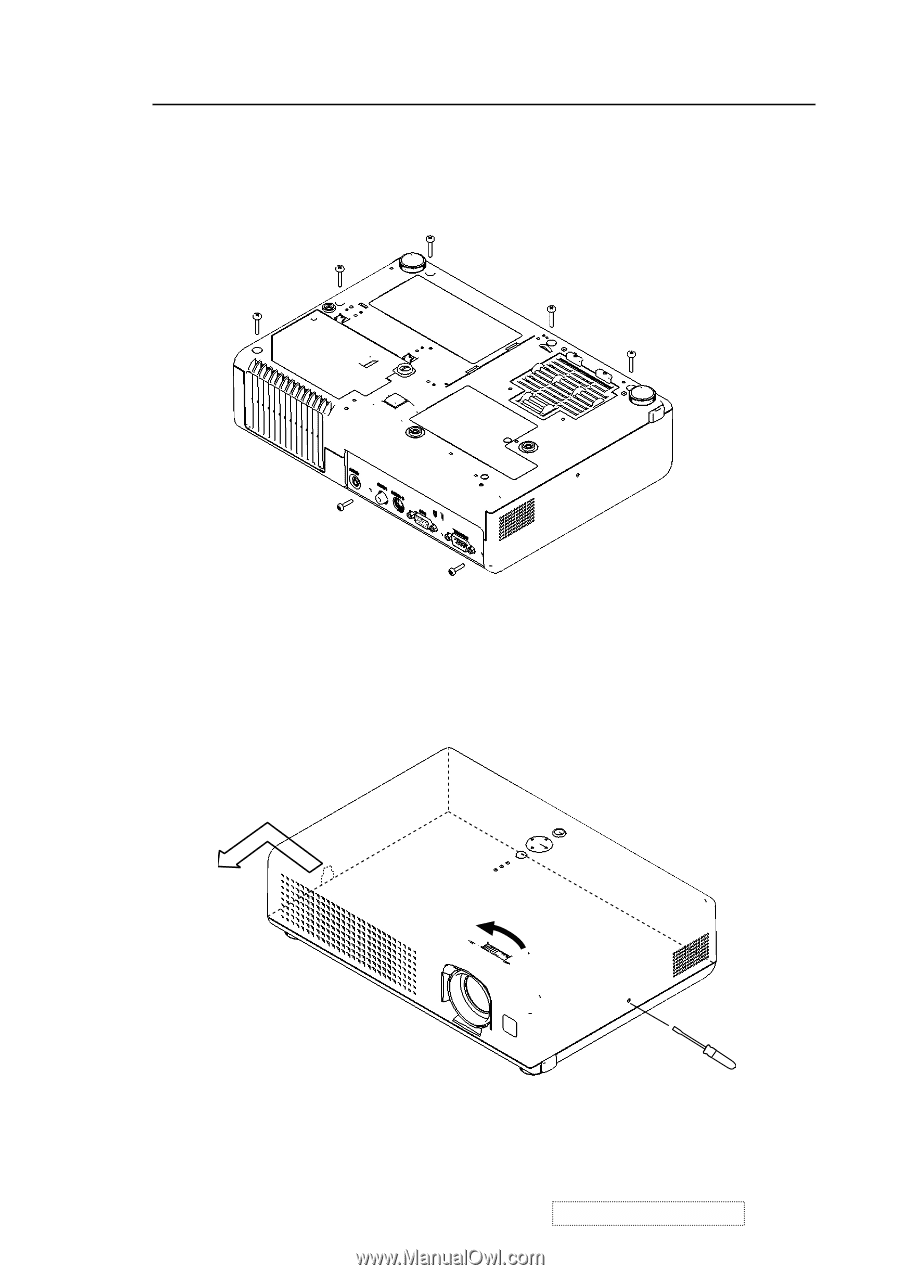
Notice 1. Removes the UPPER CASE assembly (1) Turn over the projector slowly, so that the bottom is facing up. (2) Unscrew five tapping screws on the bottom and 2 merter screws on the rear. (3) Turn the focus ring in the direction shown in the figure to shift the lens inward. (4) Stick a hard and thin stick into a hole (2mm in diameter) on the right side of the projector to unclip the UPPER CASE assembly from the BOTTOM CASE assembly. (They will be separated with about 2mm gap.) (5) Shift the hole part around the AC inlet forward and upward. ViewSonic Corporation Confidential - Do Not Copy PJ452 36
-
 1
1 -
2
-
3
-
4
-
5
-
6
-
7
-
8
-
9
-
10
-
11
-
12
-
13
-
14
-
15
-
16
-
17
-
18
-
19
-
20
-
21
-
22
-
23
-
24
-
25
-
26
-
27
-
28
-
29
-
30
-
31
-
32
-
33
-
 34
34 -
 35
35 -
 36
36 -
 37
37 -
 38
38 -
 39
39 -
 40
40 -
 41
41 -
 42
42 -
 43
43 -
 44
44 -
45
-
46
-
47
-
48
-
49
-
50
-
51
-
52
-
53
-
54
-
55
-
56
-
57
-
58
-
59
-
60
-
61
-
62
-
63
-
64
-
65
-
66
-
67
-
68
-
69
-
70
 |
 |
Notice
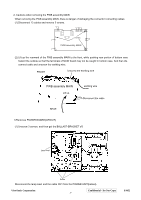
1. Removes the UPPER CASE assembly
(1) Turn over the projector slowly, so that the bottom is facing up.
(2) Unscrew five tapping screws on the bottom and 2 merter screws on the rear.
(3) Turn the focus ring in the direction shown in the figure to shift the lens inward.
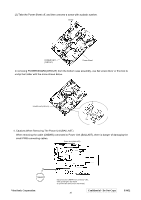
(4)
Stick a hard and thin stick into a hole (2mm in diameter) on the right side of the projector to unclip the
UPPER CASE assembly from the BOTTOM CASE assembly. (They will be separated with about 2mm
gap.)
(5) Shift the hole part around the AC inlet forward and upward.
ViewSonic Corporation
Co
nfidential
- Do Not Copy
P
J452
36