ViewSonic Pro8800WUL PRO8800WUL User Guide English - Page 36
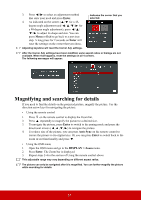
Magnifying and searching for details
 |
View all ViewSonic Pro8800WUL manuals
Add to My Manuals
Save this manual to your list of manuals |
Page 36 highlights
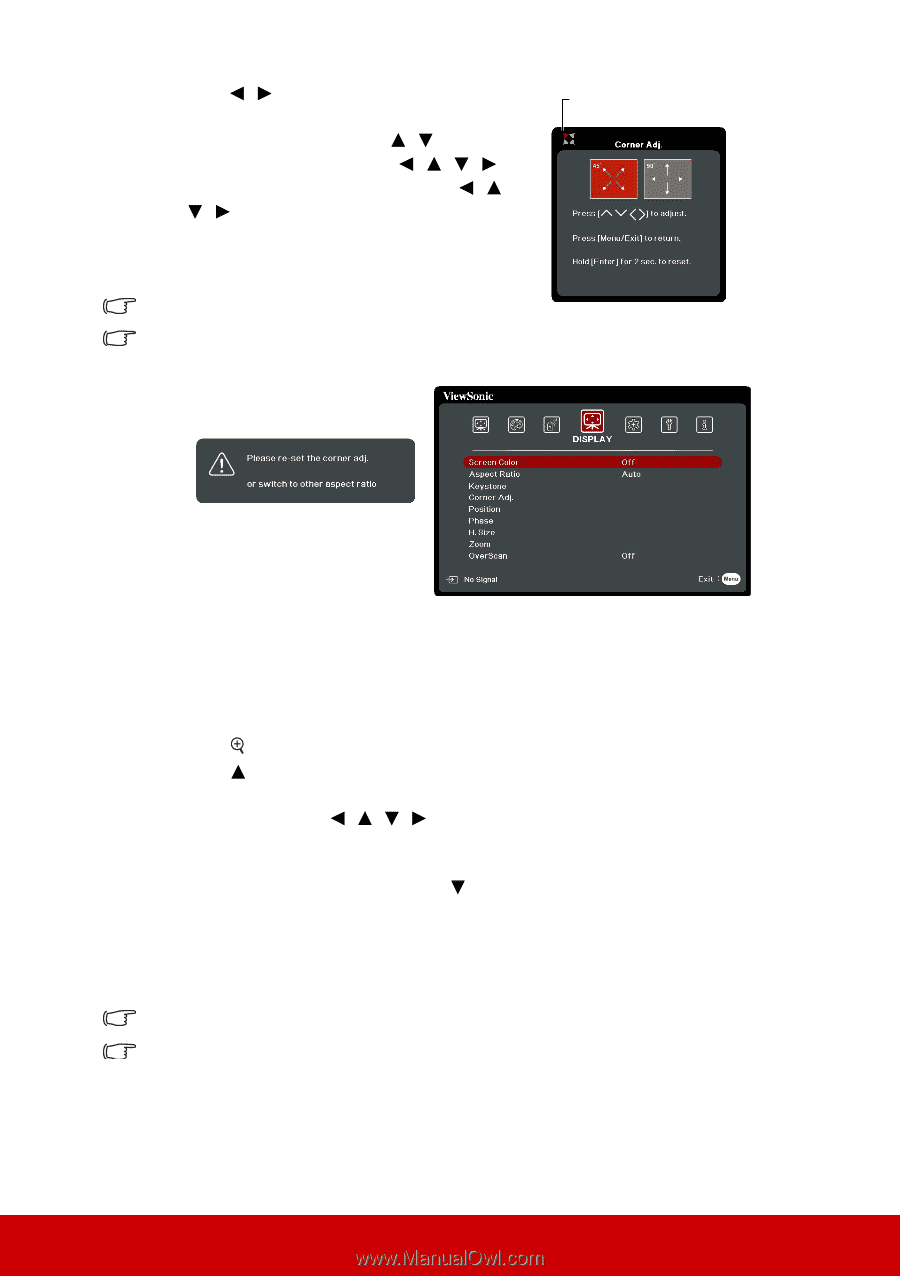
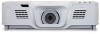
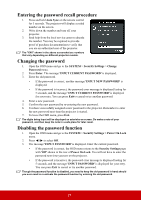
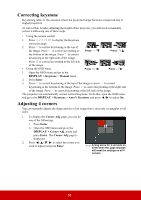
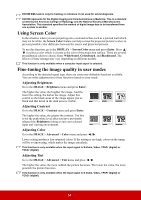
3. Press / to select an adjustment method that suits your need and press Enter. 4. As indicated on the screen ( / for a 45degree angle adjustment and / / / for a 90-degree angle adjustment), press / / / to adjust its shape and size. You can press Menu or Exit to go back to a previous step. A long press for 2 seconds on Enter will reset the settings on the corner that you chose. Adjusting keystone will reset the Corner Adj. settings. Indicates the corner that you selected. After the Corner Adj. settings have been modified, some aspect ratios or timings are not available. When that happens, reset the settings on all 4 corners. The following messages will appear: Magnifying and searching for details If you need to find the details on the projected picture, magnify the picture. Use the direction arrow keys for navigating the picture. • Using the remote control 1. Press on the remote control to display the Zoom bar. 2. Press repeatedly to magnify the picture to a desired size. 3. To navigate the picture, press Enter to switch to the paning mode and press the directional arrows ( , , , ) to navigate the picture. 4. To reduce size of the picture, you can press Auto Sync on the remote control to restore the picture to its original size. Or you can press Enter to switch back to the zoom in/out functionality and press . • Using the OSD menu 1. Open the OSD menu and go to the DISPLAY > Zoom menu. 2. Press Enter. The Zoom bar is displayed. 3. Repeat steps 2-4 in the section of Using the remote control above. This adjustable range may vary depending on different aspect ratios. The picture can only be navigated after it is magnified. You can further magnify the picture while searching for details. 31
-
 1
1 -
2
-
3
-
4
-
5
-
6
-
7
-
8
-
9
-
10
-
11
-
12
-
13
-
14
-
15
-
16
-
17
-
18
-
19
-
20
-
21
-
22
-
23
-
24
-
25
-
26
-
27
-
28
-
29
-
30
-
 31
31 -
 32
32 -
 33
33 -
 34
34 -
 35
35 -
 36
36 -
 37
37 -
 38
38 -
 39
39 -
 40
40 -
 41
41 -
42
-
43
-
44
-
45
-
46
-
47
-
48
-
49
-
50
-
51
-
52
-
53
-
54
-
55
-
56
-
57
-
58
-
59
-
60
-
61
-
62
-
63
-
64
-
65
-
66
-
67
-
68
-
69
-
70
-
71
-
72
-
73
-
74
-
75
-
76
-
77
-
78
-
79
-
80
-
81
-
82
-
83
-
84
-
85
-
86
-
87
-
88
-
89
-
90
-
91
-
92
-
93
-
94
-
95
-
96
 |
 |