Vivitar IPC-222 User Manual - Page 12
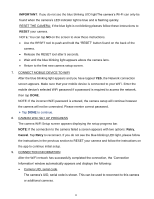
IMPORTANT, RESET, Retry, Cancel
 |
View all Vivitar IPC-222 manuals
Add to My Manuals
Save this manual to your list of manuals |
Page 12 highlights
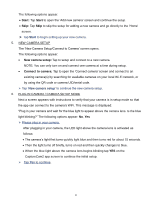
IMPORTANT: If you do not see the blue blinking LED lightThe camera's Wi-Fi can only be found when the camera's LED indicator light is blue and is flashing quickly. RESET THE CAMERA: If the blue light is not blinking pleases follow these instructions to RESET your camera. NOTE: You can tap NO on the screen to view these instructions. Use the RESET tool to push and hold the "RESET" button found on the back of the camera. Release the RESET tool after 5 seconds. Wait until the blue blinking light appears above the camera lens. Return to the first new camera setup screen. 7. CONNECT MOBILE DEVICE TO WIFI After the blue blinking light appears and you have tapped YES, the Network connection screen appears. Make sure that your mobile device is connected to your WiFi. Enter the mobile device's selected WiFi password if a password is required to access the network, then tap DONE. NOTE: If the incorrect WiFi password is entered, the camera setup will continue however the camera will not be connected. Please reenter correct password. Tap DONE to continue. 8. CAMERA WIFI SET UP PROGRESS The camera WiFi Setup screen appears displaying the setup progress bar. NOTE: If the connection to the camera failed a screen appears with two options: Retry, Cancel. Tap Retry to reconnect. If you do not see the blue blinking LED light, please follow the instructions in the previous section to RESET your camera and follow the instructions on the app to continue initial setup. 9. CONNECTION INFORMATION After the WiFi network has successfully completed the connection, the 'Connection Information' window automatically appears and displays the following: Camera UID, serial code. The camera's UID, serial code is shown. This can be used to reconnect to this camera or additional cameras. 11
-
 1
1 -
2
-
3
-
4
-
5
-
6
-
 7
7 -
 8
8 -
 9
9 -
 10
10 -
 11
11 -
 12
12 -
 13
13 -
 14
14 -
 15
15 -
 16
16 -
 17
17 -
18
-
19
-
20
-
21
-
22
-
23
-
24
-
25
-
26
-
27
-
28
-
29
-
30
-
31
 |
 |