Western Digital WDBACW0030HBK User Manual - Page 57
Installing on Windows Vista or Windows 7 Computers, Run WDSmartWare.exe
 |
UPC - 718037771922
View all Western Digital WDBACW0030HBK manuals
Add to My Manuals
Save this manual to your list of manuals |
Page 57 highlights
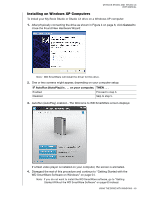
MY BOOK STUDIO AND STUDIO LX USER MANUAL Installing on Windows Vista or Windows 7 Computers To install your My Book Studio or Studio LX drive on a Windows Vista or Windows 7 computer: 1. After physically connecting the drive as shown in Figure 4 on page 8, click Cancel to close the Found New Hardware screen: Note: The WD SmartWare software will install the appropriate driver for the drive. 2. Two or three screens might appear, depending on your computer setup: IF AutoRun (AutoPlay) is . . . on your computer, THEN . . . Enabled Disabled Proceed to step 3. Skip to step 5. 3. AutoRun (AutoPlay) enabled-Click Run WDSmartWare.exe on the AutoPlay screen: USING THE DRIVE WITH WINDOWS - 52
-
 1
1 -
2
-
3
-
4
-
5
-
6
-
7
-
8
-
9
-
10
-
11
-
12
-
13
-
14
-
15
-
16
-
17
-
18
-
19
-
20
-
21
-
22
-
23
-
24
-
25
-
26
-
27
-
28
-
29
-
30
-
31
-
32
-
33
-
34
-
35
-
36
-
37
-
38
-
39
-
40
-
41
-
42
-
43
-
44
-
45
-
46
-
47
-
48
-
49
-
50
-
51
-
 52
52 -
 53
53 -
 54
54 -
 55
55 -
 56
56 -
 57
57 -
 58
58 -
 59
59 -
 60
60 -
 61
61 -
 62
62 -
63
-
64
-
65
-
66
-
67
-
68
-
69
-
70
-
71
-
72
-
73
-
74
-
75
-
76
-
77
-
78
-
79
-
80
-
81
-
82
 |
 |
MY BOOK STUDIO AND
STUDIO LX
USER MANUAL
USING THE DRIVE WITH WINDOWS
– 52
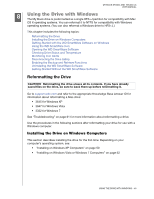
Installing on Windows Vista or Windows 7 Computers
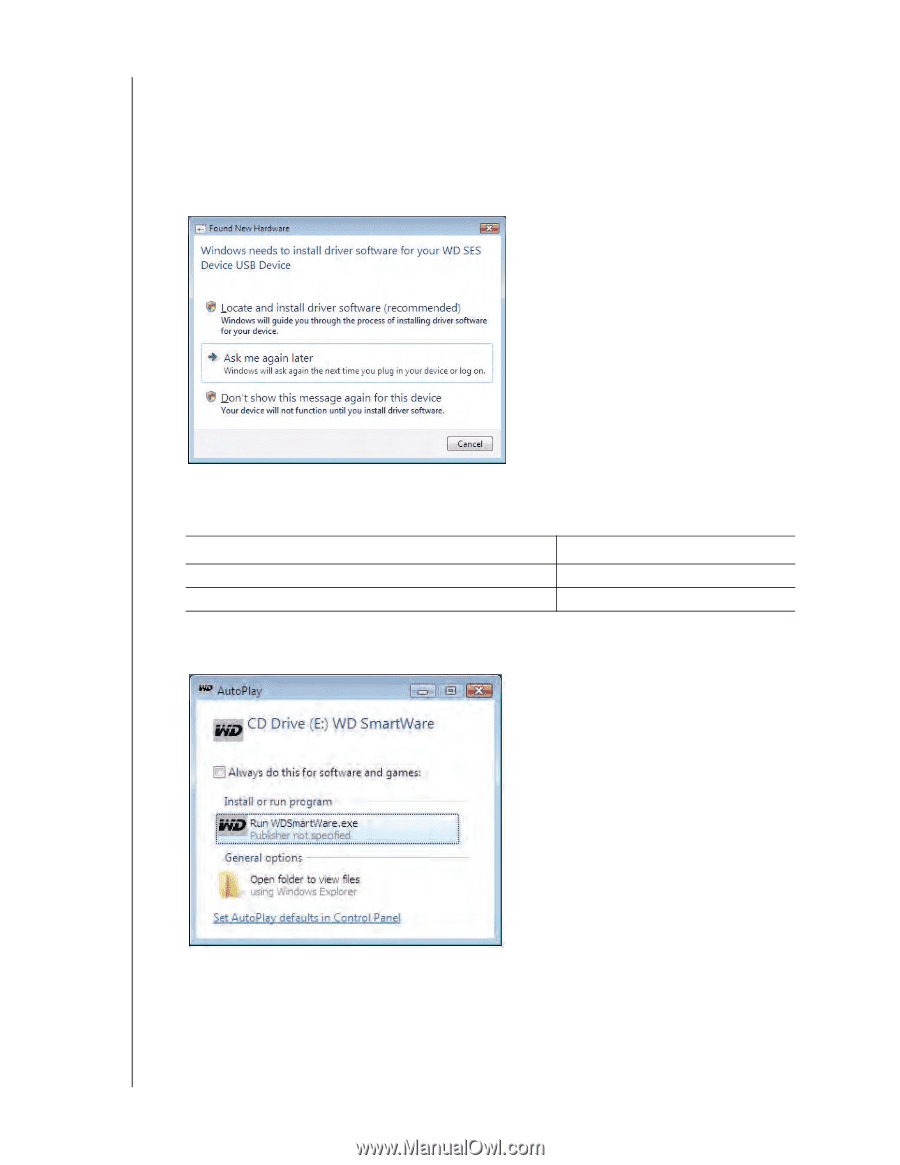
To install your My Book Studio or Studio LX drive on a Windows Vista or Windows 7
computer:
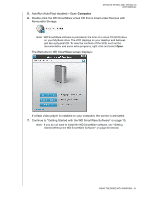
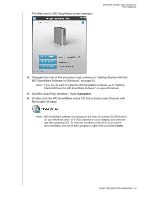
1.
After physically connecting the drive as shown in Figure 4 on page 8,
click
Cancel
to
close the Found New Hardware screen:
Note:
The WD SmartWare software will install the appropriate driver for the drive.
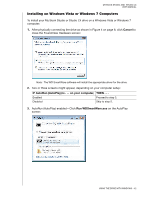
2.
Two or three screens might appear, depending on your computer setup:
3.
AutoRun (AutoPlay) enabled—Click
Run WDSmartWare.exe
on the AutoPlay
screen:
IF AutoRun (AutoPlay) is . . . on your computer,
THEN . . .
Enabled
Proceed to step 3.
Disabled
Skip to step 5.