Xerox 7760DN User Guide - Page 23
Setting Up the Network, Choosing a Connection Method, Connecting via USB - phaser driver
 |
UPC - 095205225938
View all Xerox 7760DN manuals
Add to My Manuals
Save this manual to your list of manuals |
Page 23 highlights
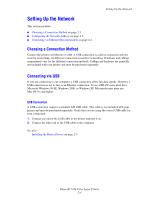
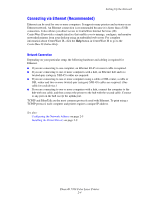
Setting Up the Network Setting Up the Network This section includes: ■ Choosing a Connection Method on page 2-3 ■ Configuring the Network Address on page 2-5 ■ Connecting via Ethernet (Recommended) on page 2-4 Choosing a Connection Method Connect the printer via Ethernet or USB. A USB connection is a direct connection and not used for networking. An Ethernet connection is used for networking. Hardware and cabling requirements vary for the different connection methods. Cabling and hardware are generally not included with your printer and must be purchased separately. Connecting via USB If you are connecting to one computer, a USB connection offers fast data speeds. However, a USB connection is not as fast as an Ethernet connection. To use USB, PC users must have Microsoft Windows 98 SE, Windows 2000, or Windows XP. Macintosh users must use Mac OS 9.x and higher. USB Connection A USB connection requires a standard A/B USB cable. This cable is not included with your printer and must be purchased separately. Verify that you are using the correct USB cable for your connection. 1. Connect one end of the USB cable to the printer and turn it on. 2. Connect the other end of the USB cable to the computer. See also: Installing the Printer Drivers on page 2-9 Phaser® 7760 Color Laser Printer 2-3
-
 1
1 -
2
-
3
-
4
-
5
-
6
-
7
-
8
-
9
-
10
-
11
-
12
-
13
-
14
-
15
-
16
-
17
-
 18
18 -
 19
19 -
 20
20 -
 21
21 -
 22
22 -
 23
23 -
 24
24 -
 25
25 -
 26
26 -
 27
27 -
 28
28 -
29
-
30
-
31
-
32
-
33
-
34
-
35
-
36
-
37
-
38
-
39
-
40
-
41
-
42
-
43
-
44
-
45
-
46
-
47
-
48
-
49
-
50
-
51
-
52
-
53
-
54
-
55
-
56
-
57
-
58
-
59
-
60
-
61
-
62
-
63
-
64
-
65
-
66
-
67
-
68
-
69
-
70
-
71
-
72
-
73
-
74
-
75
-
76
-
77
-
78
-
79
-
80
-
81
-
82
-
83
-
84
-
85
-
86
-
87
-
88
-
89
-
90
-
91
-
92
-
93
-
94
-
95
-
96
-
97
-
98
-
99
-
100
-
101
-
102
-
103
-
104
-
105
-
106
-
107
-
108
-
109
-
110
-
111
-
112
-
113
-
114
-
115
-
116
-
117
-
118
-
119
-
120
-
121
-
122
-
123
-
124
-
125
-
126
-
127
-
128
-
129
-
130
-
131
-
132
-
133
-
134
-
135
-
136
-
137
-
138
-
139
-
140
-
141
-
142
-
143
-
144
-
145
-
146
-
147
-
148
-
149
-
150
-
151
-
152
-
153
-
154
-
155
-
156
-
157
-
158
 |
 |
