Yamaha A5000 Owner's Manual - Page 120
TRIM/LOOP, Waveform
 |
View all Yamaha A5000 manuals
Add to My Manuals
Save this manual to your list of manuals |
Page 120 highlights
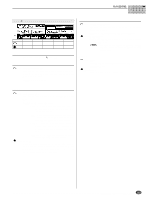
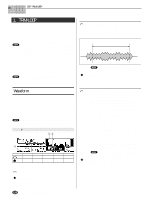
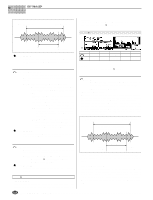
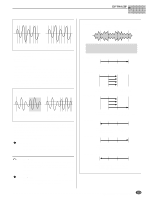
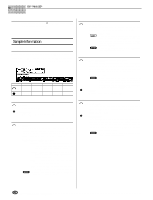
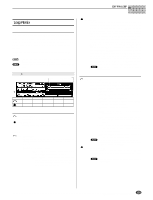
EDIT-TRIM/LOOP 1. TRIM/LOOP This section describes the EDIT mode's TRIM/LOOP function. You use this function to change the playback area on the waveform (the playback "start" and "end" points), to trim off extraneous waveform data, to set the playback direction (forward or backward) and loop characteristics (loop range and type), and to make various other related settings. • Keep in mind that the [COMMAND/EXIT] button gives you rapid access to a number of helpful commands while you are working with this function. For example, you can use the [COMMAND/EXIT] button when you want to save your edit results to disk, or when you want to cancel your new changes and restore the previously saved data. Press the [EDIT] button and then the [F1] button to go to the TRIM/LOOP function. 3 display pages are provided: Waveform, SmpInfo (Sample Information - page 124), and LoopRmx (Loop Remix - page 125). • See the "Basic Operation" section on page 78 for details on switching between display pages. Waveform [EDIT] Button → [F1] Button → Knob 1 to select "EDIT-Waveform" Use this page to change the playback area on the waveform (the playback "start" and "end" points), to trim off extraneous waveform data, to set the playback direction (forward or backward) and loop characteristics (loop range and type), and to make various other related settings. • When editing a sample bank, all parameters will appear as "(----)" and cannot be edited. Cursor q qw Cursor q Turn action Press action Knob 1 Cursor/Page Tree View Knob 2 Wave Start Address ZOOM IN Knob 3 Wave End Address ZOOM OUT Knob 4 Step S-CATCH Knob 5 Shortcut Command EXECUTE Knob 1 [ Turn] Cursor/Page Positions the cursor and selects display pages. [ Press] Tree View Calls the Tree View display (page 83). Knob 2 [ Turn] Wave Start Address Sets the playback "start" address on the waveform. (Note that the waveform itself always starts at address 0.) The concept is illustrated below. [Range] 0 - Wave End Address Start Address End Address Playback Area of Waveform • When "- →O" or "→O→" is selected as the Loop Mode, The Wave Start Address cannot be set later than the Loop Start Address. [ Press] ZOOM IN Press this knob to expand the waveform display. This can be repeated until maximum magnification is reached. Knob 3 [ Turn] Wave End Address Sets the playback "end" address on the waveform. The actual playback endpoint also depends on the loopmode setting that you make at the Wave Mode page. [Range] Wave Start Address - End of wave data. The range of this parameter changes according to the setting of the End Type parameter (page 124). • End Type = Address ... Sets the wave end address (this is the normal function). • End Type = Length ... Specifies the actual playback length (Wave End Address - Wave Start Address). • End Type = Time ... Specifies the actual playback time in seconds (From the Wave Start Address to the Wave End Address at the original pitch of the sample). • End Type = Beat ... Specifies the playback time (Wave Start Address to Wave End Address at the original pitch of the sample) in beats based on the Loop Tempo setting. • When "- →O" or "→O→" is selected as the Loop Mode, The Wave End Address cannot be set earlier than the Loop End Address. [ Press] ZOOM OUT Reduces the waveform display. This can be repeated until the minimum magnification level is reached. 120 Chapter 5 EDIT Mode • A5000/A4000 q q q q q q q q q q q q q q q q q q q q q q q q q q q q q q q q q q q q q q q q q q q q q q q q q q q q q q q q
-
 1
1 -
2
-
3
-
4
-
5
-
6
-
7
-
8
-
9
-
10
-
11
-
12
-
13
-
14
-
15
-
16
-
17
-
18
-
19
-
20
-
21
-
22
-
23
-
24
-
25
-
26
-
27
-
28
-
29
-
30
-
31
-
32
-
33
-
34
-
35
-
36
-
37
-
38
-
39
-
40
-
41
-
42
-
43
-
44
-
45
-
46
-
47
-
48
-
49
-
50
-
51
-
52
-
53
-
54
-
55
-
56
-
57
-
58
-
59
-
60
-
61
-
62
-
63
-
64
-
65
-
66
-
67
-
68
-
69
-
70
-
71
-
72
-
73
-
74
-
75
-
76
-
77
-
78
-
79
-
80
-
81
-
82
-
83
-
84
-
85
-
86
-
87
-
88
-
89
-
90
-
91
-
92
-
93
-
94
-
95
-
96
-
97
-
98
-
99
-
100
-
101
-
102
-
103
-
104
-
105
-
106
-
107
-
108
-
109
-
110
-
111
-
112
-
113
-
114
-
 115
115 -
 116
116 -
 117
117 -
 118
118 -
 119
119 -
 120
120 -
 121
121 -
 122
122 -
 123
123 -
 124
124 -
 125
125 -
126
-
127
-
128
-
129
-
130
-
131
-
132
-
133
-
134
-
135
-
136
-
137
-
138
-
139
-
140
-
141
-
142
-
143
-
144
-
145
-
146
-
147
-
148
-
149
-
150
-
151
-
152
-
153
-
154
-
155
-
156
-
157
-
158
-
159
-
160
-
161
-
162
-
163
-
164
-
165
-
166
-
167
-
168
-
169
-
170
-
171
-
172
-
173
-
174
-
175
-
176
-
177
-
178
-
179
-
180
-
181
-
182
-
183
-
184
-
185
-
186
-
187
-
188
-
189
-
190
-
191
-
192
-
193
-
194
-
195
-
196
-
197
-
198
-
199
-
200
-
201
-
202
-
203
-
204
-
205
-
206
-
207
-
208
-
209
-
210
-
211
-
212
-
213
-
214
-
215
-
216
-
217
-
218
-
219
-
220
-
221
-
222
-
223
-
224
-
225
-
226
-
227
-
228
-
229
-
230
-
231
-
232
-
233
-
234
-
235
-
236
-
237
-
238
-
239
-
240
-
241
-
242
-
243
-
244
-
245
-
246
-
247
-
248
-
249
-
250
-
251
-
252
-
253
-
254
-
255
-
256
-
257
-
258
-
259
-
260
-
261
-
262
-
263
-
264
-
265
-
266
-
267
-
268
-
269
-
270
-
271
-
272
-
273
-
274
-
275
-
276
-
277
-
278
-
279
-
280
-
281
-
282
-
283
-
284
-
285
-
286
-
287
-
288
-
289
-
290
-
291
-
292
-
293
-
294
-
295
-
296
 |
 |
