Yamaha CDR HD1500 MCXSP10 Manual - Page 10
NAMES OF BUTTONS AND CONTROLS, Front panel, Remote control - cd recorder
 |
UPC - 027108922737
View all Yamaha CDR HD1500 manuals
Add to My Manuals
Save this manual to your list of manuals |
Page 10 highlights
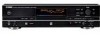
NAMES OF BUTTONS AND CONTROLS ■ Front panel 1 23 4 NATURAL SOUND HDD/CD RECORDER POWER 5 PHONES LEVEL MIN MAX HDD CDR COPY A.M.Q.R. 6 789 0 q w er TEXT/TIME MODE MULTI JOG PUSH ENTER MENU TRACK NO. COMPLETE CLEAR BOOKMARK DIGITAL REC LEVEL REC FINALIZE ERASE INPUT OPTICAL COAXIAL ANALOG ANALOG REC LEVEL MIN MAX ty u 1 POWER Turns on/off this unit (P.14). 2 HDD Sets the unit to the HDD operation mode (P.14). 3 CDR Sets the unit to the CDR drive operation mode (P.14). 4 COPY Sets the unit to the copy standby mode. 5 Front panel display Displays information on the current playback or recording. You can switch information by pressing TEXT/TIME (P.18). 6 Disc tray Set a disc on here when playing a CD, recording track data from a CD to the HDD, or copying track data from the HDD to a CD-R or CD-RW disc. 7 v (Open/Close) Opens or closes the disc tray. 8 TRACK NO./BOOKMARK Adds track markers (P.37) or bookmarks (P.24) to favorite tracks. 9 TEXT/TIME Switches display information (P.18). 0 COMPLETE Confirms specified operations or selected items. q MODE Press the button when configuring the settings of the playback, recording, and copy modes. iopas df g h w MULTI JOG knob/DIGITAL REC LEVEL control Normally, press to switch between the GROUP and TRACK modes, and rotate to select a group (disc or album) or track. In the menu screen, rotate to select items or adjust parameters, and press to decide. e MENU Displays the menu screen corresponding to the current status of the unit. r CLEAR Deletes the selected item or clears the setting. t PHONES jack Connect headphones (P.25). y PHONES LEVEL control Adjusts the headphone volume when connecting headphone to the PHONES jack (P.25). u A.M.Q.R. Turns on/off the Audio Master Quality Recording (P.41, 46) when copying data onto a CD-R disc. i REC Sets the unit to the recording standby mode. o t/e (Skip/Search) Press to skip to the beginning of a current track (press repeatedly to skip to a previous track), and press and hold to fast-rewind the current playback (P.19). p FINALIZE Starts to finalize a CD-R or CD-RW disc (P.47). 4
-
 1
1 -
2
-
3
-
4
-
 5
5 -
 6
6 -
 7
7 -
 8
8 -
 9
9 -
 10
10 -
 11
11 -
 12
12 -
 13
13 -
 14
14 -
 15
15 -
16
-
17
-
18
-
19
-
20
-
21
-
22
-
23
-
24
-
25
-
26
-
27
-
28
-
29
-
30
-
31
-
32
-
33
-
34
-
35
-
36
-
37
-
38
-
39
-
40
-
41
-
42
-
43
-
44
-
45
-
46
-
47
-
48
-
49
-
50
-
51
-
52
-
53
-
54
-
55
-
56
-
57
-
58
-
59
-
60
-
61
-
62
-
63
-
64
-
65
-
66
-
67
-
68
-
69
-
70
-
71
-
72
-
73
-
74
-
75
-
76
-
77
-
78
-
79
-
80
-
81
-
82
-
83
-
84
-
85
-
86
-
87
-
88
-
89
-
90
 |
 |
