Yamaha CDR HD1500 MCXSP10 Manual - Page 59
EDITING, Edit Stored, Press CLEAR.
 |
UPC - 027108922737
View all Yamaha CDR HD1500 manuals
Add to My Manuals
Save this manual to your list of manuals |
Page 59 highlights
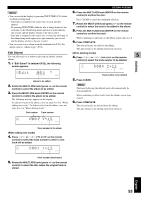
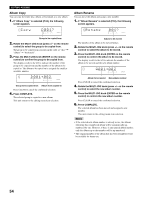
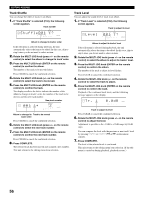
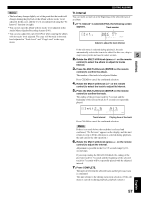
Memo • You can switch the display by pressing TEXT/TIME (P.18) while an album is being made: - If the title is assigned to the source disc or track, the title appears. - By pressing TEXT/TIME while the title is being displayed, the total time of the album being made appears for approximately one second, and the display returns to the one in step 1. - If no title is assigned to the source disc or track, the total time of the album being made appears for approximately one second, and the display returns to the one in step 1. • You can create a new album from the bookmark list (P.24). For details, refer to "Album Copy" (P.54). Edit Stored You can add tracks to or delete tracks from an already created album. 1. If "Edit Stored" is selected (P.52), the following screen appears. Edit 001 ? L dB -30 -10 -6 -2 0 R GROUP Album to be edited 2. Rotate the MULTI JOG knob (press +/- on the remote control) to select the album to be edited. 3. Press the MULTI JOG knob (ENTER on the remote control) to confirm the album to be edited. The following message appears on the display. To add new tracks to the album, carry out steps 4 to 9 in "When adding new tracks". To delete tracks from the album, carry out steps 4 to 6 in "When deleting tracks". Disc number Track number EDITING ALBUMS 6. Press the MULTI JOG knob (ENTER on the remote control) to confirm the disc. Press CLEAR to cancel the confirmed selection. 7. Rotate the MULTI JOG knob (press +/- on the remote control) to select the track to be added in the album. 8. Press the MULTI JOG knob (ENTER on the remote control) to confirm the track. When continuing to add tracks to the album, repeat steps 4 to 8. 9. Press COMPLETE. The selected tracks are added to the album. This unit returns to the editing menu item selection. (When deleting tracks) 4. Press t/e or r/y (T or Y on the remote 5 control) to select the track number to be deleted. EDITING D004 2≥11 L dB -30 -10 -6 -2 0 R GROUP 5. Press CLEAR. Track number to be deleted Memo The tracks following the deleted track will automatically be down-numbered. When continuing to delete tracks from the album, repeat steps 4 and 5. 6. Press COMPLETE. The selected tracks are deleted from the album. This unit returns to the editing menu item selection. D001 1≥15 L dB -30 -10 -6 -2 0 R GROUP Track number in the album (When adding new tracks) 4. Press t/e or r/y (T or Y on the remote control) to select the track number to where a new track will be added. D001 1≥13 L dB -30 -10 -6 -2 0 R GROUP Track number (destination) 5. Rotate the MULTI JOG knob (press +/- on the remote control) to select the disc where the original track is stored. English 53
-
 1
1 -
2
-
3
-
4
-
5
-
6
-
7
-
8
-
9
-
10
-
11
-
12
-
13
-
14
-
15
-
16
-
17
-
18
-
19
-
20
-
21
-
22
-
23
-
24
-
25
-
26
-
27
-
28
-
29
-
30
-
31
-
32
-
33
-
34
-
35
-
36
-
37
-
38
-
39
-
40
-
41
-
42
-
43
-
44
-
45
-
46
-
47
-
48
-
49
-
50
-
51
-
52
-
53
-
 54
54 -
 55
55 -
 56
56 -
 57
57 -
 58
58 -
 59
59 -
 60
60 -
 61
61 -
 62
62 -
 63
63 -
 64
64 -
65
-
66
-
67
-
68
-
69
-
70
-
71
-
72
-
73
-
74
-
75
-
76
-
77
-
78
-
79
-
80
-
81
-
82
-
83
-
84
-
85
-
86
-
87
-
88
-
89
-
90
 |
 |
