Yamaha CDR HD1500 MCXSP10 Manual - Page 61
EDITING, Album Delete, Album Pack, Album Title, Delete, Title
 |
UPC - 027108922737
View all Yamaha CDR HD1500 manuals
Add to My Manuals
Save this manual to your list of manuals |
Page 61 highlights
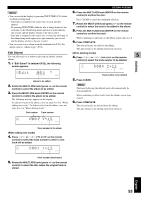
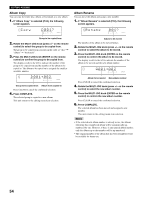
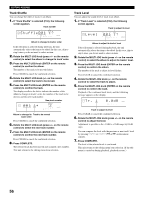
Album Delete You can delete an existing album. 1. If "Album Delete" is selected (P.52), the following screen appears. Delete 001? L dB -30 -10 -6 -2 0 R GROUP Album to be deleted If the edit menu is selected during playback, the unit automatically selects the item to be edited. In this case, skip to step 4 since you do not need to select an item. 2. Rotate the MULTI JOG knob (press +/- on the remote control) to select the album to be deleted. 3. Press the MULTI JOG knob (ENTER on the remote control) to confirm the album. Press CLEAR to cancel the confirmed selection. 4. Press COMPLETE. The selected album has been deleted. This unit returns to the editing menu item selection. Memo The number of the deleted album will be available for future use. EDITING ALBUMS Album Pack You can re-organize the album numbers by eliminating unused album numbers that have been created by changing album numbers or deleting albums. 1. If "Album Pack" is selected (P.52), the following screen appears. Pack ? L dB -30 -10 -6 -2 0 R 2. Press COMPLETE. The album numbers are re-organized without unused album numbers. This unit returns to the editing menu item selection. 5 Before "Album Pack" 1 3 4 6 EDITING 1 2 3 4 5 6 After "Album Pack" (Unused albums are removed) Album Title You can assign a title to a created album. 1. If "Album Title" is selected (P.52), the following screen appears. Title 001? L dB -30 -10 -6 -2 0 R GROUP Album to assign the title to If the edit menu is selected during playback, the unit automatically selects the item to be edited. In this case, skip to step 4 since you do not need to select an item. 2. Rotate the MULTI JOG knob (press +/- on the remote control) to select the album to assign a title to. 3. Press the MULTI JOG knob (ENTER on the remote control) to confirm the album to assign a title to. L dB -30 -10 -6 -2 0 R The cursor flashes. (If the selected album already has a title, the title appears on the display.) 4. Use the MULTI JOG knob (press alphabetical/numeric buttons on the remote control) to enter characters. For details on selecting characters, refer to "Entering characters in the edit menu" (P.51). 5. Press COMPLETE when all the characters have been entered. The title is assigned to the selected album. Press TEXT/TIME to switch the display information as necessary (P.18). This unit returns to the editing menu item selection. (If the edit menu is carried on during playback, playback restarts.) 55 English
-
 1
1 -
2
-
3
-
4
-
5
-
6
-
7
-
8
-
9
-
10
-
11
-
12
-
13
-
14
-
15
-
16
-
17
-
18
-
19
-
20
-
21
-
22
-
23
-
24
-
25
-
26
-
27
-
28
-
29
-
30
-
31
-
32
-
33
-
34
-
35
-
36
-
37
-
38
-
39
-
40
-
41
-
42
-
43
-
44
-
45
-
46
-
47
-
48
-
49
-
50
-
51
-
52
-
53
-
54
-
55
-
 56
56 -
 57
57 -
 58
58 -
 59
59 -
 60
60 -
 61
61 -
 62
62 -
 63
63 -
 64
64 -
 65
65 -
 66
66 -
67
-
68
-
69
-
70
-
71
-
72
-
73
-
74
-
75
-
76
-
77
-
78
-
79
-
80
-
81
-
82
-
83
-
84
-
85
-
86
-
87
-
88
-
89
-
90
 |
 |
