Yamaha CDR HD1500 MCXSP10 Manual - Page 73
EDITING, Disc Rename, Rename, Erase
 |
UPC - 027108922737
View all Yamaha CDR HD1500 manuals
Add to My Manuals
Save this manual to your list of manuals |
Page 73 highlights
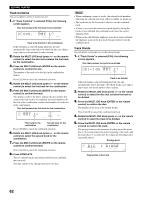
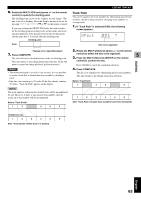
Disc Rename You can move a disc and assign a new number. 1. If "Disc Rename" is selected (P.66), the following screen appears. Rename 001? L dB -30 -10 -6 -2 0 R GROUP Disc to be moved If the edit menu is selected during playback, the unit automatically selects the item to be edited. In this case, skip to step 4 since you do not need to select an item. 2. Rotate the MULTI JOG knob (press +/- on the remote control) to select the disc to be moved. 3. Press the MULTI JOG knob (ENTER on the remote control) to confirm the disc to be moved. The display scrolls to the left to indicate the disc number to be moved and new number. D002≥003 L GROUP G dB -30 -10 -6 -2 0 R Disc to be moved New disc number Press CLEAR to cancel the confirmed selection. 4. Rotate the MULTI JOG knob (press +/- on the remote control) to select the new disc number. 5. Press the MULTI JOG knob (ENTER on the remote control) to confirm the new disc number. Press CLEAR to cancel the confirmed selection. 6. Press COMPLETE. The selected disc has been moved to and assigned a new number. This unit returns to the editing menu item selection. (If the edit menu is carried on during playback, playback restarts.) Memo • If the selected new disc number is already in use, the disc numbers following this renumbered disc will be automatically upnumbered by one. However, if there is any unused disc number, only the discs up to that number will be up-numbered. • The original number of the disc that has been renumbered will be available for future use. EDITING DISCS Disc Erase You can erase a selected disc. 1. If "Disc Erase" is selected (P.66), the following screen appears. Erase 001? L dB -30 -10 -6 -2 0 R GROUP Disc to be erased If the edit menu is selected during playback, the unit automatically selects the item to be edited. In this case, skip to step 4 since you do not need to select an item. 2. Rotate the MULTI JOG knob (press +/- on the remote control) to select the disc to be erased. 5 3. Press the MULTI JOG knob (ENTER on the remote control) to confirm the disc to be erased. EDITING Press CLEAR to cancel the confirmed selection. 4. Press COMPLETE. The selected disc is erased. This unit returns to the editing menu item selection. (If the edit menu is carried on during playback, playback restarts.) Memo The number of the erased disc will be available for future use. English 67
-
 1
1 -
2
-
3
-
4
-
5
-
6
-
7
-
8
-
9
-
10
-
11
-
12
-
13
-
14
-
15
-
16
-
17
-
18
-
19
-
20
-
21
-
22
-
23
-
24
-
25
-
26
-
27
-
28
-
29
-
30
-
31
-
32
-
33
-
34
-
35
-
36
-
37
-
38
-
39
-
40
-
41
-
42
-
43
-
44
-
45
-
46
-
47
-
48
-
49
-
50
-
51
-
52
-
53
-
54
-
55
-
56
-
57
-
58
-
59
-
60
-
61
-
62
-
63
-
64
-
65
-
66
-
67
-
 68
68 -
 69
69 -
 70
70 -
 71
71 -
 72
72 -
 73
73 -
 74
74 -
 75
75 -
 76
76 -
 77
77 -
 78
78 -
79
-
80
-
81
-
82
-
83
-
84
-
85
-
86
-
87
-
88
-
89
-
90
 |
 |
