Yamaha CRX-M5 Owner's Manual - Page 13
Setting the clock
 |
View all Yamaha CRX-M5 manuals
Add to My Manuals
Save this manual to your list of manuals |
Page 13 highlights
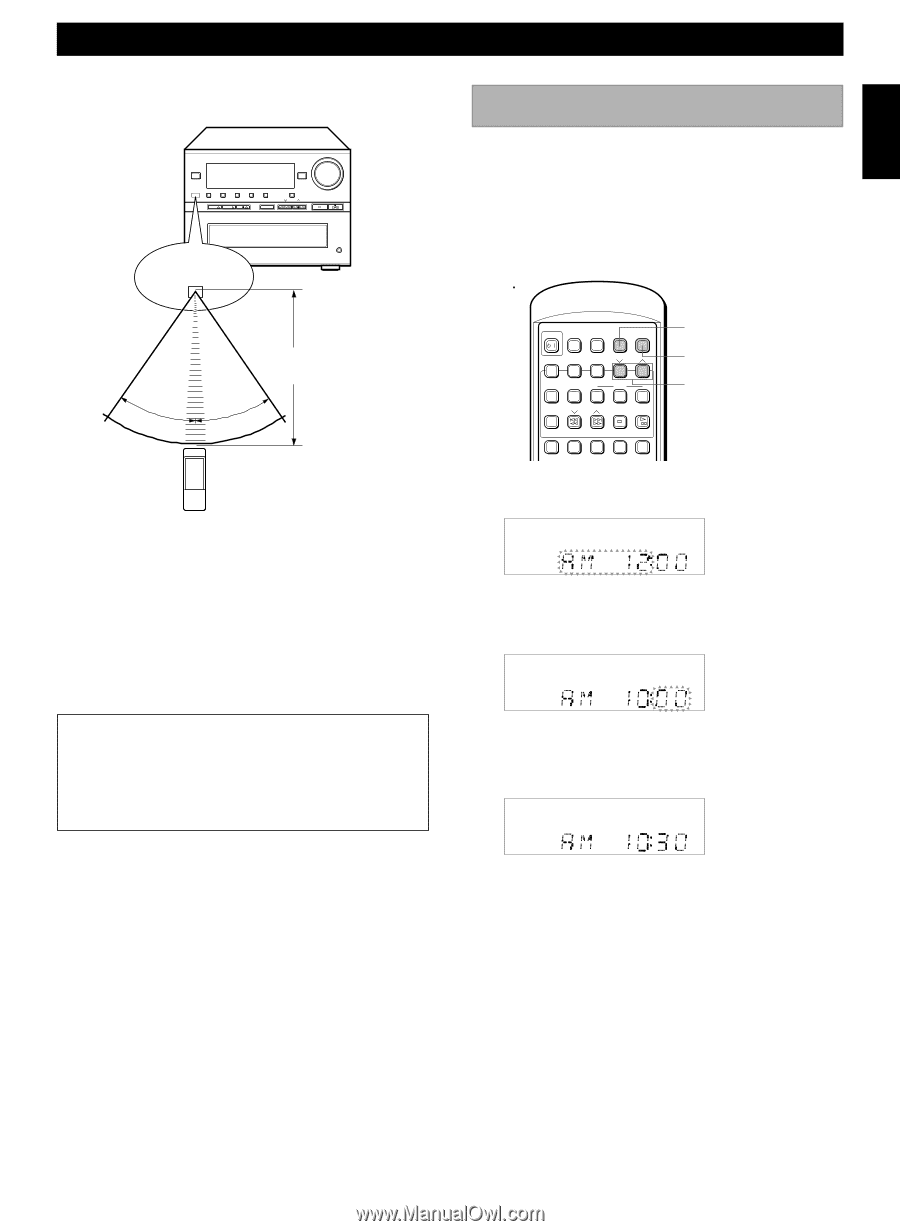
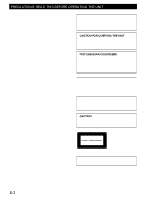
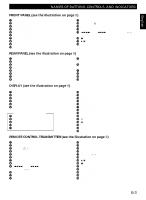
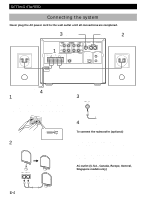
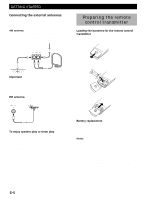
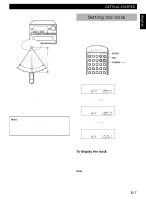
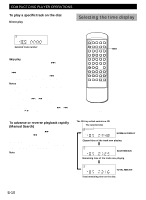
English Remote control transmitter operation range STANDBY/ON INPUT VOLUME RANDOM TIME RDS REPEAT PTY EDIT PROGRAM RT MEMORY DISC 1 DISC 2 DISC 3 DISC SELECT FM/AM TUNING/PRESET PHONES Remote control sensor Within approximately 6 m (19.7 feet) 30° 30° Notes • There should be no large obstacles between the remote control transmitter and the main unit. • If the remote control sensor is directly illuminated by strong lighting (especially an inverter type of fluorescent lamp etc.), it might cause the remote control transmitter not to work correctly. In this case, reposition the main unit to avoid direct lighting. GettPinlagyiSntgarCteDds GETTING STARTED Setting the clock You must set the clock before you can use the timer functions. The clock is based on a 24-hour system for the U.K., Europe, Australia, Singapore, and General models, and a 12-hour system for U.S.A and Canada models. You can set the clock while in standby mode. POWER CT / TIMER CLOCK SET RDS PTY RT TIME REP EDIT TUNING FM/AM ST/MONO DISC 1 2 3 MEMORY PRESET PGM / TUNER CD 1 2 3 4 5 CLOCK SET TUNING //? 1 Press CLOCK for more than two seconds. 2 Press TUNING //? to set the hour, then press SET. Note • This manual describes how to operate this unit by using the remote control transmitter mainly. To operate the unit from the front panel, use the corresponding buttons on the front panel (see page 3). 3 Press TUNING //? to set the minute, then press SET. The clock starts. To display the clock Press CLOCK. The current time appears for three seconds, then the normal display returns. Note • In the event of a power failure or when the AC power cord is disconnected for more than three seconds, you must reset the clock. E-7
-
 1
1 -
2
-
3
-
4
-
5
-
6
-
7
-
 8
8 -
 9
9 -
 10
10 -
 11
11 -
 12
12 -
 13
13 -
 14
14 -
 15
15 -
 16
16 -
 17
17 -
 18
18 -
19
-
20
-
21
-
22
-
23
-
24
-
25
-
26
-
27
-
28
-
29
-
30
-
31
-
32
-
33
-
34
-
35
 |
 |